Hello! I'm Suzannah, a serious DIYer and mom of two little ones. Follow along with my DIY fixer upper house renovations, sewing and crafty projects, real food recipes, and de-stressing goals.
I believe you can love your home just the way it is, AND have the power to design and make big changes to make it better.
This spring I had my driveway and back patio replaced with new concrete (read about that here). It was an expensive project and it had quite a few domino effects and other little things it encouraged me to get done around the backyard. One domino was this strange back patio door we’d had with a 5” or so ledge you had to step (or trip) over. I had the concrete guys cut the ledge down to the grade, but then the old door was too short! I found an antique one on Facebook, probably around the same age as my others (1937 home with all the original doors). I’ll spare you the installation saga (it took two handymen and a custom brickmold trim order to get this thing installed right…) but I also really took some steps to do the painting of the new door and trim right, and I’m sharing a few tips for smart paint purchasing, storage, and recycling in this post.
This post is sponsored by PaintCare, an organization with a ton of resources to help you paint smarter and recycle paint!
I've been wishing for some updates for my bedroom for quite a while now. I felt too lazy to paint but the white walls were getting reeeeally boring. I redid this room from 2021-2022 and called it done here. It was fine, but minimal (just, with antiques). Since that reveal I've gone through a separation and then divorce and now the room is solely mine, so all the more reason for a feminine update!
I'm still working on some big changes in here, but I debated so much over the paint color and ended up mixing it myself and getting it color matched, so wanted to document that here at least! And you can see what a change paint and 2 hours of work on a Sunday did.
Pale peachy pink bedroom makeover
I wanted a pink, except those all felt too pink or blue, but a peach felt too 90's. I wanted really pale, though. Adding color to walls is still relatively new to me (my past few room projects have involved colored walls, but always smaller rooms!) and lighter felt more versatile. I got some muddy pink paint cards and chose two and got sample pots at 50% strength. They were still way more saturated than I wanted! I added white paint I had and played around. I added some warm yellow-brown to the pinks (and more white) and made my own color!
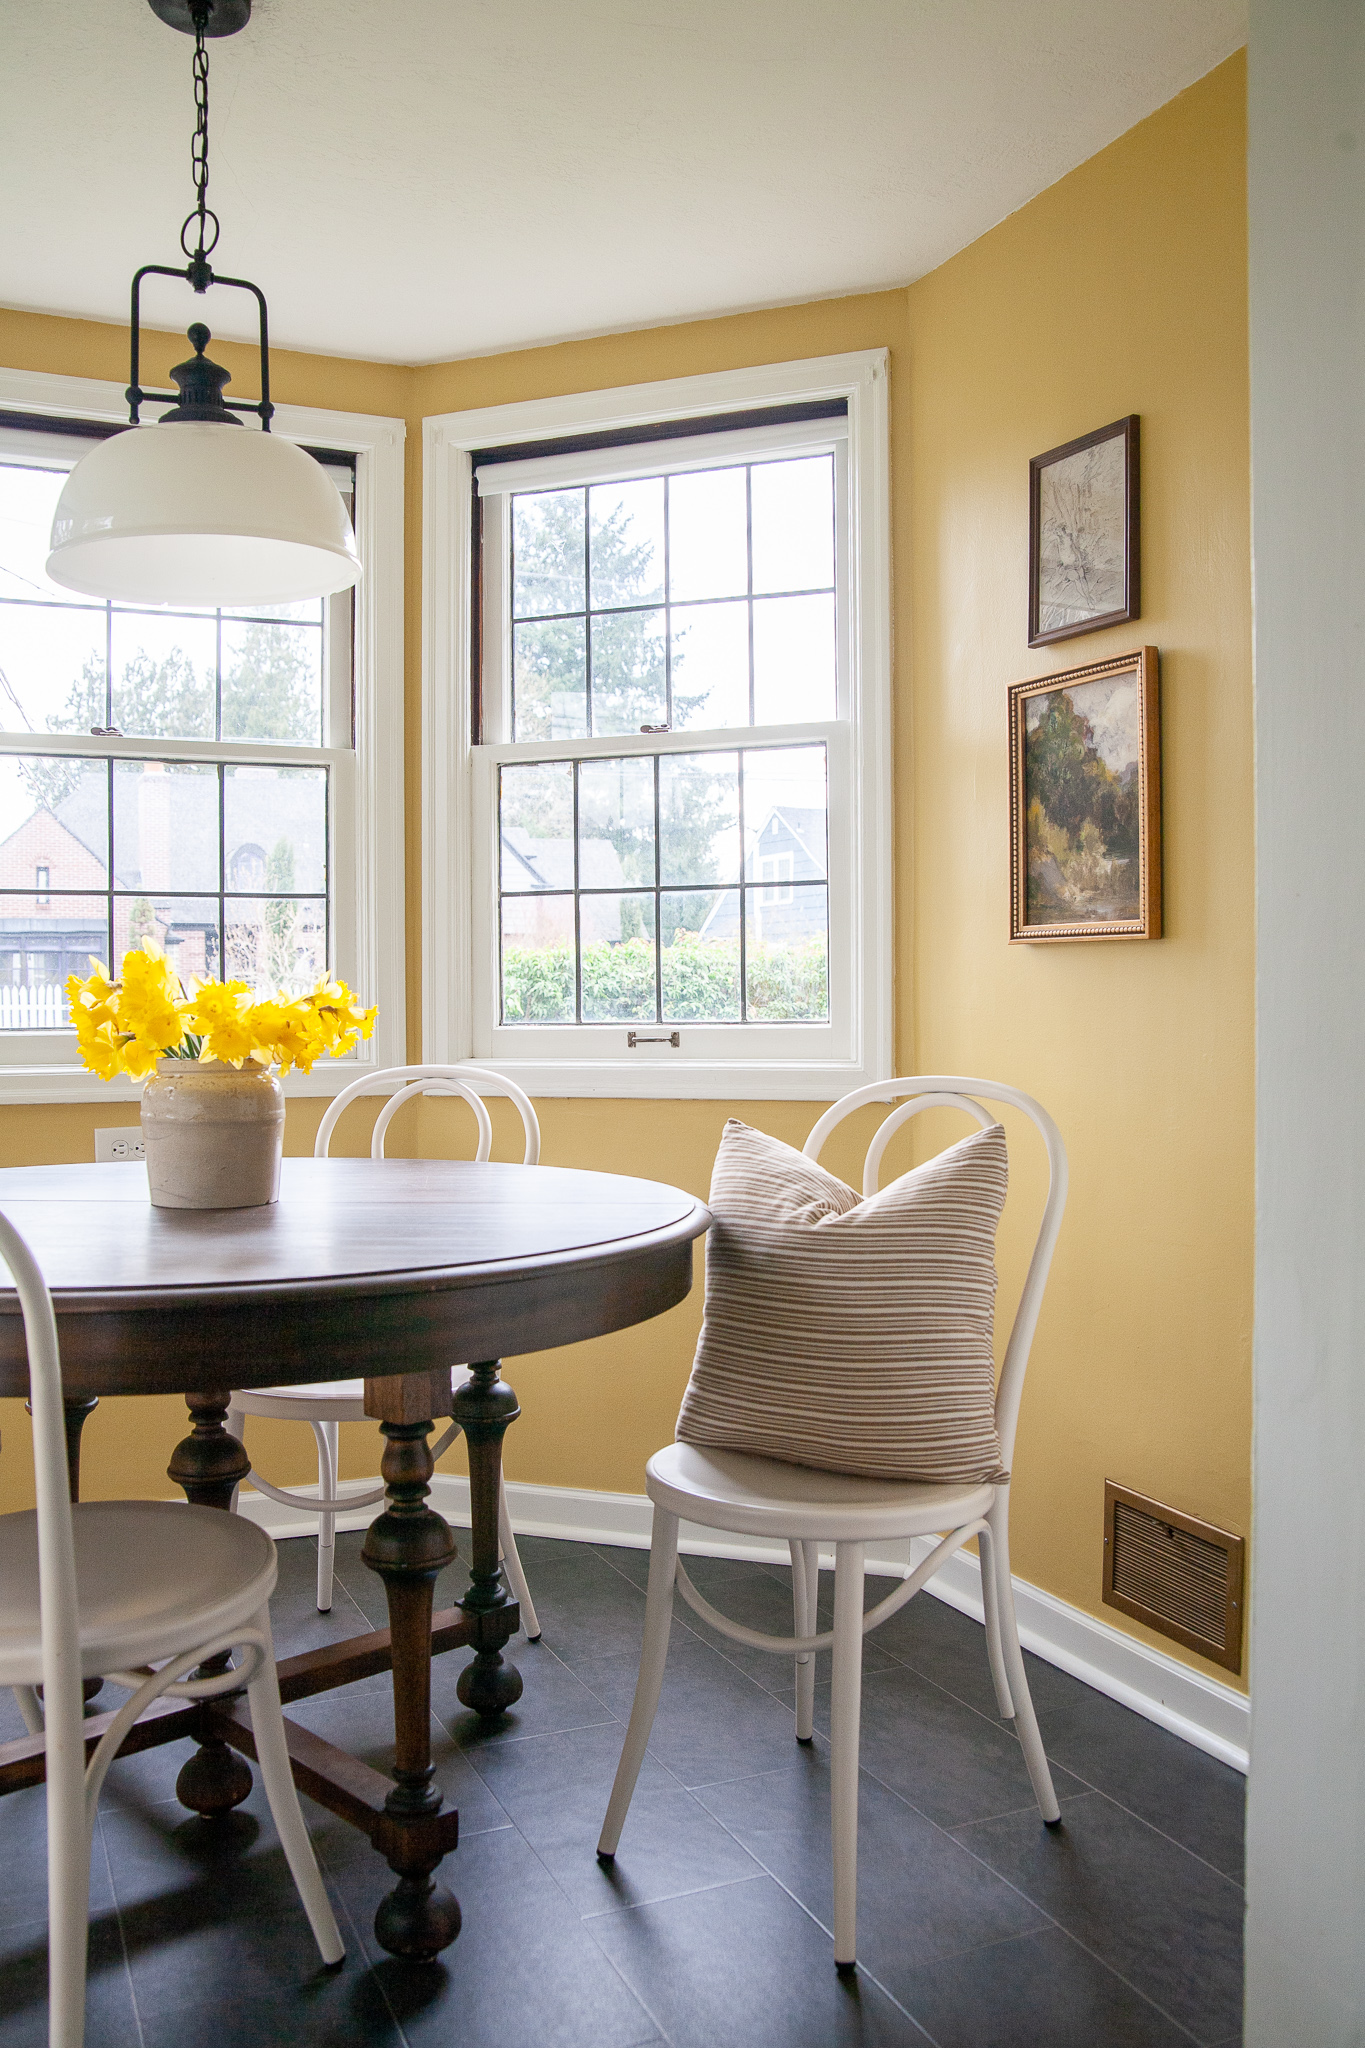
I did it! I painted our breakfast nook, which involved not only a lot of edging (so many windows!) but also sanding and priming to fix some texture issues on the walls. Our house is from the 1930's and the plaster is in pretty good shape most places (that is, where it wasn't wallpapered then painted over that so who knows), but there were a ton of paint drips in this breakfast nook, and some all-directions brush strokes that bugged me.
I sanded, primed, and added one even coat of a beautiful, rich paint color and... it's a new space!
Ohhh, this is a loaded topic. It goes way back to my childhood growing up in a restored 1909 foursquare house, but in short let's say I respect old houses and was (mostly) glad when we first walked through this 1937 Tudor revival home and I saw still had the original wood trim in almost every room. Well, sort of glad, sort of trapped because it wasn't exactly my style but I didn't want to paint it. It's made it this long and shows off the original character of the house! Plus I liked that it's the stained wood in every room except the bathrooms, kitchen, and one bedroom, so it doesn't feel piecemeal.
But. Let's talk about our office project. As you may remember from the before photos, this north-facing room has dark wood trim including three doors and a fireplace. It's super contrasty with the white paint (it was turquoise with a dark silver ceiling when we moved in so that's an improvement!) and the white (Sherwin-Williams Alabaster, like all the white paint in our house) looks much colder than it does elsewhere.
Let me show you the design direction I'm going and what I've decided about painting this trim or not!
New here?
If you're new to this blog from the ORC site, welcome!! I'm Suzannah, a longtime DIYer and design lover currently making over our 1937 Tudor revival style home, our second fixer-upper. My style is modern traditional and I'm always working toward high quality design.
I have a 3-year-old and 9-month-old, but my husband and I have done almost all of the work on our homes ourselves! I've blogged about all of it so you can check out my tutorials page and room reveals to see. You can also follow along with me and my projects on Instagram! I also co-host the Your Home Story podcast! See all my posts about this ORC here!
I'm really leaning toward painting our walls a light dusty aqua/sage/warm grey. Looking around at my pins, I found a couple other rooms in a similar color that--hey! had painted their trim, too. Some with fireplaces even!
OMG! I never thought I would be motivated to do this, but I just finished a great project and I went bold! One of the closets at the top of our stairs is a great one for my clothes, but was in bad shape--lots of scratches and cracks in the plaster and seriously probably hadn’t been painted since the house was built in 1937. There were stains and the walls just looked terrible, and painting it a fresh coat of white just sounded boring, and like it probably wouldn’t even work to cover everything. Enter… good primer and an exciting color!
I worked with KILZ on this project and they recommended KILZ 3® Premium Primer to cover the stains and make a good surface on this old plaster. It is water-based and is ready to accept paint after only an hour! Low VOC as well. I’m going to share what I did step-by-step to get this funky old closet ready for a beautiful color! I chose from the Magnolia Home by Joanna Gaines® paint line, and every single one of those colors is awesome. I kind of can't believe I chose the one I did (way outside my white/beige comfort zone), but it turned out great!!
We recently transformed a dark, dated small bonus room off our bedroom into a charming nursery. It had dark wood stained paneling and dark green linoleum on the floor (think 1950's elementary school). Now, it's fresh and pretty and has a storybook vibe. Oh, the power of paint!!! (and new flooring).
But it took a few extra steps to paint the wood paneling, and we tried multiple methods (sprayer, roller, and brush). Sharing what we did, and how you can paint wood paneling better, here!
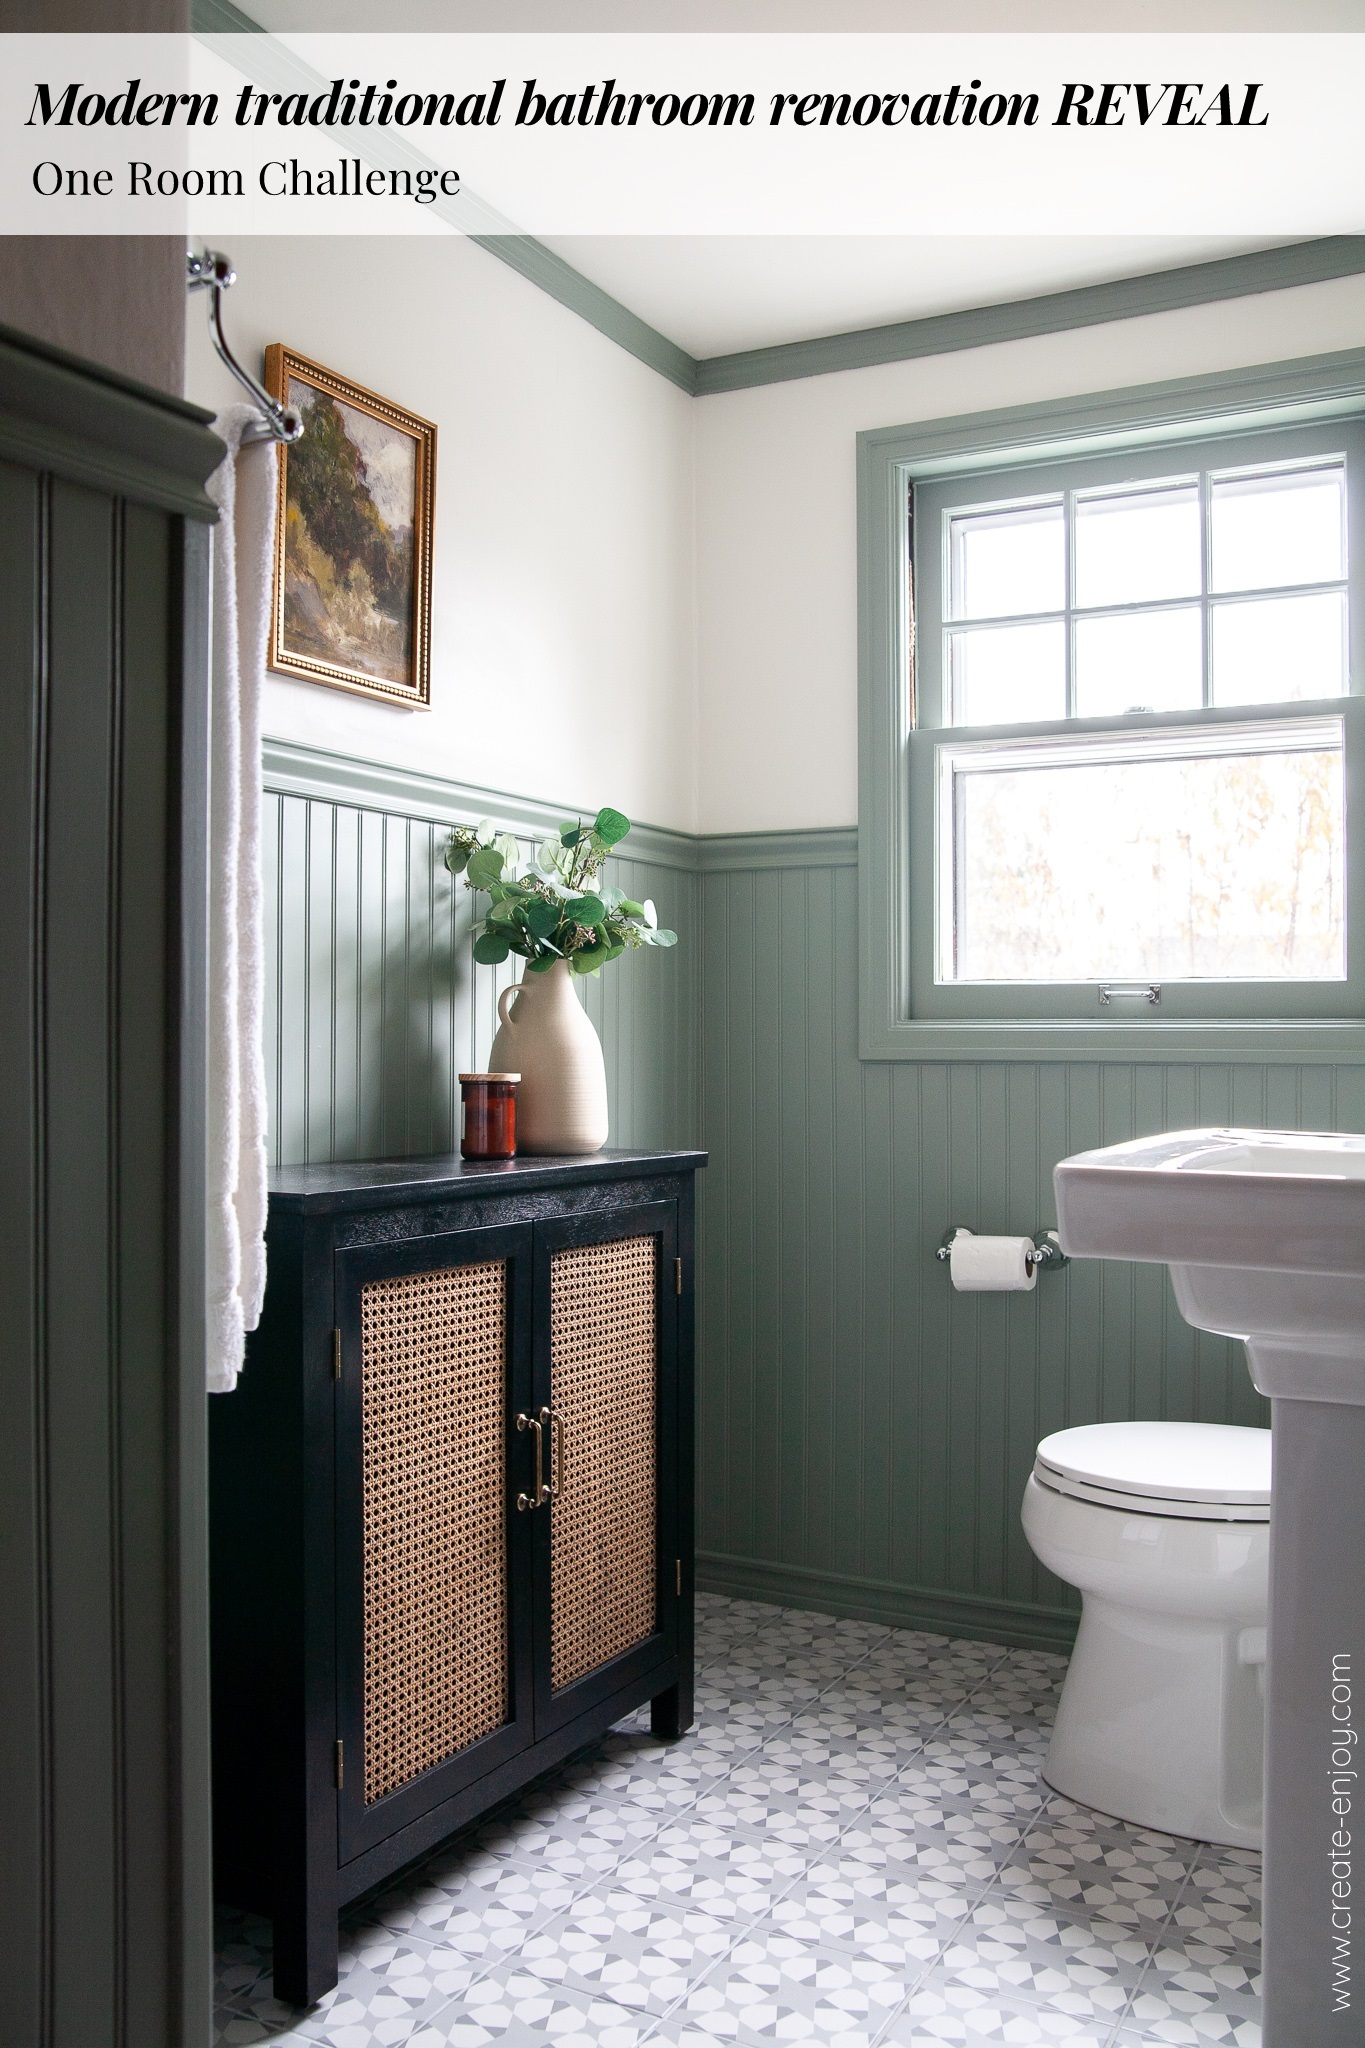
It is such a good feeling to finish a room!!! We've been renovating this house corner by corner over the past 2+ years and now almost all the hardest projects are done... and now we get to enjoy two beautiful bathrooms!
Over the past 5 weeks Jason and I have been working on our upstairs half bathroom as part of the One Room Challenge... it's been exciting, tiring, and satisfying. It is DONE now and I'm sharing the glamour shots, before photos, and total cost with you here!
New here?
If you're new to this blog from the ORC site, welcome!! I'm Suzannah, a longtime DIYer and design lover currently making over our 1937 Tudor revival style home, our second fixer-upper. I have a 2-year-old and newborn, but my husband and I have done almost all of the work on our homes ourselves! I've blogged about all of it so you can check out my tutorials page and room reveals to see. You can also follow along with me and my projects on Instagram! I also co-host the Your Home Story podcast! See all my posts about this ORC here! And see:
Modern traditional historic bathroom renovation REVEAL
Where do I begin... if you remember from my Week 1 post with the before images and design concept, this is a half bathroom on the second floor of our 1930s home. There are two (and a half) bedrooms upstairs as well and we're moving our rooms up there this week!, now that this bathroom is done. We explored adding a shower which would have been a huge plus, but the cost and steps involved just aren't possible for us. That would not be a DIY project in this case and would involve reconfiguring a lot of walls and possibly the exterior.
So, we decided to just make this the best half bath we can!! Welcome in, I'll show you around!
The "found pot" DIY has been very popular on Instagram since @jaci.daily came up with it earlier this year (see this highlight). Spray paint a thrifted pot, vase, or lamp, then rub mud onto it and wipe it off. It's a super easy DIY project and gives a cool vintage look.
There are a couple other vase/pot/lamp DIYs I've seen--#trashtoterracotta mixes baking soda with terra cotta-colored paint, and I've also seen a paint/chalk method. Well, I played around and combined them all, and Instagram has loved it! So I'm sharing the full method/tutorial here as well!
We've turned a corner and the One Room Challenge bathroom reno is looking VERY different this week! I went outside my comfort zone because my comfort zone was feeling boring for this one. We now have beautiful, not-white-or-neutral painted wainscoting in the bathroom!
New here?
If you're new to this blog from the ORC site, welcome!! I'm Suzannah, a longtime DIYer and design lover currently making over our 1937 Tudor revival style home, our second fixer-upper. I have a 2-year-old and newborn, but my husband and I have done almost all of the work on our homes ourselves! I've blogged about all of it so you can check out my tutorials page and room reveals to see. You can also follow along with me and my projects on Instagram! I also co-host the Your Home Story podcast!
As you may remember in the design plans, I originally was thinking white beadboard... classic, what's not to like (like for resale), matches the trim we had already painted when we moved in. But I'd also seen some beautiful bathroom inspiration images with dusty teal trim or vanity (see three faves here). The third image, this powder bath by Studio McGee, uses Pigeon by Farrow & Ball. I looked it up... it's really a chameleon color and more grey-blue than teal. I decided to just take a look at the dusty teal options at Sherwin Williams and pick one of those.
We're doing this One Room Challenge makeover right. Even though we're not changing the wall color from the existing Benjamin Moore Simply White, we're repainting the whole room to fix some old issues and errors, and get a really beautiful, high quality look overall!
New here?
If you're new to this blog from the ORC site, welcome!! I'm Suzannah, a longtime DIYer and design lover currently making over our 1937 Tudor revival style home, our second fixer-upper. I have a 2-year-old and baby on the way, but my husband and I have done almost all of the work on our homes ourselves! I've blogged about all of it so you can check out my tutorials page and room reveals to see. You can also follow along with me and my projects on Instagram! I also co-host the Your Home Story podcast! See all my posts about this ORC here!
Perfect painting and wall patching
A little background on the house where this guest room is. It belongs to my friends/clients Gabriela and Matt, who bought it 3 years ago and immediately had the floors refinished and all the rooms repainted. It's a pretty classic 1961 home and had most of the original features, but had seen some funky improvements from the previous owners including different bold paint colors in every room. It was a great fresh start to have all of the rooms repainted white--they choose Simply White by Benjamin Moore, in flat for the ceilings and eggshell for the walls.
When I've walked through their home, I've never noticed anything wrong with the walls, so I was wondering why they wanted to repaint in this room even though we decided not to change the color.
Gabriela and Matt have high standards, and weren't happy with the quick job the painter did 3 years ago. Let me tell you why!
I am soooooo excited to share about this project. We've had so many things on our wish list for this fixer upper house the past almost 2 years, and repainting the exterior was one of the most fun/big impact, but had to wait for a lot of other projects to get done first.
Historic Tudor revival home exterior paint update
Here she is--our 1937 home, with 1990's (?) paint job, freshly painted and taken care of!
Before/After
The original blue color wasn't my fave but wasn't the biggest issue--as you can see in these close-up before shots, the paint was peeling (especially in wet areas and on the south and west facades) and even exposing some of the wood. We're glad our house has the original cedar siding and wood windows, and need to take care of them!
We neglected an important part of our kitchen (sort of) even though we finished our kitchen reno last month... the basement stairwell and side door that lead into our kitchen, and are our most commonly used entrance to the house, were terrifying!! Dirty 40-year-old vinyl, wallpaper, stained ivory trim, constant dust, piles of shoes and boxes of soda... NOT what you want to see when you walk into your home every day!
We made a few small changes over a couple of weekends and totally transformed this functional space!
I have been working on updates to our dining room and I knew I would need to hunt a while for ONE final piece to finish it off! We were lacking in storage and furniture in this almost-square room that had a lot of extra space on the sides because our dining table is rectangular. Plus we have one perfect, blank, long back wall just screaming for a statement piece of furniture!
I hunted and hunted on Craigslist and Facebook Marketplace, and online sources, but my budget was small and I wanted a specific color, so I planned to DIY. Well, about a month ago I got very lucky and found a fantastic piece!!
It's now sanded, primed, painted, sealed, and installed and looking great! This is a really fun before/after!
I have been up to my ears in painting projects this summer... and the past couple years, really! We've done a combination of DIY and hiring professionals, and... well, there's a time and place for each.
Super timely that we talked about this question on the Your Home Story podcast this week! Ashley and I both have plenty of painting experience and share our tips and thoughts on painting (both interior and exterior) for the do-it-yourself route or hiring it out. (Spoiler alert: we think both are good options depending on the project, you'll have to listen to the episode to hear when and why!)
We even talk about using a paint sprayer, to tape or not to tape (taping off windows and ceilings), and more about how to get the job done!
Resources we mentioned in the episode (this list contains affiliate links):
Episodes 1-3 are live now and I hope you download and love them!
Episode 2 is one of our deep dives, with practical tips and experience on a sometimes daunting task--painting cabinets. Read on for my episode notes and to listen online if you like!
Episode 2: All About Painting Cabinets
Ashley and I have both painted our kitchen cabinets, and she's done some bathroom ones, too.
In the episode we talk about the projects we've done (I painted our dingy oak cabinets, tutorial here, and Ashley got new fronts and painted them and her existing bases) and why we both used and loved the same brand/line of paint.
Because of all the work we had to do in the interior of our fixer upper home, getting to the outside work has been a little on the back burner. But, we had an opportunity to get the painting done for a great price earlier this summer and took it.
I haven't shared hardly any photos of the exterior of our home because it was so ugly when we bought it!! But I'm sharing them here, with the painting and minor landscape updates we've done to dramatically improve its curb appeal (and make us happy when we drive up to it each day!).
I shared some inspirations and paint color combinations here, and puzzled over how to make our totally 90's garage-with-house-attached home look classy but still appropriate for its architecture which we're not really changing.
I am SO excited that we're planning to paint our 90's fixer upper home already! We had planned to put it off till next summer but found a connection to a very affordable painter and are making it happen in less than 2 weeks! That means I have to choose a color in a hurry, which has been hard.
Honestly, I love white as an exterior paint color as well as an interior, and picking white would make it easy. But, Jason won't let me paint anything else white for a while... :P... and I think a nice soft color could be nice, too. I actually also love dark navy or charcoal, but there's a house on our street that's painted a dark grey with white trim and it looks off to me. I think something about the bland early 90's style of our neighborhood doesn't lend itself to modern dramatic tones.
So, I'm thinking about other colors I like. I've found a few combinations I think could work well. I like a sagey, beigey, warm, pale grey like this, plus the black door.
My friend at work has been house-hunting for months and made 6 offers before finally having an offer accepted last week! I am so happy for her and we've been talking about houses and DIY projects and decorating for ages and now she has a place to implement her ideas and good style. We started talking about paint colors and turns out I blew her mind (her words) about choosing it. Read on, this may be something you didn't know, too!
My friend said her mother-in-law loves paint colors and was excited to help them choose, but they were going to go with plain white so she thought she might disappoint her. I said, well, she can still help you choose which shade of white!
My friend was confused. "There's more than one white?"
I explained what I know from my limited knowledge of color theory, and how there are undertones to whites that can make them look bluer, yellower, etc. in different settings. I explained, the original 1960's hardwoods in her house were a warm tone, so if she chose a cooler white it might look pretty blue in contrast. I said ideally you'd try several paint colors in the room, in artificial and natural light, to see how they really look.
(I know this from choosing greys, too, greys are so hard! When we chose the color for our townhouse walls and ceiling it was really helpful to see it in rooms in other homes (online) first. The color we went with (Sherwin Williams Snowfall) looks almost brown higher up on the card, but reads as a comfortable, pale grey in person, rather than a blue-grey or purple-grey as are common.)
Anyway, I told my friend about how I chose the white we used alllll throughout our house. We sprayed our paint on in about 5 hours and did every wall and ceiling the same color. We chose not to use a ceiling paint for the ceilings, even though it's cheaper, because we were using the sprayer and didn't want to change the paint out. We used an eggshell finish so it works well on walls and ceilings.
Walls: "White" by Benjamin Moore in Eggshell
Trim: "White" by Benjamin Moore in Semi-Gloss
I have always loved bedroom decor. Bedrooms can be so pretty and personal. That means I love playing around with our decor at home!
Unfortunately for my husband, who likes things to stay the same... I have often been a serial bed owner. Until I did the pro tufting on the headboard my dad built for us, we owned several beds, several versions of that tufted headboard, lots of Craigslist updates and nightstand changes to go with. I loooooooved that grey velvet headboard but in our new home, I wanted to change more than just the bed. A whole new look.
I've gravitated toward the mid-century natural wood look, but this fab bed from West Elm is not quite in the budget right now. Maybe someday. I also found this black four-poster bed look and just fell in love! It's way more traditional than most of my favorite bedrooms, but somehow totally fresh and clean, too.
I found a couple black four poster beds online, but nothing fabulous. I scrolled Craigslist and actually found several cool ones, usually for less than $100! It looks like Sears made a lot of pine four-posters in the 90s that are now available on the used furniture circuit and may have a few scratches or missing finials, but are just great for this purpose.
I found this one for $40 and transformed it! Here's how I did it!
Painted Four Poster Bed Makeover Tutorial
You will need:
Wooden bed frame
Wood filler (if any scratches/dents)
Spackle knife (if any scratches/dents)
Sandpaper
Primer (tinted if you will be using a dark color of paint)
Semi-gloss or satin sheen trim paint (I used Benjamin Moore Advance in Black)
Painting tools including small roller
Instructions:
1. Lightly sand down the bed (not to remove all of the finish, just to rough it up and even out small scratches). Brush dust off with damp cloth.
2. If you notice any scratches or gouges, apply wood filler with spackle knife. Let dry and sand and brush down. It's amazing what wood filler can do for dents and imperfections, especially when you're going to paint over it!
3. Prime bed pieces using an angled paint brush for the corners and inside areas and a small paint roller for the flat sides. Again, tinted primer if you're doing a dark paint color. Let dry. I did this step once for each side, flipping all of the pieces over about 24 hours after priming the first side.
4. Paint the first coat of paint, again doing the corners first with the brush and then the large, flat areas. I used a full size roller for the first coat but it was a bad choice. I used a small foam paint roller for the primer and second coat, much easier!! Let dry. Repeat second side.
5. Paint the second coat; let dry. Repeat second side.
6. Once fully dry, assemble bed.
I found that this was a great weeknight project cause I could do one coat in 30 minutes or so and then easily wait 24 hours for it to dry. And I don't have enough energy to do much else house project-wise on weeknights so it was nice to have a small project I could work on!
This particular bed was once an actual canopy bed, with a metal frame that has since been lost. It came with four wooden pegs that go in holes on top of the posts. They're plain disc shapes, but I did shop around online for decorative finials. I even ordered some, but ended up liking the posts just as they are so I didn't use them!
I did find a similar bed online for less than $400--if you're not into DIYing. I linked it and the other products we've decorated the bedroom with so far in this post! (This rug was an awesome price and we actually have it in blue in the dining room and tan in the bedroom.)


.jpg)