WELCOME

Hello! I'm Suzannah, a home design lover and mom of two, with one more on the way in January 2027. Follow along with my DIY fixer upper house renovations, design tips, occasional sewing and crafty projects, and de-stressing goals.

I show you how to create a beautiful home that still works with kids!

Subscribe to the blog below and join me on Substack here!
bathroom
Showing posts with label bathroom. Show all posts

11.23.2025

My friend's simple but impactful kids' bathroom makeover

My sweet friend has a very nice but somewhat builder basic home from the early 2000s and I’ve been helping her lately make it a little bit more personal to her style. They did some nice updates to their bathrooms when they moved in, like replacing the square tile countertops with solid surface, but her kids' upstairs bathroom was still feeling kind of plain. We made a few simple updates over the course of about two weekends to totally refresh it!
No comments

7.30.2025

Floral wallpaper transformation (and more) in our plain upstairs bathroom

I think I’ve done it… I think I’ve wallpapered the last room in this home that needs it! I hesitated for a while because I had already renovated this bathroom… Back in 2020, with kind of a mix of that organic earthy modern thing that was trending for a while plus some traditional elements like wainscoting. It was...fine. Honestly, fine. But I also thought it was sort of begging for wallpaper about the wainscoting on the white walls.

No comments

3.04.2024

Main bathroom sage green floral wallpaper transformation

I recently made a big change in my main bathroom and it's past time I share it on here. We redid this bathroom in fall 2019 (hardest reno we ever did btw) and afterwards it was... fine. Clean, fresh, not at all offensive. But my style has changed since 2019 and I've been leaning into the traditional and romantic vibes this house does well with, and this bathroom felt so boring. 

I knew adding some wallpaper above the tile, and painting the vanity to match, would totally transform it. I was overwhelmed by the prospect of the project, and choosing a paper, so I sat with this idea for more than a year. Well, I finally did it, and I LOVE it!

Historic home sage green wallpaper bathroom

Ta-da! I chose the Alexandra Sage Green wallpaper from Sandberg Wallpaper. It's a floral stripe with a 19th century French feel. 


No comments

6.21.2022

From-scratch sink skirt tutorial

The sink skirt is back! It's not just to hide unattractive plumbing; it can add so much charm and softness to an otherwise standard-feeling bathroom. I added a floral block print sink skirt to the pedestal sink in our recent basement bathroom project and it made it so much more fun!

I started my sink skirt journey by turning two shower curtains into sink skirts for my friend @ciarakenaston. It was a genius idea of hers--clearance West Elm Heather Taylor Home big gingham shower curtains, sturdy fabric and great colors. You can see the stories here and the finished product here. 

Making a sink skirt from a shower curtain is by far easier than what I did for our bathroom. I highly recommend that shortcut route! They come hemmed on all three sides; all you have to do is add a casing at the top for elastic or gathering and attach it with velcro. But if you want to pick your fabric (even use a lighter weight fabric) and make something totally custom... this tutorial will tell you how!

Sink Skirt Tutorial


You will need:

No comments

5.30.2022

English country-inspired basement bathroom REVEAL! And budget/costs

PHEW! Our basement bathroom is DONE--AND I am so, so happy with how it turned out! Sorry for all the caps. I wasn't sure for a while there if I would wrap this up in time, and how I would feel about it. Very happy to share this post today.

This is my final post in this One Room Challenge of this bathroom we're doing as part of our basement renovation.


English Country-inspired bathroom renovation

I'm proud!

No comments

5.18.2022

Wallpaper, tile, beadboard, and a door: Major bathroom progress, ORC week 7

One Room Challenge Week 7! We have finally picked up the pace and are now getting so close to being done.


Big Bathroom Progress

We've spent the past couple weekends working a ton on the bathroom and my parents helped me get the tile done (my mom and I tiled, my dad watched the kids) the other Friday, and Jason grouted Sunday. I spent a couple of evenings listening to Taylor Swift and hanging wallpaper instead of relaxing on the couch like I wanted... but it's done!

The wallpaper is this pretty one from A Street Prints (sponsored). It was my first time using pasted wallpaper (versus peel and stick). Easier in some ways (like on the corners).

We've been spraying the trim and laundry room beadboard walls the past few weekends too, and man, am I glad to be done using the paint sprayer. But we did spray these beadboard panels flat on the ground which was 1000x faster than the brush-and-roll method for beadboard. We'll touch them up once they're installed. I picked out art today too so wanted to visualize it and brought the beadboard in and leaned them up against the walls. I can almost picture it!

Then, right after I took these pictures this evening, I got excited to hang some doors and I installed the new antique brass hinges and doorknob. I think the antique brass (almost matches the original ones upstairs) will give the basement some character and less of a brand-new build feel.

Later this week I'll do the pleated shade DIY on the sconce shades, and this weekend, we'll install the beadboard and baseboards. The plumber will install the toilet and sink next week! Almost done!

Follow along on my Instagram for regular updates on this exciting basement project, and the bathroom!

And you can follow along with hundreds of other 8-week room makeovers this One Room Challenge!
No comments

4.28.2022

It looks like a bathroom! Week 4 ORC

One Room Challenge Week 4! I didn’t have much of an update last week so I’ll catch you up on the past two weeks of progress. The bathtub is now installed and we have drywall up, though not finished, in the bathroom.

Bathroom Progress

The drywall and the rest of the basement is completely done (and the very light/smooth texture is beautiful)! We had to wait for the initial plumbing and electrical inspections before drywalling the bathroom itself, but we’ve passed those now. I am taking today off work to get as far as I can painting the basement and getting ready to install some beadboard, and then once that’s done and the drywall is done over the weekend I’m hoping to paint and install beadboard in the bathroom!

Here’s the current status!

I’m also still making design decisions… leaning toward this look and colors. I have some wallpaper samples for the upper half of the walls; nothing is looking perfect but I think I can make one of them work… I am going for sort of a bold look with a dark keyboard on the bottom and a lighter wallpaper, that doesn’t necessarily have a lot of color the same as the beadboard. Like this inspiration.
Image source

Follow along on my Instagram for regular updates on this exciting basement project, and the bathroom!

And you can follow along with hundreds of other 8-week room makeovers this One Room Challenge!
No comments

4.13.2022

Choosing electrical locations for our new bathroom! ORC Week 2

Things are moving along in the basement bathroom (part of the 8-week One Room Challenge), and I got to do something I’ve never done before: decide on the placement of the electrical work! 


Bathroom Sconce Placement

Lighting, switches, and outlets, but the lighting was particularly exciting because in every other bathroom I've had I've had vanity lighting over the mirror, and now I get to put the lights on the sides of the mirror. Part of that is necessity because the ceiling is very low! But it’s really the best place for flattering, helpful lighting when using the mirror.

I had to do some math, diagramming, Google research, and actually laying it out to determine how high the sconces should go and how far away from the mirror. Thankfully I already had the sconces, mirror, and sink on site and was able to get pretty close with my research and then lay the sconces out next to the mirror on the floor to see that I needed to account for some room for the shades!


60" is pretty low for sconces, but we have a low ceiling. We decided on 62" up from the floor and 5" out from the mirror. That will put the sconces 28" apart, which is closer than what you see above a big vanity with a big mirror, but will actually be great lighting. I looked through my Pinterest bathroom pins for examples of sconces above pedestal sinks and quickly realized I don't need to worry about the relationship of the sconces to the sink width. It doesn't matter that they don't line up to the center or edge of the sconces or sink.

The electrician talked to me about where the switches, etc. would go and we decided on lighting locations, and then he got to wiring everything. You can see in this photo of the boxes are set, and there are wires to where the sconces will go (above the sink plumbing).

There will be an outlet to the right of the sink, and as you can see the switch is handy by the door frame. The door swings in and will open up toward the wall to the left.

Drywall goes up soon, and the tub will be installed soon, so it will start to look like a bathroom any day now.

Even though this phase is not all that beautiful, I am particularly enjoying it because I don’t have to do any of the work! I might not be as cheerful in a few weeks when I’ve been painting and installing bead board and tile. Ha!

You can follow along with hundreds of other 8-week room makeovers this One Room Challenge!

No comments

4.06.2022

Beautiful basement bathroom from scratch! ORC Week 1

We are in the middle of our biggest house project yet, and it’s stressful and hard and expensive BUT! I get to design some really pretty rooms from scratch! We are renovating our 1,200 SF basement including adding a full bathroom. It’s also our first project not doing almost everything ourselves, so thankfully I have a contractor, drywaller, electrician, and plumber doing the heavy lifting and I’ll be doing DIYs like tiling the floor and painting. (And decor!) I’m still figuring it out but I’m excited to share these design ideas with you. And the before photos and floorplan of the space!

I'll be sharing this bathroom as part of the 8-week One Room Challenge!

No comments

7.22.2021

How to shorten and recover a readymade Roman shade

After my huge success recovering a cheap blackout Roman shade for Lucy's room with some pretty block print fabric, I decided I need at least one more custom fabric shade! Our upstairs bathroom gets crazy sun in the afternoons and I knew I'd have to hang something pretty but also very functional there. (We renovated it last fall, and it's not a problem in the fall/winter.) The problem with my readymade blackout shade project? The cheap Roman shades only come in a couple lengths (like 60") and that window is short. 

You can hang a too-long shade on a window and just leave a bunch of extra at the bottom... but it's not ideal. I ordered the right width of this Roman shade (around $50) and figured there must be a way to shorten it. Well, there is, and I'm sharing how!

No comments

4.30.2021

Bathroom art! 14 FREE download art prints that are perfect for a bathroom

I recently helped a friend with a DIY bathroom reno. I'd love to share more about that one sometime soon since they did an awesome job!!! but once all the big stuff was done she said she felt good about it, but still needed art. I totally know what it's like to save art for last! (In fact, I mentioned it in this recent post with 3 things not to forget for your bathroom reno.) 

She said when she searched for ideas for "bathroom art" she got a lot of awkward potty-themed quote art. Nothing classy and beautiful like she wanted for her newly renovated space! While you can put absolutely any art you like in a bathroom, I understand the appeal of nude sketches and seascapes and good news--I'm here to redefine "bathroom art" and am sharing 14 beautiful FREE downloads you can print and frame for a bathroom!

I didn't get too creative here--there are a few categories of art that just feel perfect for a bathroom. Sketches, particularly figures or nudes (not too realistic), are lovely and intimate and casual, like you want in a personal space. And then of course, water! Ocean oil paintings are great and there are so many out there, you can choose one that has colors that work in your space. 

Here are 14 bathroom-ey free downloads, no potty humor involved!


  1. Female Nude Bending Toward the Left | The Art Institute of Chicago
  2. I downloaded this one from a link from www.sccpre.cat which is no longer working. I also made the background a little more tan than white. I wish I knew the original source, but you can download it here. 
  3. Bouquet with Peonies | The Art Institute of Chicago
  4. Study of a female figure | Smithsonian Institution
  5. Grounded Fishing Boat | The Art Institute of Chicago
  6. Opal Beach | Freer Gallery of Art & Arthur M. Sackler Gallery
  7. Female Nude, Arms Over Head | The Art Institute of Chicago
  8. Maroc | The Art Institute of Chicago
  9. Beach with Fishing Boats (recto); Landscape with Farmer Plowing a Field (verso) | The Art Institute of Chicago
  10. Seascape | Rijksmuseum
  11. Harbor of Boston, with the City in the Distance | Cleveland Museum of Art
  12. Violet and Silver - The Deep Sea | The Art Institute of Chicago
  13. Sunset | The Metropolitan Museum of Art
  14. Calm Sea | National Gallery of Art
That’s just a few, but several options that will work in a lot of styles of bathroom! You could even combine—one figure sketch, one seascape. I did something similar in this bathroom reno!

As for printing, I haven’t experimented too much, but I’ve had success with custom framing from Art to Frames as well as ordering prints of paintings on mat board from Mpix (but they have to be standard sizes), and taking the glass out of a standard frame for a vintage painting look.

Art adds so much to a functional, fixture-heavy space like a bathroom! Don’t forget it!

No comments

3.25.2021

Lessons learned: 3 things to remember for your bathroom reno

This is a funny post. We've redone two bathrooms in the past two years and we're done for now, but I just installed a new toilet handle downstairs and wow, I should have done that when we first renovated it!! A detail like a toilet handle that matches the faucet and towel bars make a big difference, but I overlooked it before. Sharing that and other lessons I've learned for bathroom renos!

If you're tackling a bathroom reno, you've probably researched a lot of the important steps and made a shopping list. The tile and how to lay it, which vanity you want, any drywall patching... bathrooms can be super complicated for how small they are! (See all my tutorials here including some great tile ones.) But in the past few years I've done 6 bathroom renos (see all Room Reveals here), plus consulted on others, and learned a few extra steps for getting a high quality feel, plus more function for everyone who uses them.

3 Elements to Remember for a Beautiful, Functional Bathroom Reno


1. Art!!!

This is a hard one, because you're making so many decisions about big, permanent things like the sink and toilet that art might seem unimportant. In terms of resale value it probably isn't too important. But for creating a really beautiful space you love?? Key! 

I've learned this slowly--I hardly thought about art at all in the three bathrooms we did at our first fixer upper house (you can see them on the bottom row of bathrooms on my Room Reveals page), and I don't think we had any in our master bath. (It was a great room but it could have used some art and a pretty Roman shade.)

For our latest bathroom reno, our upstairs half bath, I thought about the main piece of art early, and included something similar in design collages from day 1 (you can see the plans/collage here). It really, really helped to know the color and vibe I was going for.

No comments

11.11.2020

Modern traditional historic bathroom renovation REVEAL and cost! One Room Challenge Week 6

It is such a good feeling to finish a room!!! We've been renovating this house corner by corner over the past 2+ years and now almost all the hardest projects are done... and now we get to enjoy two beautiful bathrooms!

Over the past 5 weeks Jason and I have been working on our upstairs half bathroom as part of the One Room Challenge... it's been exciting, tiring, and satisfying. It is DONE now and I'm sharing the glamour shots, before photos, and total cost with you here!


New here?


If you're new to this blog from the ORC site, welcome!! I'm Suzannah, a longtime DIYer and design lover currently making over our 1937 Tudor revival style home, our second fixer-upper. I have a 2-year-old and newborn, but my husband and I have done almost all of the work on our homes ourselves! I've blogged about all of it so you can check out my tutorials page and room reveals to see. You can also follow along with me and my projects on Instagram! I also co-host the Your Home Story podcast!

See all my posts about this ORC here! And see:

Modern traditional historic bathroom renovation REVEAL


Where do I begin... if you remember from my Week 1 post with the before images and design concept, this is a half bathroom on the second floor of our 1930s home. There are two (and a half) bedrooms upstairs as well and we're moving our rooms up there this week!, now that this bathroom is done. We explored adding a shower which would have been a huge plus, but the cost and steps involved just aren't possible for us. That would not be a DIY project in this case and would involve reconfiguring a lot of walls and possibly the exterior.

So, we decided to just make this the best half bath we can!! Welcome in, I'll show you around!

No comments

11.04.2020

Art!! Vintage oil painting look with digital prints. Week 5 One Room Challenge

The One Room Challenge bathroom reno is almost done! When I do these all-at-once room renos it's easy to leave art and styling until the last minute. Well, this time I planned ahead and ordered a beautiful print in a new way that makes for a vintage oil painting look in any size and print you want!

Thanks to Museum Quality Art and Mpix for providing one of the prints for this project!


New here?


If you're new to this blog from the ORC site, welcome!! I'm Suzannah, a longtime DIYer and design lover currently making over our 1937 Tudor revival style home, our second fixer-upper. I have a 2-year-old and newborn, but my husband and I have done almost all of the work on our homes ourselves! I've blogged about all of it so you can check out my tutorials page and room reveals to see. You can also follow along with me and my projects on Instagram! I also co-host the Your Home Story podcast!

See all my posts about this ORC here! And see:
This time, when I was putting together the initial design plans, the room was looking pretty flat and boring (a white background collage with white toilet and sink will do that). The purpose of my mood boarding is usually to identify big pieces like tile, metal colors, and big accent pieces, but this time around I added in some art ideas too! It really made it look more interesting and give me a sense of what this room will feel like. I also decided I wanted a black/gold textured, antique-looking (but not too heavy) frame to pick up on the black of the cabinet, and add some warmth/contrast with the chrome plumbing and lighting fixtures.

So I set out to find the perfect oil painting image, and get it printed and framed in a way that would look like an oil painting!

How to get a digital download to look like an old oil painting


No comments

10.28.2020

Choosing the perfect paint and COLOR! Big changes in the bathroom reno. Week 4 One Room Challenge

We've turned a corner and the One Room Challenge bathroom reno is looking VERY different this week! I went outside my comfort zone because my comfort zone was feeling boring for this one. We now have beautiful, not-white-or-neutral painted wainscoting in the bathroom!


New here?


If you're new to this blog from the ORC site, welcome!! I'm Suzannah, a longtime DIYer and design lover currently making over our 1937 Tudor revival style home, our second fixer-upper. I have a 2-year-old and newborn, but my husband and I have done almost all of the work on our homes ourselves! I've blogged about all of it so you can check out my tutorials page and room reveals to see. You can also follow along with me and my projects on Instagram! I also co-host the Your Home Story podcast!

See all my posts about this ORC here! And see:
As you may remember in the design plans, I originally was thinking white beadboard... classic, what's not to like (like for resale), matches the trim we had already painted when we moved in. But I'd also seen some beautiful bathroom inspiration images with dusty teal trim or vanity (see three faves here). The third image, this powder bath by Studio McGee, uses Pigeon by Farrow & Ball. I looked it up... it's really a chameleon color and more grey-blue than teal. I decided to just take a look at the dusty teal options at Sherwin Williams and pick one of those.

No comments

10.21.2020

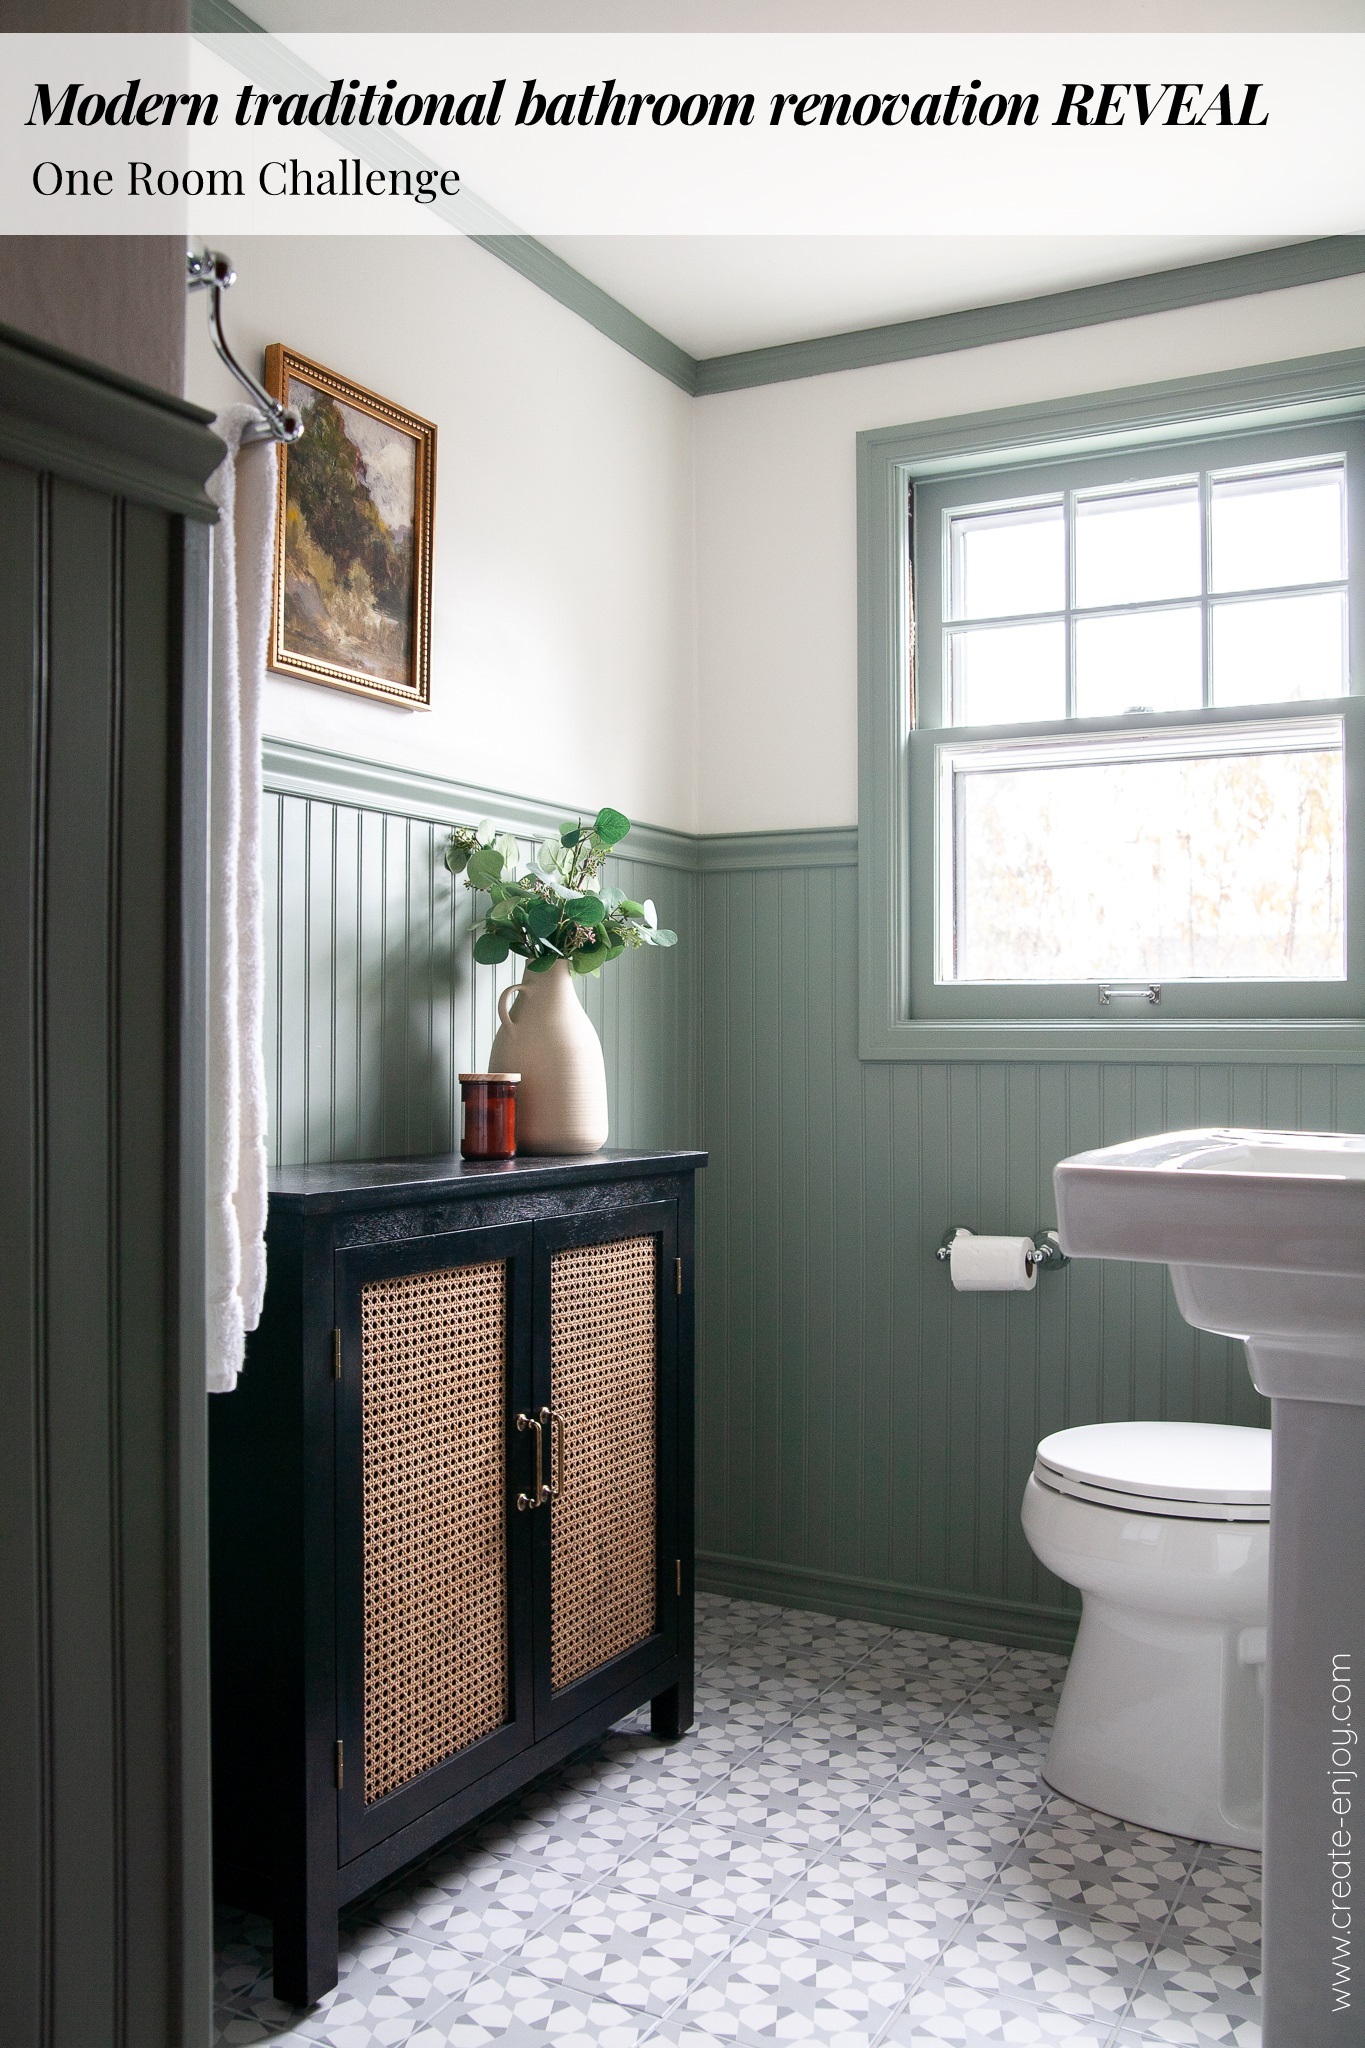
How to lay medium-sized square tile: Tutorial and Week 3 One Room Challenge progress

We are more than halfway through the 6-week One Room Challenge! We are making great progress on our bathroom reno AND I have a tutorial for you today, with some great tips on how to lay the type of tile we used.

New here?


If you're new to this blog from the ORC site, welcome!! I'm Suzannah, a longtime DIYer and design lover currently making over our 1937 Tudor revival style home, our second fixer-upper. I have a 2-year-old and newborn, but my husband and I have done almost all of the work on our homes ourselves! I've blogged about all of it so you can check out my tutorials page and room reveals to see. You can also follow along with me and my projects on Instagram! I also co-host the Your Home Story podcast!

See all my posts about this ORC here! And see:
I absolutely believe that tiling is one of the top 5 essential DIY skills! I have done it so many times now and every time it makes the room feel so much more intentional and high-quality. I love using a real tiles, and it is not that much more expensive or that much harder than alternate methods which may not last as long.

I’ve used mosaic tiles (small tiles that come attached to ~1 SF sheets), large hexagon tiles, subway tiles, subway tiles in a unique pattern, and square tiles. They all have their pros and cons! I often recommend mosaic tiles to new tilers, because they are more forgiving, but I really like the ease of cleaning larger tiles. Plus, patterned tiles (which are often medium-sized square) can make such a great impact!

We used patterned tile in our en-suite bathroom at our last house, and they really made that room exciting. In a space with white walls and other neutrals like a white toilet and sink or vanity, something fun on the floor is a really great way to make a permanent statement, which has more authority than painted walls, as a way to add color.

But, with that project at our last house a couple years ago, I made a couple mistakes and I learned some things. This time around, I wanted to do an even better job laying these square tiles! The ones we chose are 8", which I think of as a medium size tile. It’s not tiny like the ones on mosaic sheets, which allow for more imperfections in the mortar or tile board underneath, but it’s also not massive like some of those 12"x24" tiles, which I’ve never used but look harder to work with.

So, here’s a tutorial sharing what we’ve learned for laying medium sized square tile!

No comments

10.14.2020

Affordable patterned floor tile round-up. Plus Week 2 One Room Challenge bathroom progress

We kicked off demo and tile last weekend and the bathroom is already looking transformed! I'm working on an tutorial for how to lay medium-sized square tile but in the meantime, wow, I am so impressed by how the patterned tile we chose looks. It was crazy affordable and it's nothing ground-breakingly original, but it really makes a great statement and I am now all excited about patterned tile!

There are also a lot of temporary tile techniques out there these days. I have friends who've painted and stenciled their existing tile, or applied peel-and-stick. I'm sure these are good options sometimes, and it's a huge pain to tear out old tile, but in our houses we've always been replacing vinyl or linoleum, and real tile is the way to go. Tiling is probably #2 on my list of essential hardcore DIY skills (after installing light fixtures). It is NOT that hard! I am all about real tile instead of peel-and-stick if you can manage, and with some of these affordable options, it's a budget-friendly way to elevate a reno and get a high quality look!


New here?


If you're new to this blog from the ORC site, welcome!! I'm Suzannah, a longtime DIYer and design lover currently making over our 1937 Tudor revival style home, our second fixer-upper. I have a 2-year-old and newborn, but my husband and I have done almost all of the work on our homes ourselves! I've blogged about all of it so you can check out my tutorials page and room reveals to see. You can also follow along with me and my projects on Instagram! I also co-host the Your Home Story podcast!

See all my posts about this ORC here! And see:

First weekend progress


We made a bunch of progress last weekend: demo, lay tile board, lay tile. You have to wait about 24 hours in between mortaring the tile board and tiling, and between tiling and grouting, so we had some breaks, but other than that Jason worked hard both days!

Took these pics before we finished the edges. We tried a new method this time where we did all the whole tiles first. I'll share more about that/pros and cons, plus a full tutorial on laying medium sized square tile, next week!
No comments

10.07.2020

Upstairs bathroom reno plans: Week 1 One Room Challenge!

I'm so excited it's One Room Challenge season again! We have yet another bathroom planned for this ORC (I've done two other bathroom challenges--this midcentury modern-inspired one at my friends' home and our main bathroom) and it's not that I loooove them over other rooms, but this house did have two dated bathrooms so now we have to do the second one!


New here?


If you're new to this blog from the ORC site, welcome!! I'm Suzannah, a longtime DIYer and design lover currently making over our 1937 Tudor revival style home, our second fixer-upper. I have a 2-year-old and newborn, but my husband and I have done almost all of the work on our homes ourselves! I've blogged about all of it so you can check out my tutorials page and room reveals to see. You can also follow along with me and my projects on Instagram! I also co-host the Your Home Story podcast!

See all my posts about this ORC here! And see:

Historic Home Half Bath Reno Plans


OMG, I am so glad we are finally doing this project!! It wasn't initially on our 2020 house project goals list but we decided to do it this summer, but then it got pushed back by several things. Jason's study schedule for the PT board exam, baby Lucy coming (and us being more tired than we expected), then finally, the smoke/air quality due to all the forest fires in Oregon in early September. We ordered almost all the materials back in June! They've been taking up space in our garage. I am so excited to get this done!

No comments

2.17.2020

Unique, vintage-inspired bathroom art updates and affordable custom framing

I am the first to admit that art was an afterthought when we did our main bathroom reno last fall. Despite planning that projects for months, I waited till the last week to think about the art. (Why?!) For the reveal I found some pieces we already had and printed out a free printable, but none of it was perfect.

So, I put a lot of thought into it finally and found the perfect vintage print and unique printable and went with Art to Frames custom framing, a really affordable option and best way to get the exact sizes I wanted!

Thanks to Art to Frames for providing these beautiful custom frames for me to share with you! Use code CREATE15 for 15% off site-wide through 2/25!

I wanted something short, wide, and horizontal for above the tub. Previously I'd had two vintage Japanese prints there, but they didn't have quite enough presence for that big space. I found a vintage reproduction download, Canyon, from Juniper Print Shop (so many unique pieces, vintage and new!).

No comments

11.06.2019

100% DIY modern traditional full bathroom reno REVEAL and budget: Week 6 of the One Room Challenge!

This project was possibly our biggest so far--it felt harder and longer even than our kitchen! I was intimidated to tackle it and it was not easy at times (hours and hours of tiling after work and on weekends!), but it's done and we are SO happy to have this beautiful, luxurious modern traditional style bathroom to use every day!

This post is part of my series of 6 posts about the 5-week One Room Challenge. You can see all my posts about this project here. Previous posts so far:

I was overwhelmed before we tackled this project, overwhelmed during it, and tired after. It was hard. It involved so many steps and DIY skills, I'm glad we did it after working on five other bathrooms and two kitchens! I feel exhausted but proud of this hard, but successfully completed, room renovation. Just being honest about it--the transformation pics are satisfying, but it was not an easy road!

No comments

SUBSCRIBE BY EMAIL

Get new posts by email:

Search

​
© Create / Enjoy • Theme by Maira G.