WELCOME

Hello! I'm Suzannah, a serious DIYer and mom of two little ones. Follow along with my DIY fixer upper house renovations, sewing and crafty projects, real food recipes, and de-stressing goals.
I believe you can love your home just the way it is, AND have the power to design and make big changes to make it better.
I'm also the author of DIY Wardrobe Makeovers!

sewing circle
Showing posts with label sewing circle. Show all posts

7.22.2014

Sewing Circle question: Drafting a crossback open back dress

It's been a while, but I got a great Sewing Circle question that I wanted to share with you, and get your tips for! Danielle wrote to me about another kind of backless dress (see this Sewing Circle about how to modify patterns for backless dress varieties and this tutorial on how to make an open back shape) - I had to think about this one for a while! But I think I've got it down and here are some tips on how to make this kind of summery dress yourself. (See also tips for sewing on knits!)

Q: Your blog has inspired me to better my sewing skills and start making more of my own clothing. One thing I've been dying to make is a crossback/open back dress. I loved your tutorial on how to alter any dress pattern to have a cutout back, but the style dress I'm going for is more like this Forever 21 dress:

Or this AE dress:


Where the cutout is right above the waistband. Do you know of any pattern that I could use to recreate this? Or any tips on how to alter a pattern for this? 

My biggest problem is how to finish the waistband in the back. I've only ever made dresses where the skirt attaches to the bodice all the way around so the raw edge of the skirt is all inside (attached to the bodice obviously). I just don't understand how to attach the front part of the bodice to the skirt and then finish off the rest of the raw edge of the skirt in back so it looks nice. Do I just fold over the raw edge on the backside and stitch it down? What if I'm adding elastic to the back like this dress?


A: Cute dresses! Unfortunately I haven't seen the perfect pattern, and I think mainly because those are made of unlined lightweight cotton knit, and most sewing patterns are for lined, structured dresses. But, you can definitely make one with a basic knit dress pattern (like The Out and About Dress) and some pattern-drafting. Picture this simple bodice (any sleeve length you like, or leave off the sleeves), plus a circle skirt or simple flared skirt, and the crisscross back drafted how you want it.

The most similar pattern I found for the open back and skirt treatment was actually for kids (this one), although it may shed some light on the construction. I think the key for your dress, where the crisscross starts at the side seams, is finishing the back of the skirt like an actual separate skirt - so yes, fold it back on itself and add the elastic, or add elastic in a casing. Zoom in on the AE dress in the solid red color to really see how it's made!

As for the crisscross straps, I think you'll have to play around with those and cut two of the back piece (rather than cutting on the fold, as your pattern would probably have you do), and you can finish the edges with either self-fabric bias binding (like the Forever 21 dress) or by turning under twice, maybe with some elastic to keep the fabric from stretching (like the AE one).

You can probably play around with your fabric and look at a few simple patterns that you like to see how you could modify them! And, if you're not confident in drafting or want a more structured dress, luckily there are lots of semi-backless dress patterns out there nowadays. Like this one.


Readers, have you seen a pattern for this kind of dress before? How would you modify a basic dress pattern to make this kind of comfy knit? I'm sure Danielle would love to hear your ideas, too!

5 comments
Sewing Circle: Easy-to-move-in dress patterns, like for nursing mamas

11.11.2013

Sewing Circle: Easy-to-move-in dress patterns, like for nursing mamas

A very specialized Sewing Circle question today! Got this one from Bobbi and I'm hoping you all can help her out with more first-hand experience than I have!

Q: You seem to know patterns and such so well! I'd love to make a dress; my challenge is I'm breastfeeding a 3 month old. Any fun, easy (I'm a beginner) patterns that would you would recommend for my situation? I'm a smaller frame, 5'1" tall.

A: Great question, Bobbi, but I have absolutely zero experience in this! I'll contribute what I can.

Some very pretty maternity and nursing patterns...


My first thought was that fellow sewing blogger Megan Nielsen has a seriously awesome pattern line including quite a few maternity patterns. I looked them up and sure enough, she has nursing top and dress patterns as well! I've made one of her patterns before as a tester and it was definitely beginner-friendly. Very clear instructions and a simple pattern (just one style in the envelope, easy to use).

Megan is also one of the sweetest people ever, so I'm glad I get to talk about her here on the blog! Her slogan: "where you make fashion and sewing is cool." Yay. So let's look at Megan's patterns first!

This simple lingerie pattern might be a great one to start with!
Source: Megan Nielsen Patterns

Then maybe try the Pina Dress and Top, also a deep v but more versatile for everyday.
Source: Megan Nielsen Patterns

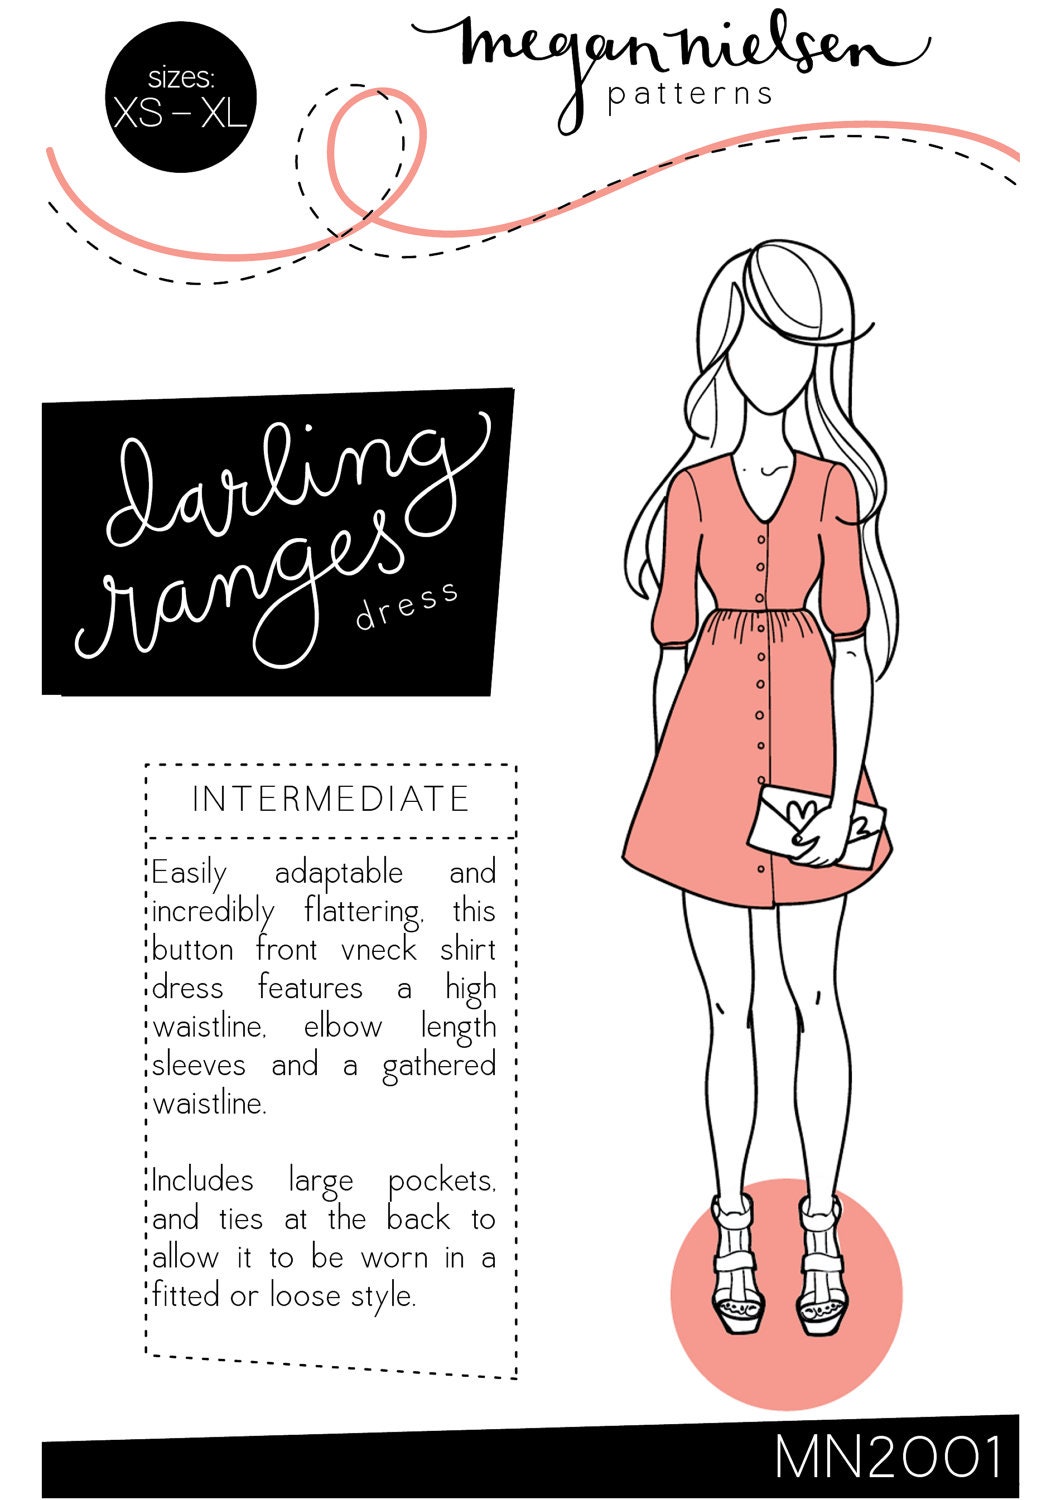
You also could definitely use a non-maternity/nursing dress pattern like the popular Darling Ranges dress, because it buttons down the front. It is really cute! (But then you have to sew button holes. ;) Trade-off.) It's super versatile, too--you can change the neckline, change the sleeves, whatever.
Source: Megan Nielsen Patterns
She also has a nursing top, The Perfect Nursing Top pattern, so you could try out some techniques with that, too!

Typical dress styles for nursing?


But there are probably a million dress patterns you could make work for nursing. In general I think you'll want to look for styles of dresses that you tend to buy for your current nursing state; that probably means deeper or crossover necklines, or something with a placket. So look for those shapes in conventional sewing patterns you may already own as well. (I think you could also probably get very fancy with horizontal openings hidden somewhere, but I really don't feel qualified to recommend any of those.)

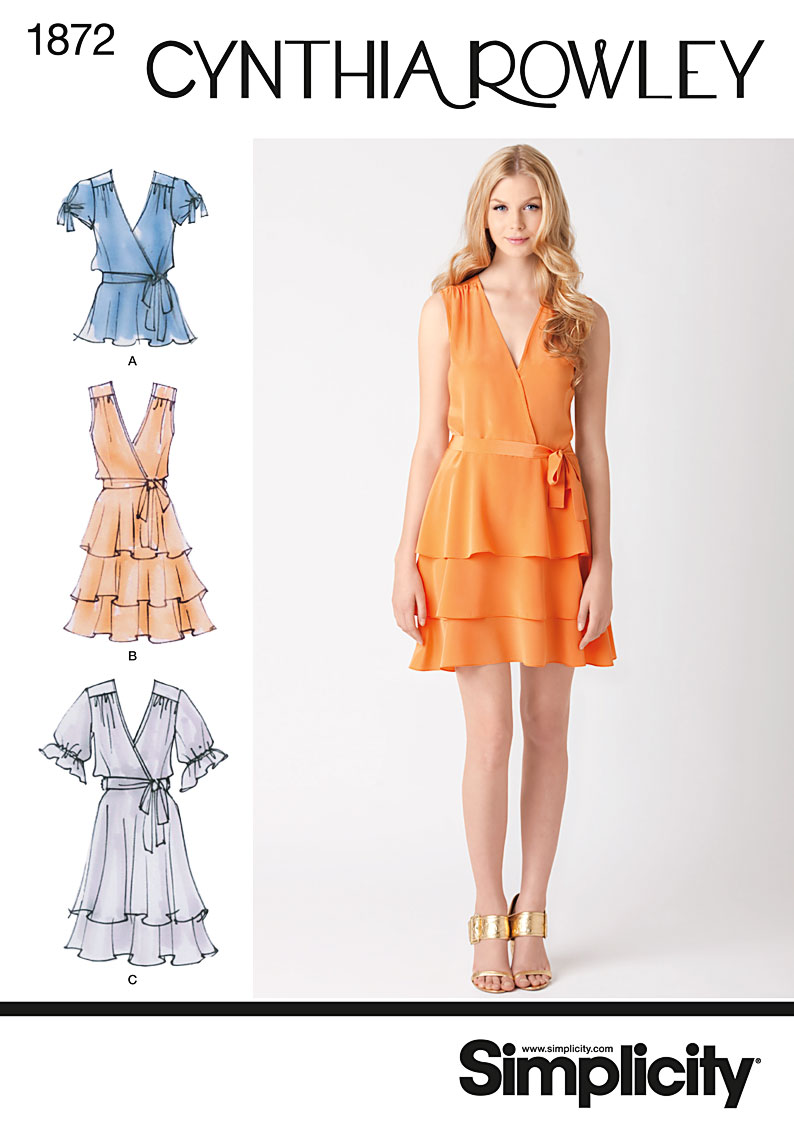
For some slightly dressier styles, try more tailored versions like Simplicity Cynthia Rowley 1872 or Simplicity Cynthia Rowley 2215.


Fabric types for nursing dresses - knit vs. woven


One thing to think about is that knits are probably easier to manipulate when nursing, but they can be a little harder to sew on than wovens. (See a previous Sewing Circle post of mine with tips for sewing on knits.) One of these crossover dresses from McCall's (M6752, M6760, or M6694) could work well.
McCall's M6752

Other ideas?


Readers, if you have experience in this department... what styles do you find are best for nursing, and have you ever sewn your own?? What advice do you have for Bobbi?
15 comments

11.01.2013

Sewing Circle: How to cut out your size from a pattern and leave it intact

Got a great Sewing Circle question from a reader the other day! There are so many things I wonder myself, but never ask, so it's great that she wrote me with this question:

Q: Hi Suzannah, 
When you are using a pattern, do you cut out your size or do you try to "preserve" the pattern by leaving all sizes in tact and trying to cut under/around/ in order to cut your size? I am obsessive about leaving the pattern in tact "just in case..." but I am finding it more difficult as I get in to more detailed patterns. I was hoping to get some perspective from another dressmaker! Thanks!

A: Hi Michelle,
Funny question, I love it! 

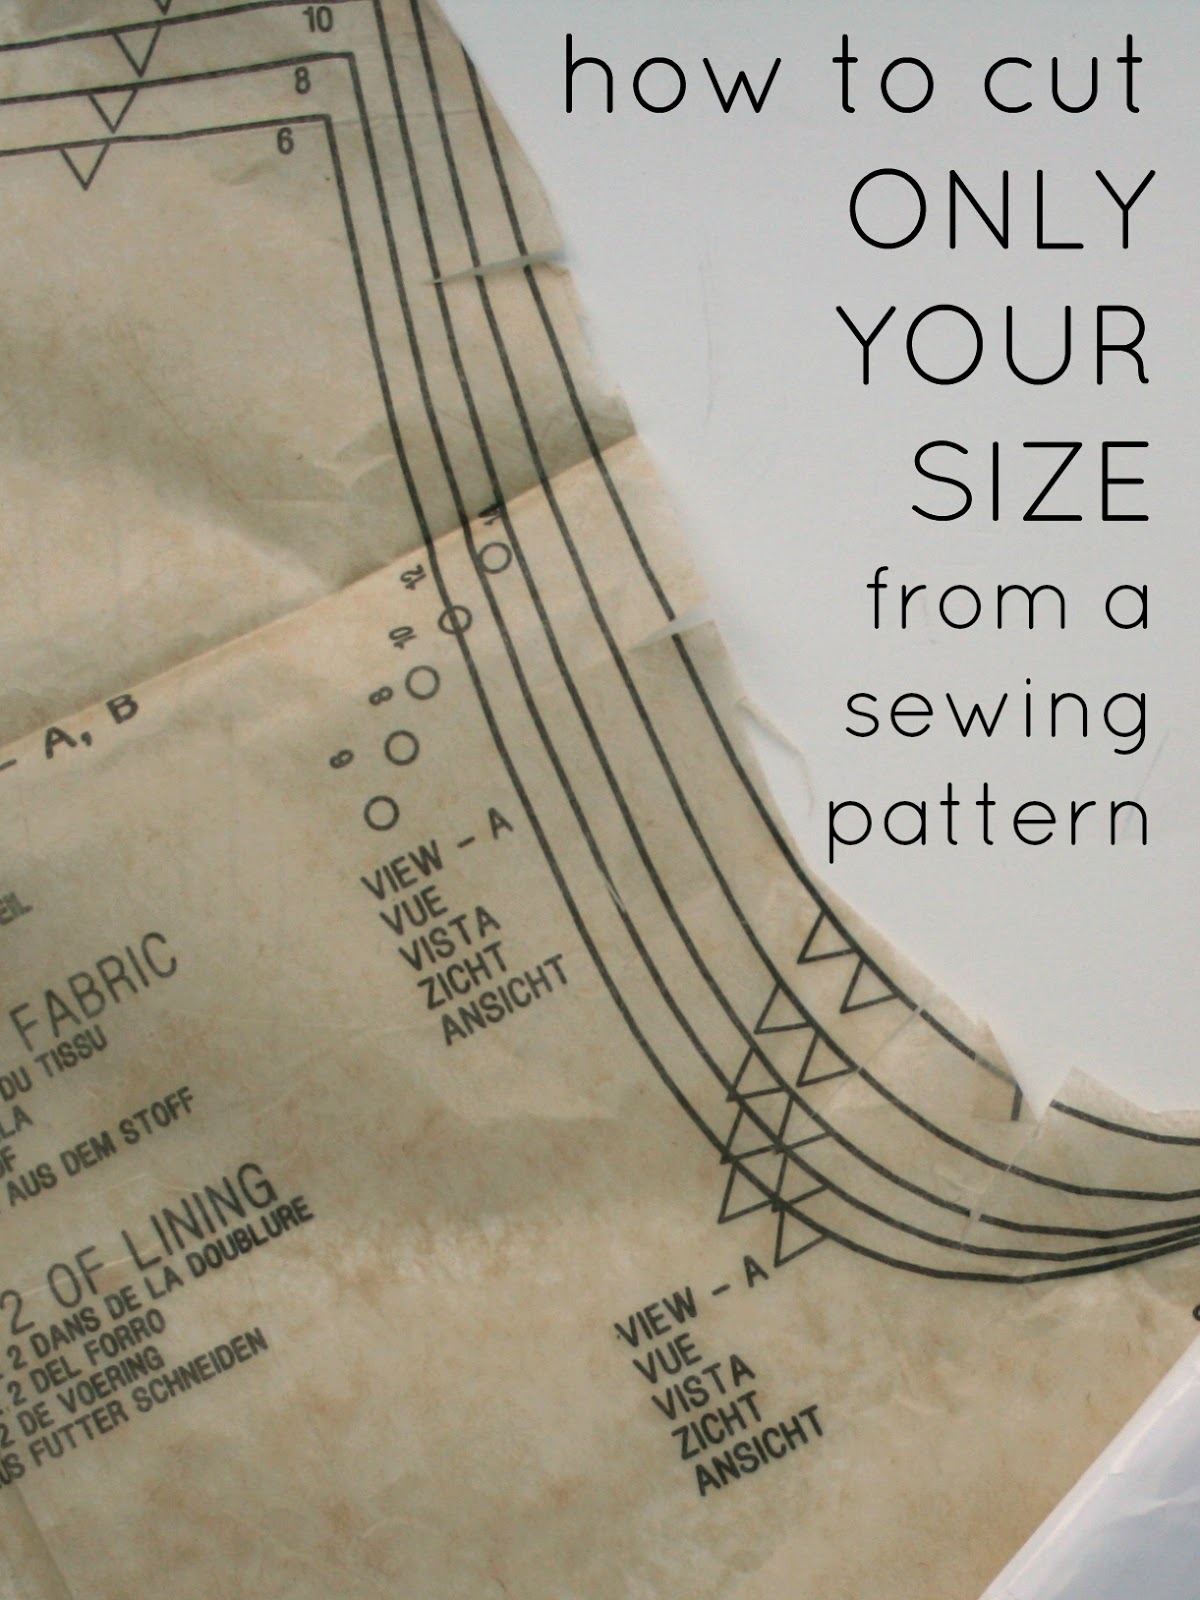
I leave the pieces intact and fold back the edges along the size I'm cutting. It's worked well for me, since I've changed sizes a couple times since I started using my fave patterns a (some of them quite a few years ago ;)). I don't think there's a right or wrong way, though. Folding is pretty perfect except on the curves like armscyes--there I often snip into the curve a couple places and fold in chunks. 

This question got me thinking, though, and I took some photos of my favorite patterns and demonstrating what I mean. So here goes: How to cut out your size from a sewing pattern, leaving the rest intact!

I also should note that this is different from others of my top Sewing Circle questions, like:
So check out those if you're new to using patterns. 

Like I said, this is a very specific question, that many people (like me) have never thought to ask out loud before!

So here's one of my all-time fave patterns, McCall's M5849. (It's out of print, but Simplicity 4070 is nearly identical). I've used this pattern so many times, but because of the straight lines and princess seams, it's so easy to fold over in a straight line to cut my size. In fact, I opened it up this way--I guess I've left it folded to my size!


When I get to the notches on the folded side, I usually lift the pattern piece a little and do my best snipping triangles of the approximate size and location. It works for me.

Here's another example, and a little trickier one because of the curved armscyes. This is Simplicity 1873, a relatively new fave pattern. This is the bodice back.

(I recommend that you do this more carefully than I did.) On the curve, where it's impossible to fold exactly along the black line for my size, I snip into the pattern to the line in a few places (using paper scissors, of course--not the fabric ones I may be holding at the time!)

There you have it! How to preserve a pattern and cut out your size.

Now, how about an unofficial survey--do you cut your exact size out of the pattern, or do you fold or have some other method?!?
39 comments

3.27.2013

Sewing Circle: Paper bag waist shorts!

I haven't done a Sewing Circle post in a while, but I just heard from a reader who said it was her favorite feature... and, I have a great recent question to share with you! I'd love to hear anyone's successes with this at home, too... have you ever used the paper bag skirt tutorial (or the simple paper bag waist skirt version) for shorts??

I got this question from Madison:

Q: I was wondering if it would be possible to take that pattern and perhaps alter it into a shorts pattern, such as these below... I like the idea of a pair of shorts with a zip up the side and no buttons or clasps on the front, while still being fitted enough to avoid using elastic if possible. Do you think you can help me out, or direct me toward a pattern?

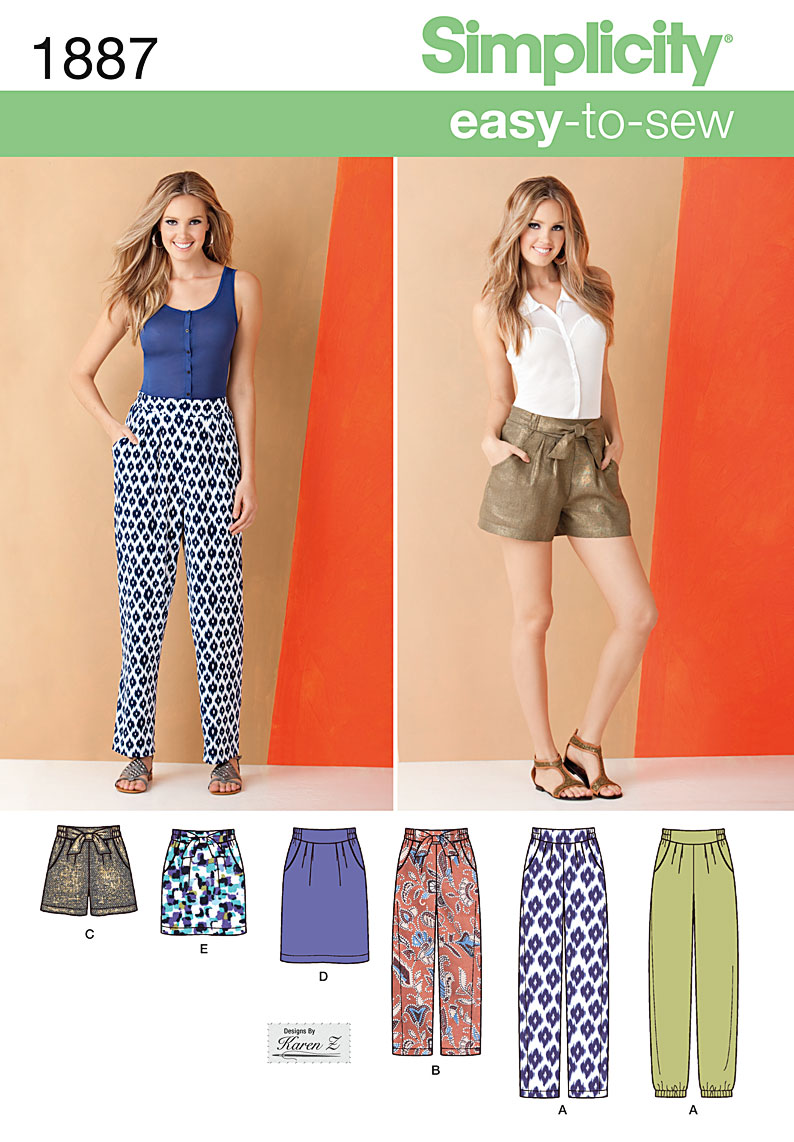
A: Yes, you definitely could use my paper bag waist skirt tutorial to modify any shorts pattern, but it could be tricky... you could take a simple shorts pattern like this Simplicity 1887 or Simplicity 1808 and cut the top piece longer--quite a few inches, like 6-8" or more depending on the pattern, if you want to be able to fold over the top edge like I did in the tutorial.

You could use the basic shorts pattern but NOT cut out the waistband pieces at all; the paper bag waist technique takes care of that. It probably wouldn't be too hard to do, really!!, but you might want to start with an old sheet and make a sample "muslin" version before cutting into nice fabric. Just in case. I also found a tutorial for making paper bag elastic shorts using an existing garment instead of a pattern, but I think for fit and comfort it's best to use a paper pattern unless you're a pro pattern drafter. =)

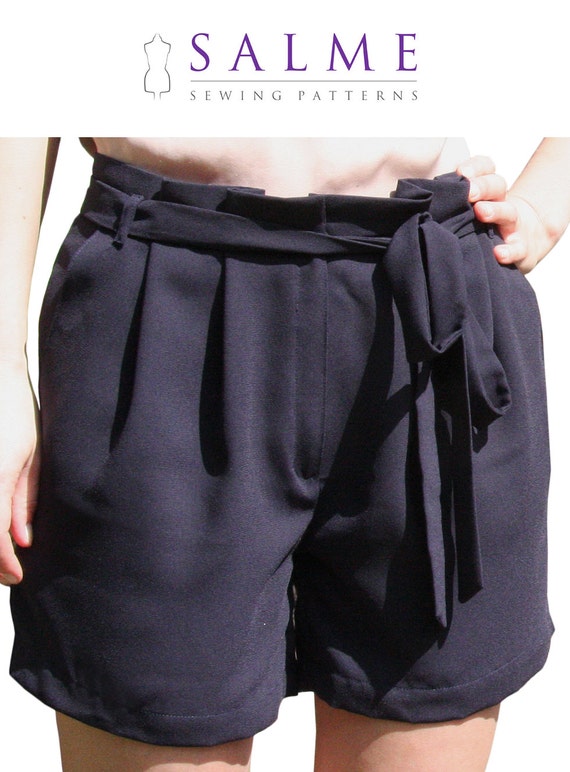
If you want a commercial pattern for paper bag waist shorts, I did find a couple choices! Here's an almost-perfect one on Etsy:

And I found a similar version from Simplicity's European line, Burda: Burda 7139. But you'd probably want to cut the front pieces narrower (at least tapering toward at the hem) so you don't have such huge pleats.

I love the paper bag waist for shorts idea, and it seems like it would be a great project to try!! Readers, have you modified any tutorials to this effect? Have you had success with the paper bag waist tutorial?

2 comments

1.24.2013

Sewing Circle: A fab Valentine's Day dress!

It's been a while since I shared a Sewing Circle question, but this one was for such a fun dress with perfect timing for the upcoming holiday... for those of us who would rather celebrate it by making something cute than by shopping for the perfect heart-shaped chocolate box or rhinestone heels or whatever it is the single folks do... (can you tell I'm out of touch?)...

This question came from Lauren...

Q: I read your blog all the time and love all your projects. I have gotten a ton of inspiration from you. I am a somewhat novice sewer, but I can tackle projects as long as I take my time! My first dress, the reason I learned to sew, was a plaid Christmas dress. I figured if I could match plaids, I could conquer anything :)

I have seen this dress over the past year or so, and I absolutely LOVE it. I was hoping you could give me some advice on how to make one myself. I think with a pair of leopard heels and some turquoise earrings it would be the perfect Valentines day dress! Here is the picture. Thank you for taking a peek!

Source: Wear is it From


A: That is a super cool dress!! Would def be perfect for Valentine’s Day. I’ve never seen a pattern for the exact thing (see some ideas below), but I’m sure you can make that sleeve peplum super easily…

To make the sleeve yourself (it looks like just a gathered rectangle, though a lined/double layer would be nicer), I would cut a piece twice as long as you’d like, about 1.5 times the width of the arm opening, along the selvage edge of the fabric. Then sew the cross grain (perpendicular to selvage) seam together, then I would fold it wrong sides together along the bottom edge, press, and gather the big raw/selvage opening. Then pin and sew right sides together the gathered piece to the sleeve opening! Does that make sense? Then you have a lining for your sleeve trumpet and no hemming to do on the bottom.

If you’re not confident, you could try using one of the sleeve trim pieces from one of these patterns. (or just take a look at the pattern piece picture and emulate it).

(Another quick search found some similar things on some Jennifer Paganelli tunic patterns... try this one, this one, one for girls, or this one for toddlers. Same construction. You would want to cut any of those bottom sleeve pieces wider than those patterns, though, for more fullness in the gathering. Probably would cut them longer, too.)

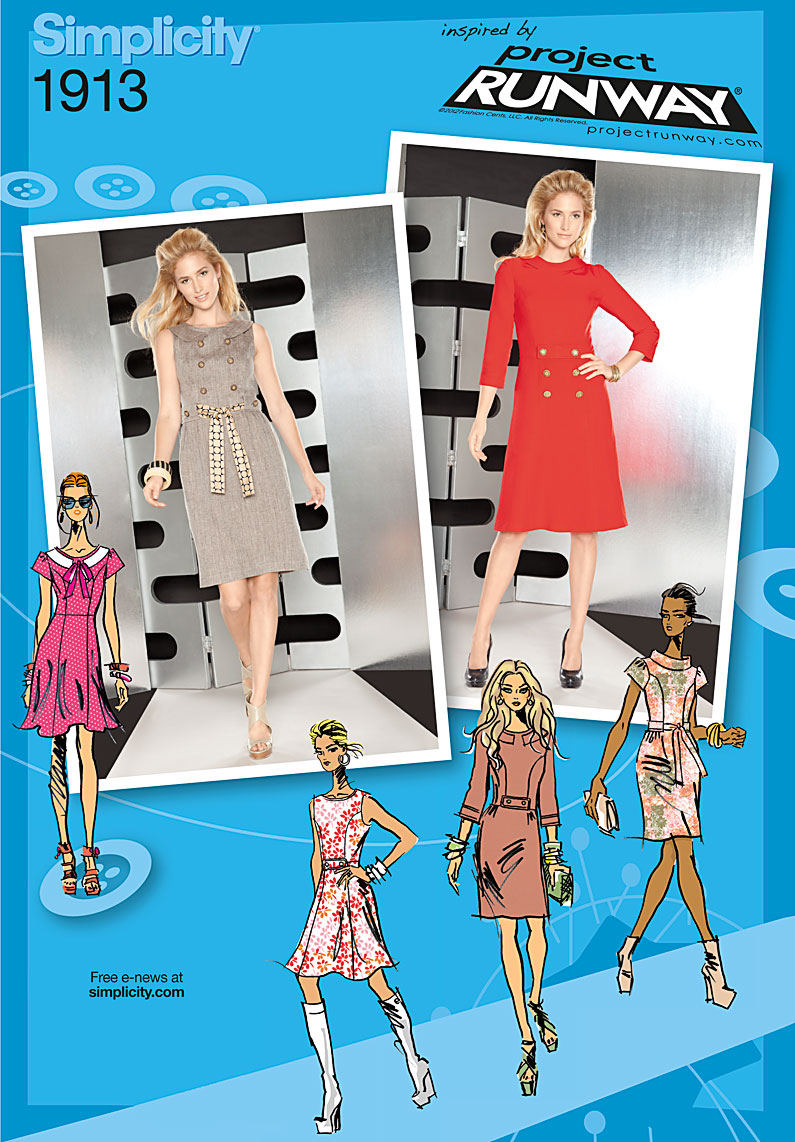
As for the dress pattern, you could use any basic natural waisted, slim-fitting dress pattern, preferably one that already has the straight sleeves. I’ve used this one before, Simplicity 1913, but I’m sure there are others… try the dresses and sportswear sections of the big pattern companies. The original pink dresses are darted bodices, more like Simplicity 1873 or you could use the flattering Simplicity 2444, but the skirt on the pattern below is so close, too; I figured if you want to get just one pattern, go with this one for a very similar look.


Hope that helps!

Readers, would you wear this dress?!? How would you make the sleeve trumpets? (Or, is there a better term for them?). Seems like the peplum trend is expanding to our arms... let's not put these on the ankles of our flared pants, k?? That make have happened in the 70's, but let's let sleeping dogs lie, right?

I kind of want to try making one of these myself!!

Update: Lauren DID make the dress, and she sent us some pics of the finished product!

From Lauren:
I used Vogue V8593--I decided that the pleat up top was important than the dress having a waist, so I found the Vogue pattern that had a pleat that matched pretty closely. I noticed too, the dress was more fitted so i thought it would be ok without a defined waist. For the trumpet sleeve I just did a rectangle and gathered it. Although I feel like maybe should i have lined it, but you sew and you learn. 

I have ordered a light pink necklace that i think will be the perfect over the top accessory :)


Thanks for sharing, Lauren!!

11 comments

11.14.2012

Sewing Circle: The perfect birthday dress

Today's Sewing Circle is a special one--it comes from my good friend and fellow Portland-area blogger Jenni, of A Well-Crafted Party--and it SO perfect for her, too!, since she has an exciting birthday coming up and of course will look fab. So she sent me this question about the most amazing BHLDN dress and how she can make it for herself!

Q: Hey... so, you know me... planning my b-day party already. I'm in love with this dress from BHLDN. I'd love to try to make something similar (the pleated look for sure) without the strap or with different style straps.

How difficult would it be? Ideas on how to go about it? Fabric?


A: Oh, that is soooo pretty!!!!

Should be pretty straightforward to make. The good news is the pattern is actually pretty simple—it looks like it’s a basic strapless dress with vertical ruching on the bodice all around and then an asymmetrical drape going left to right. All you’ll need is ANY strapless dress pattern (princess seams)—seriously, whatever brand is on sale for $1 the weekend you go, should be fine. A good basic is this one, Simplicity 4070.

Then you’ll cut the bodice to hit just above the natural waist, just below a basic empire waist… so you’ll cut out the lining normally. Then with the outer fabric, you’ll cut one piece for the front and one for the back, 1.5-2x as wide as the lining pieces will be sewn together. You’ll gather the outer fabric pieces at the top and bottom and place over the lining, pinning in place and sort of petting into the right gathers. I’d say buy some plastic boning for this one for sure. You’ll also cut out a piece to gather and drape asymmetrically—you can drape it while you’re wearing it or if you have a mannequin, use that. I can help you cut all these out next time I’m over if you want.

ORRRR, the easier option is to buy a pattern that’s close and lengthen it—like one of these, which already have the gathered bodice, so all you need to add is the asymmetrical drape. Simplicity 2398 or Butterick B5457. Just cut the bust pieces several inches longer than they’re supposed to be, shaping like your rib cage would, and then don’t cut out the midriff panel.
Butterick B5457

OR, you could get a pattern that gets at the look but isn’t constructed the same way. Like one of these McCall's M6466 or Vogue V8150 (could cut to hit at just above the natural waist) or Butterick B4918 (could add the ruching on the main layer of this one, also cut to just above natural waist).
McCall's M6466 

And the skirt is easy. They even tell you the length of the BHLDN one! (26”, but it looks longer to me… hm…). Cut two panels to the length you want, then gather or pleat to the waist.


The fabric—check out a big JoAnn or other big fabric store and look for pre-pleated fabric. You might not have that much choice color-wise, but I’m sure there’s a special occasion poly that will have that look, or at least some texture.

So that's my take! Readers, what do you think?! Have you seen THE perfect pattern or fabric for this gem??

6 comments

11.06.2012

Tutorial for the mystery pocket skirt!

Cool and unique tutorial for you on the blog today, written by a reader who was inspired by the mystery pocket skirt on Sewing Circle a few weeks back!


Kessem, a reader from Israel who posts all kinds of fancy sewing projects and tutorials on her blog, Dinosaur Girl, emailed me after seeing the mystery pocket skirt question and volunteered to try it out! Quite ambitiously, she drafted a pattern and went through the trial and error of making a replica of the mystery orange skirt. She put together an explanation of the drafting of the skirt on her blog, here, and on my blog she's sharing with us the tutorial for the construction! Follow along and see how you can make this skirt, too!

When I saw this skirt in Suzannah's Sewing Circle the wheels in my head immediately started turning and I was set upon figuring out how to draft this skirt! I ended up making it in a navy cotton-poly blend (which isn't a great color choice for a tutorial, and for this I apologize) so it does end up having a different look than the one in the picture, but I assure you the pattern is quite similar! 

The post on how to draft the skirt and the pocket is on my blog so be sure to stop by there before you start sewing! (Well, obviously.)

We'll need the basic stuff for this project:
  • Sewing sheers
  • Pins
  • Chalk or fabric pen
  • Fabric (I used about 1.5 yards, and I am a small/medium--see the drafting post on my blog for more info)
  • An invisible zipper
Let's talk about lining for a second - I didn't line my skirt and I have to be honest and say that I kind of regret it because I feel the skirt has too much drape and it shouldn't have any (if you look at the original picture of the skirt the skirt is very stiff). If you feel you want to add lining, cut four pieces of the back piece in your lining material. I think I'm going to go as far as lining my skirt with cotton because I really want to eliminate all drape.

As I said before I decided to be true to the original design and make the pockets part of the skirt panels. If you feel like this may be too advanced for you, you can opt for the easier and more user-friendly version, which is patch pockets. Along the tutorial, I'll point out which steps you should forgo/add in order to make the patch pockets. Make sure you read carefully!

Ok, so we're going to lay the patterns on the fabric. For some reason, I didn't think to get a good picture of this so I'll have to explain it rather than show you. It's not difficult at all so I'm not worried:

1) Front and Back Skirt: do not cut on fold. Cut two of each.
2) Waistband: cut two on fold and two not on the fold. (the waistband that is cut on the fold will be the front waistband and the separate ones for the back.
3) Pocket: cut two.

I added a 1/2 inch seam allowance; you're welcome to add as much as you're comfortable with.
For those of you that are making patch pockets -  you don't need the front skirt piece, just cut four of the back skirt piece and two of the pocket pieces.

Let's get started on the pockets!

Before we start assembling the skirt, we need to cut two more pieces. The larger rectangle will be the pocket sack - You want it to be longer (at least by two inches) than your pocket slit and much wider (so that you hand will fit in there. well not all of it - unless you have miniscule hands, but about up until the end of your fingers).  I made my rectangle 3 inches by 12 inches - you will need four of these.

Next, we're going to need a little square that will assist us in sewing the inverted corner of the pocket (if you're going to do patch pockets you can forgo this step), cut two 1.5 inch squares.

Copy the pocket slit from the pocket pattern onto two of the large rectangles. I placed it about an inch from the top and 1.5 inches from the side.

Use the pattern to mark the pocket slit on the wrong side of the pockets.

Baste the two pockets to each other (set your machine to a very long stitch and sew); only sew around the curved edge and the bottom of the pocket.

Flip the pockets inside out and press. Unpick the basting stitches.

Next, pin the rectangle the the right side of the pocket, matching up the pocket slit on the rectangle to the pocket slit on the pocket. (we drew the pocket slit on the wrong side of the pocket so that it will be easier to match up).


Stitch along the rectangle of the slit using a short length stitch. Next, cut a slit down the middle of the rectangle ending half an inch from the ends. Then, cut little Y shapes up to (but not through!) the corners.

Push rectangle through the slit and press press press.

Next place one of the rectangles we didn't trace the slit on, on top of the rectangle we just pushed through the slit. pin and stitch the rectangles to each other. (we just created the pocket sack!). Now do this to other pocket.

Next we're going to get the front skirt ready. Sewing the inverted corner is a little tricky so we need to reenforce it.

For the patch pocket people -  you can skip this whole step since you're not sewing an inverted corner.

Mark you seam allowance in the inverted corner on the right side of the fabric.

Place the little square we cut before on the corner and stitch along the seam allowance using a short stitch. Clip up to the corner, but not through it!

Flip the seam allowance to the back and press the whole thing. I know it looks like a mess but it will be helpful when we sew the corner! see the flap we created along the corner? if we had attempted to sew it without the square we'd have no support when we reached the point of the corner as there is not seam allowance there (think about it!) but now we have seam allowance along the whole corner! (the picture above shows the wrong side of the skirt.)

Pin the bottom of the pocket to the bottom of the pocket opening. match up the creases created from pressing the pocket and pressing the inverted corner. sew up to the corner matching up the corner carefully:

Make sure that the seam outer corner (not the seam allowance but the seam itself!) matches up with the inverted corner. Use the square as to help you match the corner. again - now you have seam allowance at the tip of the inverted corner!

Pin along the curve and sew the whole thing! (slowly!)

This is what it should look like after you sew it! (I didn't press it before I took a picture, that's why it looks all wonky, make sure you do before you move on to the next step!). Do the same thing on the other front panel.

For the patch pocket people--top stitch the pressed pocket to your front skirt along the outer lines to achieve the same look as the picture above.

Sew up the front middle seam.

I didn't take pictures of the next steps as they are quite basic and not unique to this skirt.

Sew the waistband to the front panels and the separate waistband the the back panels.

Sew the side seams of the skirt.

Sew in the zipper up the back seam. If you need help, use this tutorial.

I suggest you interface the waistband facing but that's not mandatory! Sew the side seams of the waistband facing; if you opted for adding a lining, sew the waistband facing to the lining skirt, then connect it to the main waistband by pinning them right sides together at the top. To finish your facing (and lining) beautifully with zipper, use this tutorial.

Last but not least - hem your skirt and you're done!

What do you think? If you have any question let me know through the comments!

You can see more pictures of the finished skirt, along with the drafting instructions, on my blog.

Thanks so much, Kessem!! Readers, have fun!!

3 comments

Search

© Create / Enjoy • Theme by Maira G.