Hello! I'm Suzannah, a serious DIYer and mom of two little ones. Follow along with my DIY fixer upper house renovations, sewing and crafty projects, real food recipes, and de-stressing goals.
I believe you can love your home just the way it is, AND have the power to design and make big changes to make it better.
I wanted a really unique, cool headboard for my One Room Challenge guest room but I wasn't prepared for a full-on from-scratch plywood etc. DIY headboard. I found a curved headboard with nailhead trim (not my favorite) for $10 on Facebook Marketplace and recovered it with a beautiful fabric, and found a great solution for covering up the nailhead trim. I didn't even have to remove it! Easy tutorial here!
DIY recovered curved headboard tutorial
You will need:
Headboard
Fabric (plan to run the fabric vertically, so enough for the width and height of the headboard plus 6"+ on each side--I had to use two widths of my 53" wide fabric for my full/queen headboard)
Optional/if your headboard is dark and your fabric is light: white spray paint
Hooray, my One Room Challenge is done! I 100% did not have time or capacity to do this project (hence the lack of blog posts long the way, unlike how I've done my previous ORCs) but I have to say it turned out great and I'm so glad I did it!!
Moody English-inspired basement guest bedroom
This room is part of my big basement renovation which unfortunately is still not 100% done--though now this room is, as is the bathroom right next to it (my spring One Room Challenge--reveal here). Most of the work in this room was done earlier this year, and a lot of it by the electrician, drywall team, etc. who did the rest of the basement, but still--huge transformation!
See the before/inspiration post in Week 1 of the ORC here.
I need a kick in the pants to wrap up this big basement renovation project, so here goes--my 117th (kidding) One Room Challenge. (See all my others here.) We started turning this little extra room into a guest room months ago and stopped, and... now it's just sad. But I have plans for a beautiful, richly colored, vintage-ey English country-inspired room and here I go!
Basement guest room One Room Challenge makeover
The before(s)
This room has been through a lot. Here's its recent history, from 70's/80's home office to newly framed tiny bonus room. There's no closet since it wasn't intended to be a bedroom (hence why we didn't add an egress window), and it's really very small. A full size bed is as big as you'd want to go! I was thinking it would be a nice office, too, or music room or small playroom... but then we decided we wanted it to be a guest room, and I love decorating bedrooms so that was the most fun option anyway.
The spring One Room Challenge is over, and there were hundreds of incredible design and home improvement projects as usual. (See them all here.) I've shared a handful of favorites in my Instagram stories but I like to put together a short roundup of my top faves each season and here are five that I think are really, really special. Bathrooms, a kids' room, and more!
Top 5 One Room Challenge makeovers spring 2022
Some of these are not exactly my style but I so respect them for the quality work and good design! Or maybe I kind of wish they were my style...!
A couple of these designers have been in my favorites roundups from previous seasons, too!
Honestly I didn't mind the "before" on this space, either! But now it's a way more unique and interesting, character-filled space that feels so perfect for this Victorian home.
I am in awe of this project. SO many skillful construction projects basically rebuilding this addition on this 1930's home, PLUS so much style! I would have never thought to combine some of these elements in the soft goods and wall/ceiling treatments. Epic!
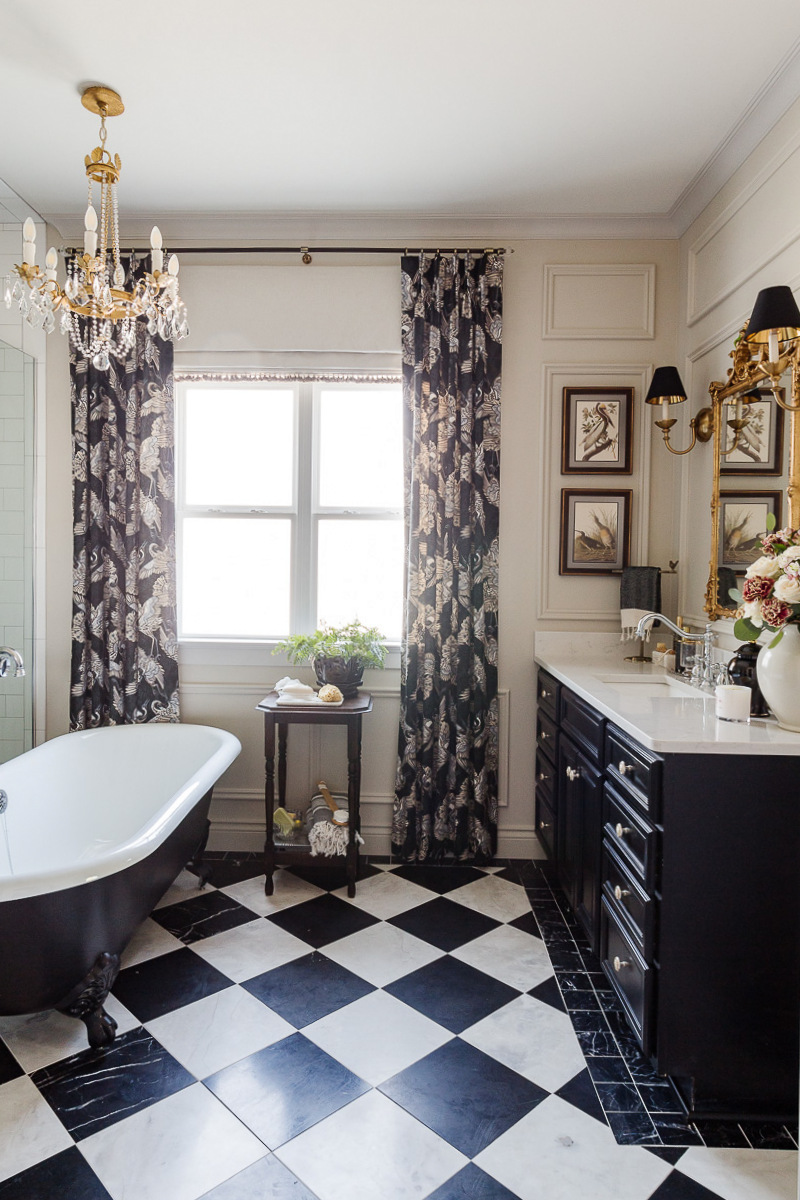
Erin does such high quality projects always, and this room is no exception. She really puts care into her DIYs (almost everything she does is DIY) and she uses a great mix of classic English-inspired quirky style and modern fresh pieces (how cute are those sconces?). She also brings great art prints from museum downloads! And that is an antique pedestal sink (hey, a few similarities to my ORC bathroom this season!). I love that this bathroom is bringing beige back, too!!
Hope you enjoyed my little roundup! Check out all the reveals here!
PHEW! Our basement bathroom is DONE--AND I am so, so happy with how it turned out! Sorry for all the caps. I wasn't sure for a while there if I would wrap this up in time, and how I would feel about it. Very happy to share this post today.
We've spent the past couple weekends working a ton on the bathroom and my parents helped me get the tile done (my mom and I tiled, my dad watched the kids) the other Friday, and Jason grouted Sunday. I spent a couple of evenings listening to Taylor Swift and hanging wallpaper instead of relaxing on the couch like I wanted... but it's done!
The wallpaper is this pretty one from A Street Prints (sponsored). It was my first time using pasted wallpaper (versus peel and stick). Easier in some ways (like on the corners).
We've been spraying the trim and laundry room beadboard walls the past few weekends too, and man, am I glad to be done using the paint sprayer. But we did spray these beadboard panels flat on the ground which was 1000x faster than the brush-and-roll method for beadboard. We'll touch them up once they're installed. I picked out art today too so wanted to visualize it and brought the beadboard in and leaned them up against the walls. I can almost picture it!
Then, right after I took these pictures this evening, I got excited to hang some doors and I installed the new antique brass hinges and doorknob. I think the antique brass (almost matches the original ones upstairs) will give the basement some character and less of a brand-new build feel.
Later this week I'll do the pleated shade DIY on the sconce shades, and this weekend, we'll install the beadboard and baseboards. The plumber will install the toilet and sink next week! Almost done!
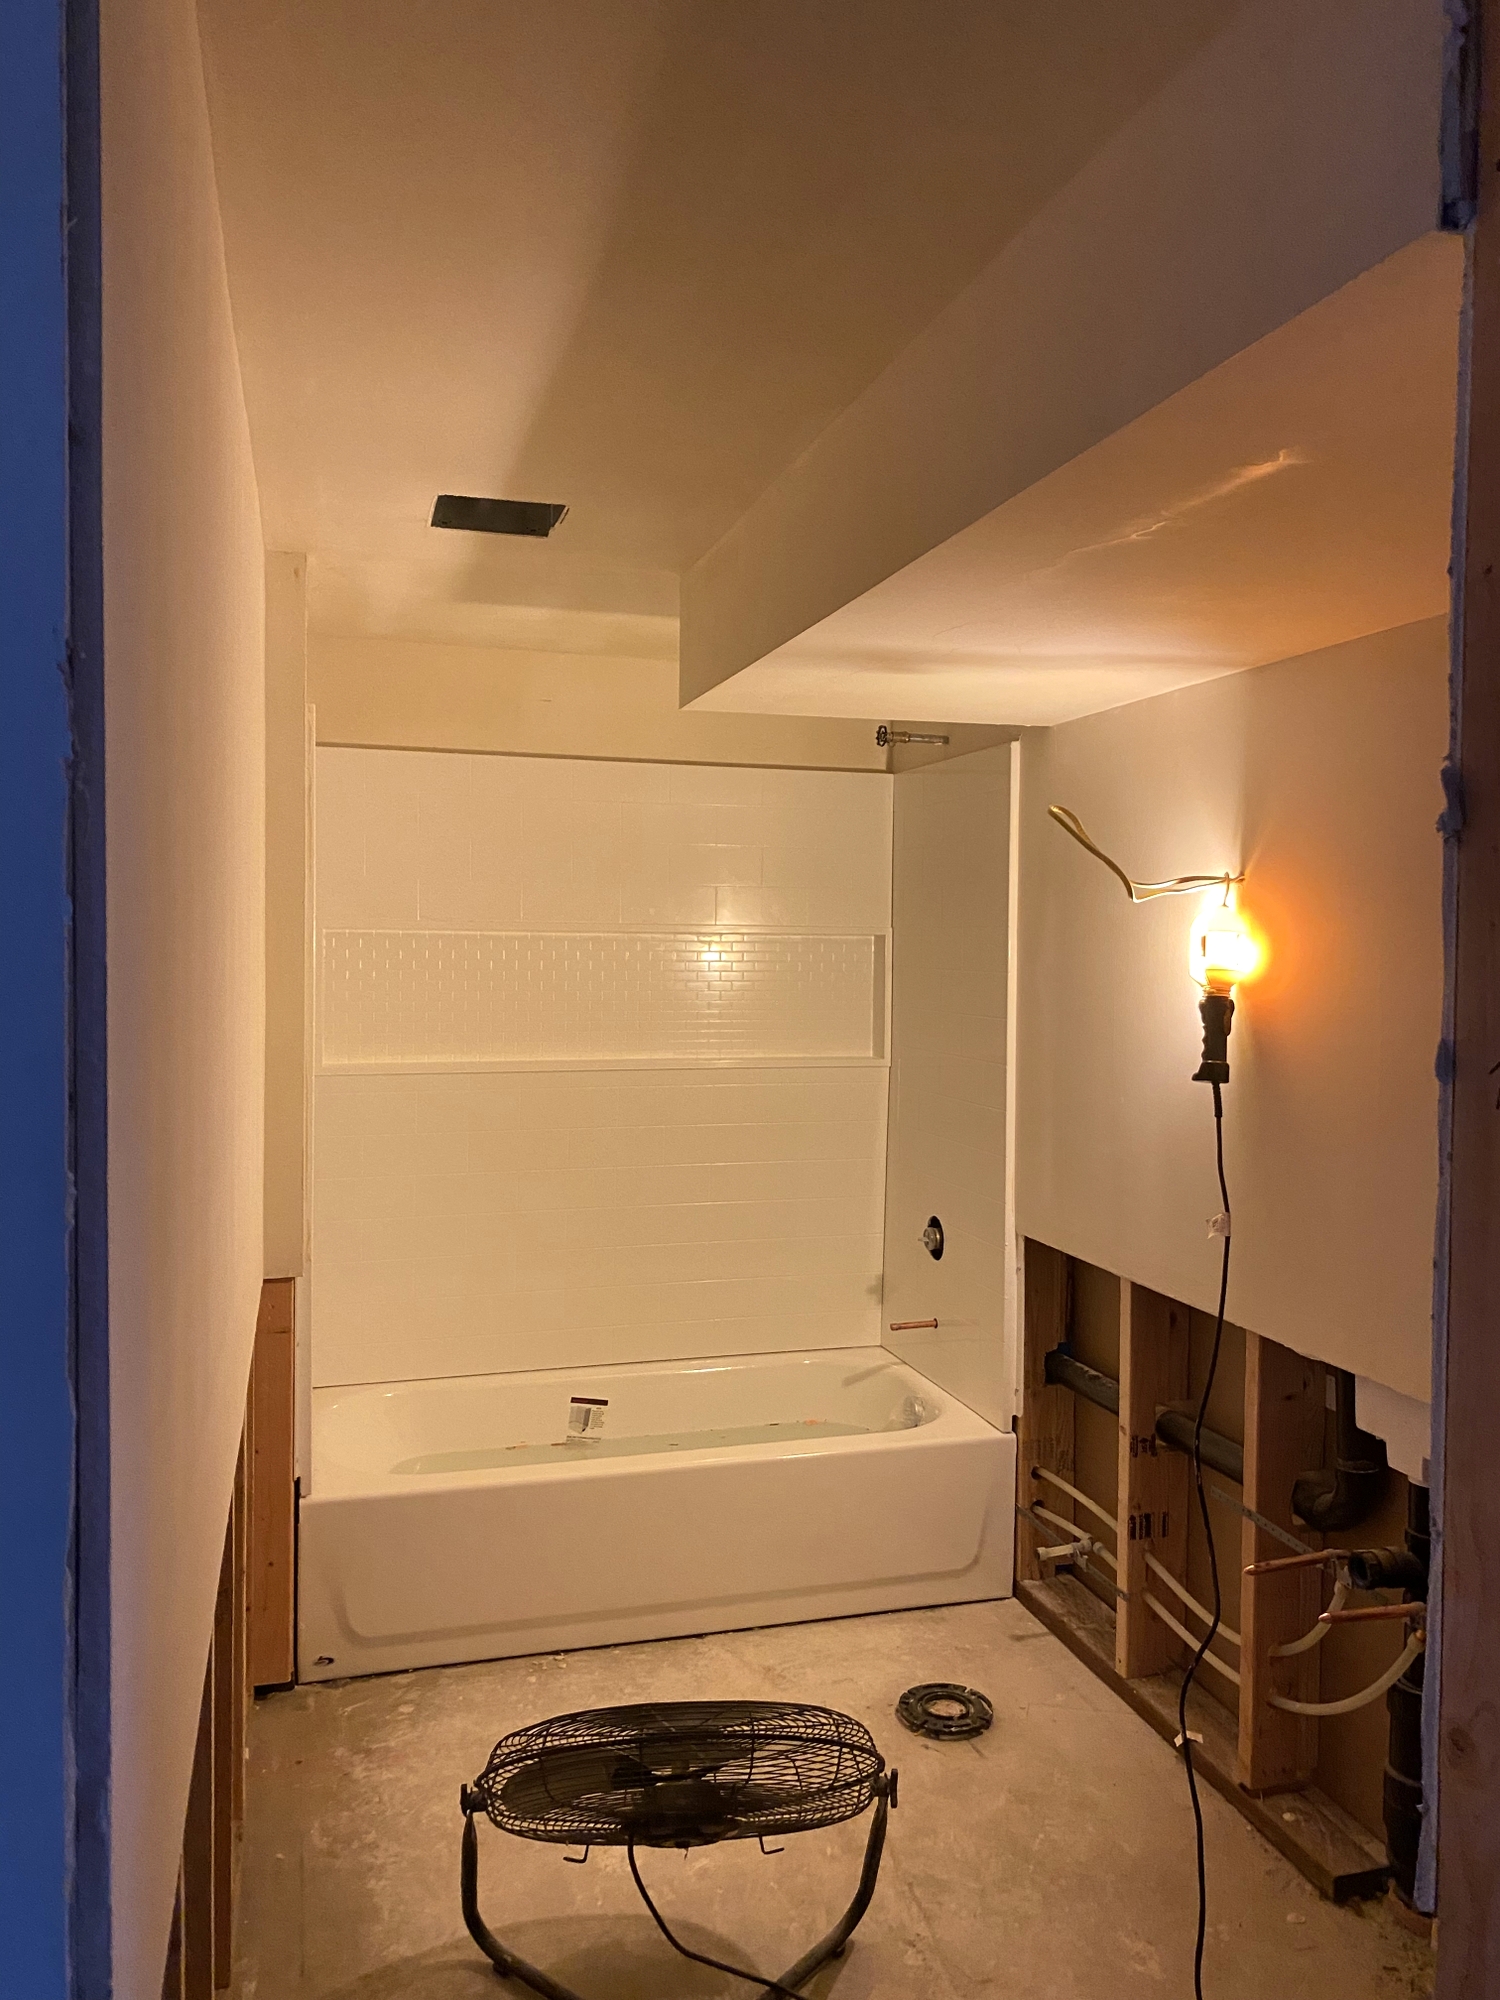
One Room Challenge Week 4! I didn’t have much of an update last week so I’ll catch you up on the past two weeks of progress. The bathtub is now installed and we have drywall up, though not finished, in the bathroom.
The drywall and the rest of the basement is completely done (and the very light/smooth texture is beautiful)! We had to wait for the initial plumbing and electrical inspections before drywalling the bathroom itself, but we’ve passed those now. I am taking today off work to get as far as I can painting the basement and getting ready to install some beadboard, and then once that’s done and the drywall is done over the weekend I’m hoping to paint and install beadboard in the bathroom!
Here’s the current status!
I’m also still making design decisions… leaning toward this look and colors. I have some wallpaper samples for the upper half of the walls; nothing is looking perfect but I think I can make one of them work… I am going for sort of a bold look with a dark keyboard on the bottom and a lighter wallpaper, that doesn’t necessarily have a lot of color the same as the beadboard. Like this inspiration.
Things are moving along in the basement bathroom (part of the 8-weekOne Room Challenge), and I got to do something I’ve never done before: decide on the placement of the electrical work!
Lighting, switches, and outlets, but the lighting was particularly exciting because in every other bathroom I've had I've had vanity lighting over the mirror, and now I get to put the lights on the sides of the mirror. Part of that is necessity because the ceiling is very low! But it’s really the best place for flattering, helpful lighting when using the mirror.
I had to do some math, diagramming, Google research, and actually laying it out to determine how high the sconces should go and how far away from the mirror. Thankfully I already had the sconces, mirror, and sink on site and was able to get pretty close with my research and then lay the sconces out next to the mirror on the floor to see that I needed to account for some room for the shades!
60" is pretty low for sconces, but we have a low ceiling. We decided on 62" up from the floor and 5" out from the mirror. That will put the sconces 28" apart, which is closer than what you see above a big vanity with a big mirror, but will actually be great lighting. I looked through my Pinterest bathroom pins for examples of sconces above pedestal sinks and quickly realized I don't need to worry about the relationship of the sconces to the sink width. It doesn't matter that they don't line up to the center or edge of the sconces or sink.
The electrician talked to me about where the switches, etc. would go and we decided on lighting locations, and then he got to wiring everything. You can see in this photo of the boxes are set, and there are wires to where the sconces will go (above the sink plumbing).
There will be an outlet to the right of the sink, and as you can see the switch is handy by the door frame. The door swings in and will open up toward the wall to the left.
Drywall goes up soon, and the tub will be installed soon, so it will start to look like a bathroom any day now.
Even though this phase is not all that beautiful, I am particularly enjoying it because I don’t have to do any of the work! I might not be as cheerful in a few weeks when I’ve been painting and installing bead board and tile. Ha!
You can follow along with hundreds of other 8-week room makeovers this One Room Challenge!
We are in the middle of our biggest house project yet, and it’s stressful and hard and expensive BUT! I get to design some really pretty rooms from scratch! We are renovating our 1,200 SF basement including adding a full bathroom. It’s also our first project not doing almost everything ourselves, so thankfully I have a contractor, drywaller, electrician, and plumber doing the heavy lifting and I’ll be doing DIYs like tiling the floor and painting. (And decor!) I’m still figuring it out but I’m excited to share these design ideas with you. And the before photos and floorplan of the space!
The One Room Challenge has wrapped up again! This is a bi-annual design event where over 8 weeks, 20 featured designers and hundreds of guest participants make over a room and document the process every week. I've participated 6 times! (See all my ORC posts here and all my room reveals here.) I did not have it in me to join in this fall, but it is so fun to watch all the projects going on and I love checking out all the reveals. There are so many good ones and so much hard work goes into them (see all the guest reveals here) but I put together a list of my all-time faves that are really exciting to me right now. Great trends, bold choices, real-life usable spaces... here they are!
This room is so dramatic! She added all the molding and chose that perfect rich blue to go with the brass/gold (I looove all the cool antique frames), and hey, that's the sofa version of this chair I also have. But it looks way more interesting in her house, against something other than white walls!
At the end of every One Room Challenge season it is easy for me to get overwhelmed by all the amazing transformations! There are almost 400 designers and guests participating this season. I like to go through and share my top top top, favorite favorite ones in a blog post that I can refer back to for inspiration!
I love seeing the mix of styles of different designers that participate. It gets me out of the standard looks that I see in the aesthetic that I follow on Instagram. I respect and enjoy learning from some of these rooms even though they are not but I would choose for my home!
This is an example of how traditional elements like wall treatment, wallpaper, and a natural rug can add so much and be so versatile. The room has vintage-ey pieces like the desk but still feels so fresh to me. You can follow @thecarneysbloom on Instagram here!
Wahoo!! Our office renovation is complete. I'm tired. It was a lot of work in a short time but I'm very happy with it!
New here?
If you're new to this blog from the ORC site, welcome!! I'm Suzannah, a longtime DIYer and design lover currently making over our 1937 Tudor revival style home, our second fixer-upper. My style is modern traditional and I'm always working toward high quality design.
I have a 3-year-old and 10-month-old, but my husband and I have done almost all of the work on our homes ourselves! I've blogged about all of it so you can check out my tutorials page and room reveals to see. You can also follow along with me and my projects on Instagram! I also co-host the Your Home Story podcast! See all my posts about this ORC here!
Honestly, this project was a head-scratcher! It's really hard to make a functional office look good, or to make a beautiful office really functional. The cords, the desk chair, the Zoom background demands... plus, ours also needs to be a play space for our 10-month-old while I'm working sometimes, and I record podcasts there! Our office situation had just gotten so bad after we moved our rooms around last summer and this room became a dumping ground as well as workspace. So I needed a kick in the pants to get this project done and make it something I'm proud of!
Welcome! This room is north-facing, so the medium-light green paint color looks blue in some lights. It's really pretty and is a big change from the white with dark wood of the rest of our living spaces! That fireplace is not functional and takes up a lot of wall space, but it's kind of cool. After, and before...
Everything is coming together! I’m so close to done with the office renovation and this week I’m highlighting the art I chose, and how I got it printed.
Thanks to Mpix for partnering with me on this One Room Challenge!
New here?
If you're new to this blog from the ORC site, welcome!! I'm Suzannah, a longtime DIYer and design lover currently making over our 1937 Tudor revival style home, our second fixer-upper. My style is modern traditional and I'm always working toward high quality design.
I have a 3-year-old and 9-month-old, but my husband and I have done almost all of the work on our homes ourselves! I've blogged about all of it so you can check out my tutorials page and room reveals to see. You can also follow along with me and my projects on Instagram! I also co-host the Your Home Story podcast! See all my posts about this ORC here!
I often leave art for the last minute with these room updates and I tried really hard not to do that this time. I knew I wanted an eclectic mix of vintage-ey pieces and gold and black frames, but how to put it all together??
I started thrift shopping for gold frames and got a good variety. Then it was just a matter of choosing the right public domain museum downloads for each frame and size! I’ve shared about art downloads before and I love getting them from the original source. A fellow home decor blogger, Katie from A Home is Announced, has put together an incredible resource on her site: the FREE print shop of public domain art! She has several collections with different themes and I had fun scrolling and finding the perfect pieces.
I mixed in a couple actual antique or vintage pieces (on the shelf--haven't hung them yet).
There are SO many talented designers and DIYers participating in the One Room Challenge this season and these days that I am excited to bring one of my more unique skills to it. With a couple decades of sewing experience (including some complicated garment sewing and a few upholstery and slipcover projects) under my belt, I am proud to be tackling a beautiful custom fabric slipcover for the high quality armchair in our office.
Thanks to Fashion Fabrics Club for partnering with me on this One Room Challenge!
The office is moving along! We got all the painting (except touch-ups) done in one long day after prepping the day before. It's looking so good. I'm really glad we decided to paint the trim. Pics below!
It's time to start putting things back, hooray! One thing I knew I wanted to upgrade in here was the switch plates. We have some original, some new throughout our house but the white plastic ones were just not going to cut it in here with this beautiful new color and tone-on-tone look! I'm replacing them with something appropriate for our 1937 Tudor revival house and sharing how to choose really nice hardware for a home with (or needing) character!
Thanks to Nostalgic Warehouse for partnering with me on this One Room Challenge!
Ohhh, this is a loaded topic. It goes way back to my childhood growing up in a restored 1909 foursquare house, but in short let's say I respect old houses and was (mostly) glad when we first walked through this 1937 Tudor revival home and I saw still had the original wood trim in almost every room. Well, sort of glad, sort of trapped because it wasn't exactly my style but I didn't want to paint it. It's made it this long and shows off the original character of the house! Plus I liked that it's the stained wood in every room except the bathrooms, kitchen, and one bedroom, so it doesn't feel piecemeal.
But. Let's talk about our office project. As you may remember from the before photos, this north-facing room has dark wood trim including three doors and a fireplace. It's super contrasty with the white paint (it was turquoise with a dark silver ceiling when we moved in so that's an improvement!) and the white (Sherwin-Williams Alabaster, like all the white paint in our house) looks much colder than it does elsewhere.
Let me show you the design direction I'm going and what I've decided about painting this trim or not!
New here?
If you're new to this blog from the ORC site, welcome!! I'm Suzannah, a longtime DIYer and design lover currently making over our 1937 Tudor revival style home, our second fixer-upper. My style is modern traditional and I'm always working toward high quality design.
I have a 3-year-old and 9-month-old, but my husband and I have done almost all of the work on our homes ourselves! I've blogged about all of it so you can check out my tutorials page and room reveals to see. You can also follow along with me and my projects on Instagram! I also co-host the Your Home Story podcast! See all my posts about this ORC here!
I'm really leaning toward painting our walls a light dusty aqua/sage/warm grey. Looking around at my pins, I found a couple other rooms in a similar color that--hey! had painted their trim, too. Some with fireplaces even!
Like I said in Week 1, I don't have this office design fully fleshed out, like I usually do before I start a room renovation. It's really showing, because we are literally two steps forward, one step back over here.
Despite how excited I was able a striped jute rug for this room, when I did my round-up of patterned jute rugs... once we got the one I chose down, I just knew it wasn't right. So I pivoted...
New here?
If you're new to this blog from the ORC site, welcome!! I'm Suzannah, a longtime DIYer and design lover currently making over our 1937 Tudor revival style home, our second fixer-upper. My style is modern traditional and I'm always working toward high quality design.
I have a 3-year-old and 9-month-old, but my husband and I have done almost all of the work on our homes ourselves! I've blogged about all of it so you can check out my tutorials page and room reveals to see. You can also follow along with me and my projects on Instagram! I also co-host the Your Home Story podcast! See all my posts about this ORC here!
A lot of the inspirations I shared in Week 1 have vintage rugs, and you know I loooove a vintage flat-ish Turkish rug. We initially went another way for softness/baby crawl-ability, but the vintage rug I just got for our upstairs hall is really not bad and I think will get softer as we walk on it.
So since I already had that one sitting around... I tried putting it in here!
I’m still designing our One Room Challenge office, but as many good that designers will tell you… start with the rug! The rug is the first thing I chose for the space and I am building the design around it. We actually had a couple debates about it: vintage rug or jute? Softness is important in this room because Lucy is often crawling around here while I work.
Neither vintage nor jute rugs are super soft… but I also have a goal of only bringing natural fiber rugs into our home. A lot of the inspiration offices I've been looking at lately have vintage rugs in them, but I recently recently purchased another one of those for upstairs, and I just want a bit more variety. Although, I have also recently added a couple of other patterned jute rugs to our home… but I love them! I am excited about creating a cohesive feel of vintage and earthy jute rugs throughout our home. Lauren Liess vibes.
I've always loved stripes and plaids, and I love the extra touch patterns add to a woven jute rug. I’ll share the one I chose for our room, but while I was at it I put together this round-up of really wonderful patterned jute rugs! Some of them are around $200 for an 8' x 10', although they can be more expensive. We’ve had several jute rugs in the past, mixed results, but we own two of the others in the round-up, and I am really happy with the quality.
New here?
If you're new to this blog from the ORC site, welcome!! I'm Suzannah, a longtime DIYer and design lover currently making over our 1937 Tudor revival style home, our second fixer-upper. My style is modern traditional and I'm always working toward high quality design.
I have a 3-year-old and 9-month-old, but my husband and I have done almost all of the work on our homes ourselves! I've blogged about all of it so you can check out my tutorials page and room reveals to see. You can also follow along with me and my projects on Instagram! I also co-host the Your Home Story podcast! See all my posts about this ORC here!
Stripes, plaid, checkerboard, and more... here are my faves! These are great on their own or you can layer another rug (maybe a smaller vintage one, like I did here) on top!
We have rug #3 in our bedroom, I love it so much. It's very densely woven but also flatter than some jute rugs I've had. It doesn't stretch or pull at all, or shed.
We have rug #8 in our dining room. That harlequin pattern is so cool! It comes in a couple other colors, all great.
And the one I chose for our office is... rug #2! We actually ordered it and tested it out for softness before deciding to keep it. We decided it is actually softer than the flat, worn down vintage rugs I like. Plus, I have learned Lucy will spit up on it no matter what it is so I may put a blanket down for her to crawl on regardless, ha.
I think changing the rug from the blue on that's in the office now will really help get the makeover rolling and help me decide on some other things!
Well… Here goes! I am excited and apprehensive to kick off this One Room Challenge project for our office! I love the One Room Challenge and have participated several times before, usually for pretty intense renovations (three bathrooms and two bedrooms, all of which you can find here). This one is more on the cosmetic side, but in some ways will be more challenging because of what I have to work with!
When I started working from home last year, we quickly got an office set up for me upstairs. That was great, but now that we have another baby we’ve moved our rooms around and that’s Otto's room. I am working downstairs in his old room, a north-facing room with one window and a bunch of mismatched, thrown-together decor. It is depressing and ugly, and messy. I haven’t been feeling super motivated to do anything with it because I just don’t know what to do that will make it look good! But I’m challenging myself to come up with some ideas, and I’m fueled by some really beautiful inspiration photos I’ve pulled lately.
Over the next 8 weeks I will transform this room, using high end design inspiration, budget friendly and vintage pieces, and I’m sure there will be some DIYs too!
New here?
If you're new to this blog from the ORC site, welcome!! I'm Suzannah, a longtime DIYer and design lover currently making over our 1937 Tudor revival style home, our second fixer-upper. My style is modern traditional and I'm always working toward high quality design.
I have a 3-year-old and 9-month-old, but my husband and I have done almost all of the work on our homes ourselves! I've blogged about all of it so you can check out my tutorials page and room reveals to see. You can also follow along with me and my projects on Instagram! I also co-host the Your Home Story podcast! See all my posts about this ORC here!
This year has been a rocky one and the One Room Challenge has responded. The spring event was delayed and extended due to COVID shutdowns and safety, and this fall the featured designers did digitally rendered designs instead of physical ones. And/but, there were still almost 400 guest participants!!
The One Room Challenge is not only a fun community event for designers and influencers, it's also a chance to go a little out of the box or comfort zone. I did that with our green half bathroom reno!! It's impossible to narrow down the rooms so here is a shot of the ones that I'm most drawn to with my current design leanings. If you want fresh ideas for a room renovation, check out all the guest designer reveals here and see which ones speak to you!
My favorite modern traditional room renovations
Here are a few that I really enjoyed watching! Mostly on the more traditional side as I'm leaning these days, but a mix!


.jpg)
.jpg)
.jpg)
.jpg)

.jpg)


.jpg)


.jpg)
.jpg)
.jpg)
.jpg)


.jpg)
.jpg)
.jpg)


