WELCOME

Hello! I'm Suzannah, a home design lover and mom of two, with one more on the way in January 2027. Follow along with my DIY fixer upper house renovations, design tips, occasional sewing and crafty projects, and de-stressing goals.

I show you how to create a beautiful home that still works with kids!

Subscribe to the blog below and join me on Substack here!
curtains
Showing posts with label curtains. Show all posts

9.22.2026

Calm playroom makeover and high impact window coverings

Oh, how I love a simple room makeover--I swear all this room needed was Roman shades and curtains, and a rug!

My friends just replaced their carpet with hardwoods to match their hallway, and now all their rooms have so much more potential. This room went from forgotten brown office to fun playroom right off the main parts of their home!

Simple Playroom Makeover

We made this room fun for kids, plus pretty for my friend.
No comments

8.06.2025

Bedroom updates, and affordable custom trimmed curtains

After many years of subpar window treatments in my bedroom… I finally cracked the code! I had been using slightly-too-short standard 84" Target curtains, pretty good blackout, but just the hidden tab top, because I knew they would be quiet for opening and closing while the kids were sleeping nearby. But I really wanted the elegant look of pinch pleat curtains on rings. Well, I figured it out!

The best window treatments for my primary bedroom

The solution: layered Roman shade and curtains. I got this beautiful woven Roman shade from Twopages, with a super thorough blackout lining, and I mounted it outside the window to block the light around the cracks and allow all the light I can through the window when the shade is open. This thing is so powerful, but all I need is the shade closed for a seriously effective blackout (and it’s silent when I open and close it).

No comments

4.09.2025

Fast, super functional custom bamboo and woven Roman shades

An overall goal I have for my home these days is using timeless, high-quality pieces. Since we’ve been here 6 years now and I’ve been decorating it pretty much the whole time--sometimes that means redoing something I did when I didn’t know any better. When we first moved in, I bought quite a few cheap Amazon Roman shades because they had the top-down option and they sort of looked like linen. For Otto's room I got a different model that was more blackout. Neither of these held up very well or looked very good. 

It was overwhelming to think about replacing them--there are several windows and I knew they were going to be lots of options to choose from now that there are so many affordable custom window treatment options--but I put the time in and I’m so happy with it!

Thank you to Neutral Curtains for sponsoring this post.


No comments

7.22.2021

How to shorten and recover a readymade Roman shade

After my huge success recovering a cheap blackout Roman shade for Lucy's room with some pretty block print fabric, I decided I need at least one more custom fabric shade! Our upstairs bathroom gets crazy sun in the afternoons and I knew I'd have to hang something pretty but also very functional there. (We renovated it last fall, and it's not a problem in the fall/winter.) The problem with my readymade blackout shade project? The cheap Roman shades only come in a couple lengths (like 60") and that window is short. 

You can hang a too-long shade on a window and just leave a bunch of extra at the bottom... but it's not ideal. I ordered the right width of this Roman shade (around $50) and figured there must be a way to shorten it. Well, there is, and I'm sharing how!

No comments

6.17.2020

How to order custom window blinds! Week 7 ORC guest room

Window coverings can be so hard! Aside from the curtains vs. shades vs. both decision, once you decide to go with blinds or shades, shopping for them can be really difficult. If you're looking somewhere like Amazon/Wayfair/Home Depot read-made, you won't have a lot of options for lengths or features. If you shop with a custom blind company that comes out and measures for you, you can spend a fortune! If you shop at an affordable custom online blind company, you can get exactly what you want at a reasonable price, but there are SO many options it can be really overwhelming. 

Well, I'm here to help. I've ordered custom blinds from several different companies and can walk you through the options and what to consider!

Also, it's week 7 of the One Room Challenge and this guest room is really coming together!
No comments

4.01.2020

Spring bedroom update! Linen sheets, striped rug, and more

We "finished" our bedroom in fall 2018 here--custom DIY slipcovered bed, window coverings, cool light fixture, matching nightstands and lamps, vintage-look rug... and then I did some rich textural wintery updates here. I love bedroom decor and am always excited for a seasonal update. I upped the quality of the pieces I brought in this time, too. And guess what, I am more in love with this room now than ever!!

Thanks to Magic Linen for providing our linen sheets and cotton blanket!

This update started with the bedding. I've been a white bedding person for YEARS but it's really not working out for me. No matter the quality or weave, white cotton sheets always yellow for us relatively quickly and I haven't found a way to refresh them well enough. So I 'm making a big change--natural-colored linen!! I love the soft beige and layering in different neutrals, plus they feel amazing!!
No comments

9.05.2019

Affordable blackout curtain DIY and how we keep our house cool in the summer!

I know this is the time of year when we all get excited for fall, but let’s face it, it is still summer over here! It's been in the 80s and 90s the past couple weeks, including a couple days at like 97 last week when we ran our air conditioning, something we really only do sporadically here in Oregon. Despire the facts that we have an old house, so the insulation is not the greatest in all spaces, and we have some huge east-facing windows that we love in the winter time but that can make it pretty warm in the summer.

This is actually our first home with air conditioning, and the home I grew up and didn’t have AC either. That means I have a lot of methods and tips for keeping a house cool! We try to save energy and only run ours when it’s really, really hot and doesn’t cool down overnight.

One key piece of this puzzle especially in our current home with large windows is blackout curtains! I finally ordered some and hemmed them and they are a great budget-friendly option! I’ll share that DIY, plus our methods for keeping our house cool, in this post!
No comments

2.07.2019

Budget-friendly alternatives to custom window shades

Window coverings can be so tricky and you can spend a LOT of money (and time!) figuring them out. Curtains, curtain rods or clips, where to hang them, when to use blinds or shades instead of curtains or in addition... so much to think about!

I had no idea what I was doing when I chose blinds and a shade for our first house, so I ordered them custom and it was a good experience since I only had two.

At our next house, I wanted all matching bamboo shades. I ordered them custom which worked out fine, and I was glad it avoided the pooling of too-long shades.

For our current house... I didn't know what type of shades I'd want on allllll the windows at once. I couldn't deal with a $1,500+ blinds order for the whole house, all custom. Also, I really wanted features like top-down and cordless--once you start adding those on to some custom products, it adds $30-50 per blind.

I find that slatted or cellular blinds often look dated or apartment-ey, and roller shades can be fine for bathrooms and kitchens, but I wanted something a little dressier in our living room and bedrooms--especially because I'm not planning to hang curtains on top of two in our living room.

I also wanted inside mount--because we have big, elegant trim and big windows. (Outside mount is appropriate if you don't want to block ANY light when the blinds are open, or if you don't have adequate room within the trim for the brackets. But I prefer inside mount whenever possible to show off the trim!)

Non-custom linen look Roman shades


So I did a bunch of online shopping and research. There are lots of Roman shades you can find online (I wanted a linen look Roman shade), but once you narrow it down to top-down and cordless, the options narrow and actually can be pretty expensive--like $100 per window.

I searched and searched, and...THIS linen roman shade was exactly what I needed. It comes in natural or white color linen-look, it's lined with a white thermal backing, it's cordless, it does the top-down feature (great for when you're close to a street or neighbors)... and it's $60!

No comments

8.17.2017

Finally, a simple, sleek ceiling mount curtain rod

We have a pop-out in the front of our living room with a big window that fills the whole wall. It's very visible from the street and I puzzled for a while over what to cover the window with! We did add bamboo blinds on the lower portion, but I'm a blinds + curtains kind of girl. But it turns out it's really, really hard to find easy-to-install-and-use-with regular-curtains rods that mount on the ceiling rather than the wall or window molding.

Also, it's shocking when I can't find what I need on Amazon, but I had to go outside the Amazon box for this order! I'll share what I found with you, and some other options.

No comments

2.03.2017

The eeeeeasiest curtain rods (that are elegant and affordable, too!)

Are you a curtain person or a blinds person? Or a blinds-with-curtains-on-top person? I have always been a curtains-only person, but in the new house, we have some huge windows and some closer neighbors--so I've opted for both!

Getting blinds and curtains up was essential to making our house feel livable. I put curtains up as soon as I could! I ordered all one type of curtain rod, a black "room-darkening" model, and they were SO easy to install and so affordable, and they look and function so well, I just have to share!

When you start looking for details in designs you like, you start to notice patterns. Most of the rooms I've been inspired by, when they have curtains, have black curtain rods with small or no end finials. I found this modern curtain rod that had the simple lines I was looking for, but it was out of our budget. Other than that I really couldn't find traditional curtain rods I liked online!

Until I stumbled upon this one. It's marketed as a "room-darkening" style, and while that's a quality I appreciate in our bedroom for maximizing sleep quality, it wasn't what I thought I was looking for. But turns out the finial-less curtain rod look is modern and sleek, and provides extra privacy and ease of use (no rods sliding around in the brackets).

Here are some of my inspirations, plus what I ended up with!
Source 1/source 2/source 3

I seriously ordered 8 of these and used them on most of our windows, even though I don't have all of the rooms designed yet. For about $20 each, I figured I would like them enough for a while and if I want to change later, no problem. But what I didn't realize was that they would be SO easy and look SO good!

Here's why they are so great. What are the worst things about installing curtain rods?

  1. Getting both screw holes on all three brackets marked and level
  2. Using drywall screws for all six holes--you know they will pull out after a couple years of use and you will be left with large holes in your drywall and you'll have to buy bigger drywall screws and bigger screws and keep messing with them forever.
    1. Or you have to install the curtain rods on studs which limits you to right on the edge of the window (so the curtains when open will still block light) or 12-18" outside (will the curtain rod be long enough for that??)

These curtain rods eliminate both of those problems. First, each bracket only has one hole. All you have to do is measure equidistant from the ceiling in two locations, then hang the rod and mark the holes for the center bracket. SO. EASY.

Two, we have low-ish ceilings and installed all of the rods right at the ceiling line, which you can do on these because you pull the rod straight out rather than up and there's no finial to bump the ceiling as you pull up! So, we were able to install the brackets right at the ceiling joist so no matter where we installed them (distance out from the window), we drilled right through to wood. No more drywall screw disasters! Such a good feeling!!

I think they're best when hung with curtain clips (I ordered a couple packs of these to match), but my curtain-hanging has been pretty haphazard so far and I hung these through the tabs since they were about the right length. Soon I'll get the sewing machine set up and hem them shorter so I can use clips here, too.

I also installed two of them touching each other over the large family room window which is very close to the sliding glass door. It's always a bit of a head scratcher on what to put over sliding doors, right? We removed some ancient, filthy, broken vertical blinds on our slider when we moved in so I was not interested in replacing them with more blinds any time soon! Installing two of these rods and matching white IKEA curtains next to each other almost makes it look like we have a wall of windows.

(Forgive that disgusting fence in the background--this is a fixer upper, after all.)

Before we hung these I was dreading hanging 8 curtain rods and figuring out heights and leveling and blah, blah, blah. But these curtain rods (plus my blanket decision to hang all of them at the ceiling height, spaced out so that the curtains when open don't block the windows) made it so fast and easy. Also, don't the curtain rings look classy on these rods??

If you need to upgrade your window treatment situation and want an easy, modern, affordable solution, I highly recommend checking these out! Shop the exact rod and rings I bought here!


No comments

3.17.2015

How to hem IKEA curtains! Essential tutorial

This is a super useful tutorial! I'm excited to share it, and proud of myself for nailing down my method and using it on a pair of curtains last weekend!

Curtains can be such a pain to get right. Store-bought panels can be really expensive, but so are the yards and yards of fabric you need to make them at home--and then you have to do the work of laying the fabric out on the floor and putting them together! I've done it before and created some really nice lined curtains, but it is quite a lot of work. And if you change your mind about decor as much as I do... it doesn't always make sense. (If you do want to make some simple ones, check out my easy curtain method tutorial here for measurements on ideal hems and top edges.) 

I made these lovely pale lined curtains for our living room, and I love them. I also made the faux double rod and sheer curtains for our dining room, but I wanted more neutral curtains on top of the sheers and I wound up spotting these super long IKEA linen curtains at Goodwill.

Target makes some very cute curtains but they're all 84" long, which is too short for my windows (I put the rods near the ceiling since we don't have window frames). But IKEA's curtains are typically 98" long (also too short for my dining and living room but long enough for the bedrooms), and they make a few styles in 118" long. That's what I needed.

As you may know, IKEA's curtains come un-hemmed. The raw edge is finished with the serger, and you can cut off and/or hem as needed to the right length. They sell no-sew iron-on hem tape, but I've never had much luck with that stuff and I know a seam will be more durable in the long run. What's probably a cost saver for IKEA is also a benefit to us, in that we can have custom length curtains--but the problem is, you do have to knuckle down and do the work some Saturday afternoon.

I confess, after I took these new curtains home they hung way too long, scrunched up by the pullbacks, for several weeks. We've all been there, right? But last weekend I sucked it up and did the work to measure, press, and sew the hems into them, and put together this tutorial for you so you can do the same!

How to Hem IKEA (or any) Curtains!


You will need:


  • Unhemmed IKEA curtains (or any brand, or homemade!)
  • Metal tape measure
  • Standard sewing supplies
  • Recommended: big quilting ruler and fabric pen

Instructions:


1. Prewash curtains. If they're a natural fiber and will shrink in length with washing and drying.

2. Iron or steam curtains. Actually, you should do this step whether you're hemming them or not. So often I see people hanging curtains or shower curtains with the rectangular folds from the package still on them. Why do people do that?? They won't flatten out much, really... take the time to iron or steam them. *Rant over.*

3. Hang curtains and measure to just above the floor. It would be nice if you could start at the bottom edge of the curtain and measure up a few inches, but IKEA curtains are not consistent lengths. You need to start at the top edge of the curtain and measure down. Have someone help hold the tape measure in place if you need. Don't pull on the fabric as you measure--you could end up stretching the fabric more than its own gravity will, and your curtains will end up too short.

As to the perfect length, that's up to you--these are on our dining room sliding doors, so I didn't want them dragging at all. Generally 1/2" to 1" above the floor is safe. On mine, this was 105".

Measure this length on the left and right sides of each curtain panel, and in the centers. If your curtain rod is hung straight and your tension is the same with each measurement, you should get the same length (i.e. 105") on all three spots on each panel.

4. Take curtains down, fold, compare. Here are my two panels folded lengthwise in quarters and lined up perfectly at the top edge. As you can see, one is more than 1" longer than the other, and my pins didn't line up perfectly.

I split the difference between my supposedly-all-105" measurements and rearranged so the pins were in the same place.

5. Connect the pins. Using a big quilting ruler or other straightedge, use more pins or a fabric pen to form a straight line from one edge pin to the center pin. Repeat to reach the other side and on both panels.

Ideally this would follow the grain, but again, IKEA curtains... not necessarily cut perfectly straight.

6. Iron bottom edge. Fold the curtain along the fabric pen or pin line.

7. Turn under raw/serged edge and measure hem. As you can see, with these very long curtains, I had a lot of extra fabric. If you had to buy 118" long ones and your windows were only 85" or 90", you'd have too much excess and I recommend cutting or tearing to leave enough room for a 4"-6" hem. On mine, however, I was able to turn under the raw edge to allow a 7" deep hem all the way across both panels.

(7" is probably the deepest you'd want a curtain hem, just for looks and weight--depending on how heavy the fabric is.)

8. Pin in place.

9. Sew hem. At the machine, sew the hem in place, 1/4" or less from the edge.

10. Hang proudly! Pat yourself on the back! You finally got that checked off the to-do list!

That wasn't so bad, right?? I think I sometimes hesitate because I want things to be perfect. I want both panels to be exactly the same lengths with the same hem depth and turn-under. That may not be possible unless you cut the edges before ironing... but, with this method you can get pretty darn close!

5 comments

1.30.2013

Two pairs of DIY curtains for my dining room, plus a DIY double curtain rod

Curtains are such a pain, aren’t they? Not only are they expensive and a big color commitment for the room, they often don't come in the right size!! We wanted to hang the curtain rods as high and as wide as looked good, to make the room look bigger, so you'll remember I made the living room curtains custom (7 yards fabric, 7 yards lining--eesh!). The dining room ones are the same length, 107" or so, and while some curtains come in 108" lengths, they tend to be, like, $60/panel. Or only come in a few colors. Bleh. Target's curtains are sooo cute, but pretty much only come in 84" lengths! What do they expect me to do with those?!

I've been hunting Goodwills for ages for long enough curtains for the dining room, and never finding. So a while ago I found some 96" tan Ikea ones for $10. I figured, closer than some of what I've been finding. I can give them a colorblock hem treatment, right??

I didn't like how the tan looked, so we dyed them with two boxes of grey RIT dye. Then on to this problem:

So, then I just needed to find the right fabric for the hem trim. I didn't expect to find something perfect, but wasn't sure what color and texture to go for. I also thought about inserting a contrast trim band somewhere in the middle or near the bottom, to give them sort of a stripe and make them longer. But, then not long ago I found some neat teal cotton twill on the JoAnn clearance shelves, an extra half off, and bought the rest of the bolt. I made colorblock hem facings, I guess you could say, as long as I could do with the length of the fabric. It was a little wider than the curtains so I tore the extra off and still have it, maybe for something else.
DIY colorblock curtains-011
They don't look FAB, but they're fine for now. I think I made them a little too short, and the teal isn't as bright or interesting as I was hoping. But better than too short!

So, another problem... unfortunately, most curtains and even fabric only come as wide as 55" or so... I think the rule of thumb is you want curtains to be about 1.5x the width of the window for nice pleating, so if you have two 55" panels, that means your window could only be 73" wide. Mine are waaay wider, and I put the curtain rods an extra several inches out to make the windows look nicer and bigger! So pretty much any curtains (two panels) will be too narrow!)

So I decided the grey curtains need to be more faux curtains, and sheers will let in more light, anyway. I had a pair of old white ones on a tension rod filling the space in the meantime, but wanted loooong sheers that went the whole length of the grey curtains and the wall.

DIY colorblock curtains-023
Then, of course, my other issue was the sheers-- ideally I would use a double curtain rod, but I already had the nice brushed chrome-ey one up... so, I bought a super cheap curved-end white, boring curtain rod from JoAnn and spray-painted it silver, because I couldn't stand to have the cheap white metal showing at all.

Now we can leave the sheers closed all the time for privacy, but still get lots of light in, and keep the grey ones pretty open to the sides.
DIY sheer curtains-002
So I was so excited by how my DIY double rod worked out that I bought another cheapie one at JoAnn... even took a picture of the label of the first one so I could remember which kind it was! I now see they have a bunch on Amazon for way cheaper than the JoAnn ones, of course, with lots of choices. I think the key on this one was the shallow depth--it only "projects" 1 1/4", way shallower than the big curtain rod for the outer curtains, so it tucks behind nicely.

I gave it the same silver spray paint treatment, and hung it in our bedroom in the same placement. I had just bought some Ikea sheers to replace some plain white ones I had on a tension rod just for privacy and light, so this is a big improvement. Close-up on the double rod situation!

Curtains can be so expensive and challenging, so it's a big relief to have these done. At least for now. ;)

18 comments

10.29.2012

House projects--recent easy home dec sewing projects

We've been doing a lot of projects for the new house, and of course that includes some sewing!! You may have noticed some of these pieces in other house-related posts, but here are the juicy details. ;)

Living room curtains. It's so hard to decide on colors and styles for curtains in a room with no predetermined color... and before I painted the painting above the couch, this room pretty much only had grey, white, and gold in it! But you've gotta start somewhere, and early on during one of my extensive JoAnn clearance rack trips (when they give an extra 50% off!) I picked up this pretty shell pink poly crepe, very drapey and pretty, and bought what was left of the bolt--7 yards, about. Which was exactly what I needed for my living room curtains, which are about 108 long since we wanted the curtain rod at the ceiling and nice and wide. I thought about putting these elsewhere or making... something else... out of them, but really, what better use for 7 yards of fabric?!

I also bought 7 yards of curtain lining, the Roc-lon® stuff in 100% cotton and white. It was a pain to cut these out and pin them together, had to use the whole living room hallway floor!

OMG, windows are hard to take pictures of. Here they are with the icky overhead light at night, but at least they're not backlit. Here you can see them a little better. For now they're attached with curtain clips, but I'd like to switch to something more formal (sewn-in rings?) sometime.

Now the big question is what to put over the dining room sliding glass door, which is opposite this window across the whole first floor. If they were neutrals, I'd say I should do matching on both, but since they're pink... I won't ask my husband if we can do MORE pink curtains! ;)

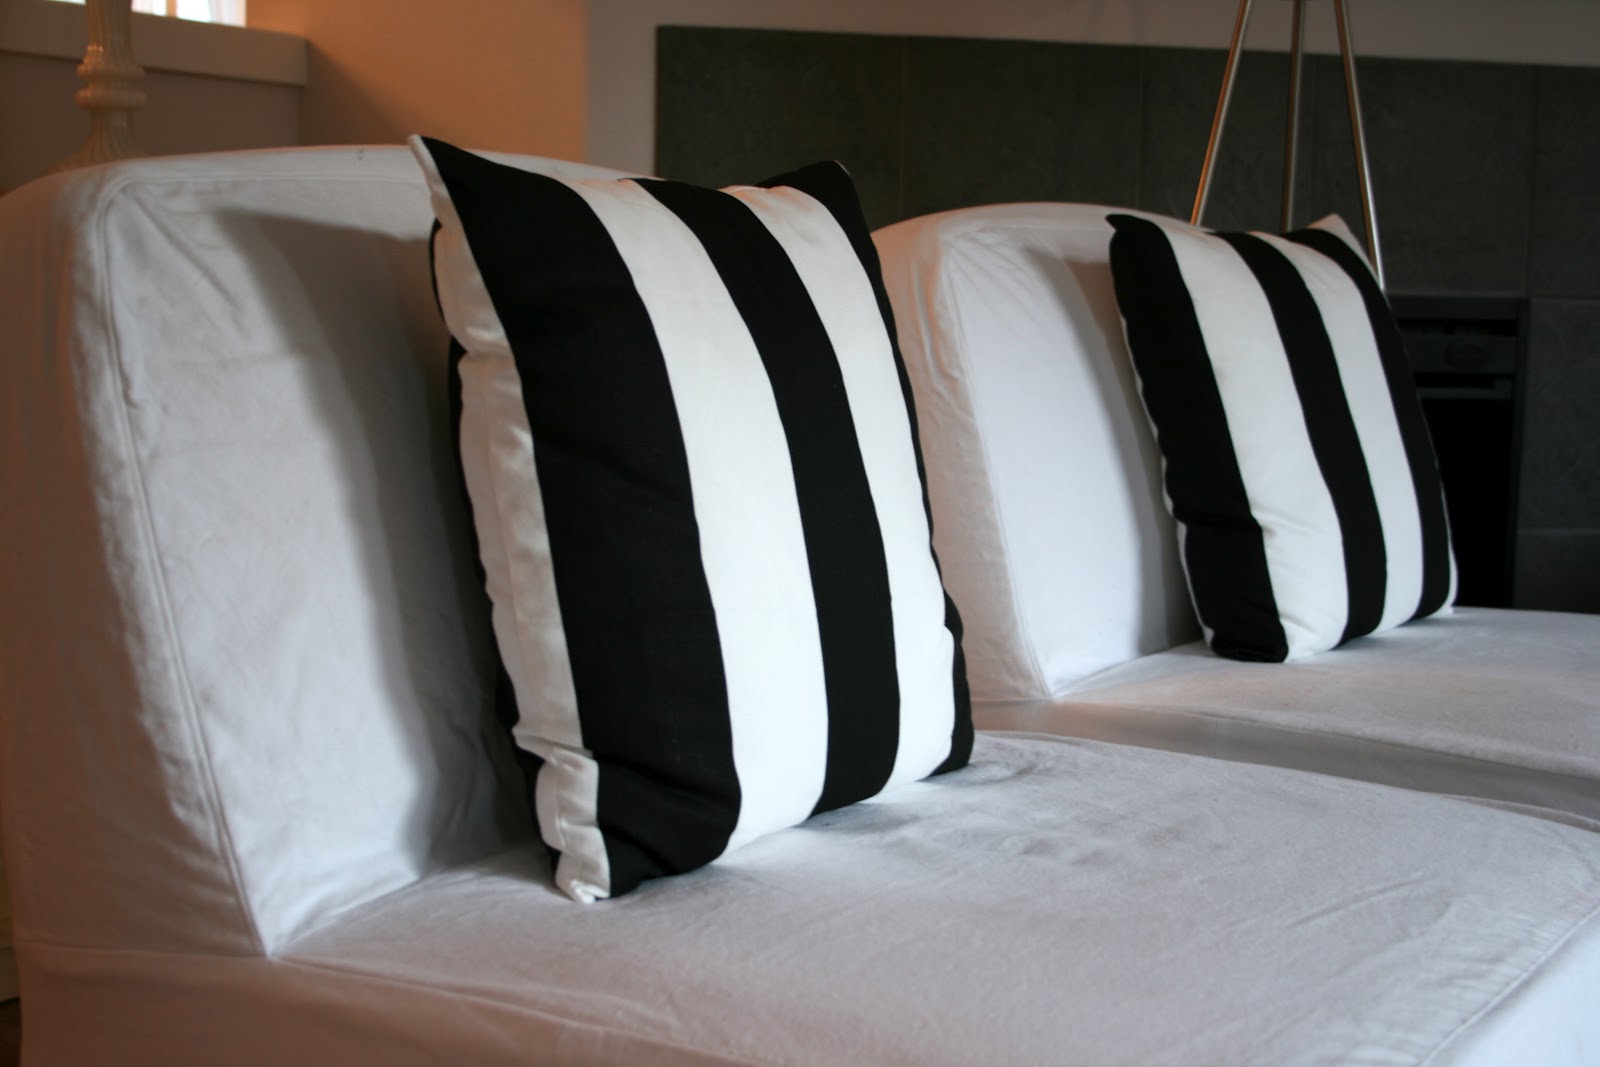
Striped pillows. More living room sewing. I've planned to make black and white striped pillows out of the leftover Premier Prints fabric from this jacket project. Didn't have a whole ton left, but all you need is a little pattern, right? So I made them for these small pillows. Currently they're sitting on these still-to-be-recovered side chairs...

...but I think they're pretty versatile. I also tried them on the couch under my DIY ikat-ey zigzag canvas, to pick up on the black. I also tried them on our bed once! I do love black and white stripes. The funny thing is, when I made them I thought it would be cool to have them be the reverse of each other, like one black-white and the other white-black, but now I think it looks weird. Oh, well, haha!

Pink patterned pillows. Speaking of the master bedroom... I showed you the DIY tufted headboard in the tutorial, but here's the latest on the pillows. The fabric for these was also at JoAnn on half-off the clearance, so a great price, and I looove the classic fabric pattern, can't remember the name of what it's knocking off right now.

The bedroom is still far from done, but the pillows help give me a little direction. Now we seriously need a nice throw at the foot of the bed, and maybe a repeat of the color or preppiness of the pattern somewhere... and of course, maybe some art above the bed! Aack! I haven't done much in the bedroom yet! Any great decor ideas, feel free to share!

So that's a few of the sewing projects I've done for the house so far. Plenty more to share, and more to do!
11 comments

4.27.2011

My easy curtain method tutorial

Yes, easy.  There are probably tons of tutorials out there for curtains, since they are about the easiest thing you can make aside from like napkins or something, but here's another one!  I got a couple requests after I posted about my recent simple and transformational curtain project.

I went in to Anthropologie a while ago and decided to remake my living room, which since we moved in not long ago doesn't really have an identity.  I even bought new fabric just for some creative pillows and home dec ideas inspired by Anthro.  I had a couple of hippie wall hangings from long ago, and I hung them up on the big window since I hate bare windows without curtains.  But they blocked too much light, didn't match each other, and didn't help my decor at all.  Bleh.  So here's the before:
Aaaah so ugly!  And dark.

So I wanted to make some new ones.  In keeping with the Anthro-ey theme, I went to their site for inspiration...
 
Pretty.

I thought, so many of those are just printed!  I can do that!  I have cool stencils and such!  What if I started with a plain curtain and stenciled or embelished the design I wanted?

I bought six yards of white 45" wide quilter's cotton at JoAnn on super sale.  I wanted something a little nicer than muslin.  That's really all you need, plus a curtain rod.  I only needed five yards for my floor-length curtains, but there's nothing wrong with having some extra white cotton around!  Anyway...

Ideally you would stencil your fabric before you sew it, so that it's flat/smooth all the way and also so that if your stencil overlaps with the edges, the pattern wraps around the edge.  But I was really anxious to get something else up on that window and don't know exactly what pattern I want yet, so I did it the wrong way and sewed them first!

The tutorial:
  •  Measure what the finished length should be.  It's hard to tell but my tape measure is going up as high as the top of the curtain rod itself.
  • For me, floor-to-top of rod was 84".  (Interesting note: I've heard from interior designers that there are only three acceptable lengths for curtains: falling to the bottom of the window glass, falling to the bottom of the window molding, or falling all the way to the floor).
  • Decide how wide a hem you want and how big a casing.  Make sure your casing is wide enough to fit the curtain rod through it!  Add .5" to both measurements for turn-under.  My top casing will be 2" and my hem will be 2.5".  Add the seam allowance, and add together to get the final measurement for your fabric.
  • I always like to start with a very straight edge--when sewing on rectangles I like to be exact.  With most woven fabrics, the best way to make sure is by tearing.  Snip near the cut edge of the fabric and tear, losing often up to an inch or so on one side due to unevenness.  If your fabric doesn't tear, then cut carefully while following a thread along the width of the fabric.  You don't want lopsided curtains!
  • Measure your fabric to the length you just calculated and snip.  Tear!  Make the two panels both exactly the same length.
  • About the width of the curtains: most people want a curtain to be is 1.5 times as big as the window--e.g. for a 60" wide window, you'd have a cumulative 90" width of curtains.  But it's perfectly okay if they're a little bigger or a little smaller.  And, for a big window, the easiest thing to do is use the entire width of the fabric (42"-60", depending) and just hem the selveges.  On a finished selvage edge, you only have to turn the fabric under once--there will be no raw edges!
  • Start by carefully pressing the long (up-and-down) edges.  I'm pressing mine with a 1/2" hem, just enough to cover all the perforations above the edge.  All fabrics have different selvages, though.
  • Sew along your pressed edges.  You can pin them if you need to, but for my simple cotton I didn't bother.
  • Now that you've got all four (two on each) long sides turned under, we'll create the casings and hem.  These do need to be turned under twice so you don't have a raw edge on the inside and a chance of seams pulling out. 
  • I recommend using a hem gauge to make sure you're even all the way across!  This is my 2" wide top casing; I'm turning under the top by .5".  On this one, I recommend pinning carefully.
  • Sew along your pinned casing, keeping a consistent and straight seam allowance.
  • Do the same with your hem.  Press, pin, sew.
  • Hang your curtains!

Yes, they are very plain.  Like I said I had planned to Anthro-tize them, and still will, with some sort of stencil or other embelishment.  But for now I just wanted to get something up on the window!  Now to brainstorm stencil colors as I decorate the rest of the room... I may even make a stencil!

20 comments

SUBSCRIBE BY EMAIL

Get new posts by email:

Search

​
© Create / Enjoy • Theme by Maira G.