WELCOME

Hello! I'm Suzannah, a home design lover and mom of two, with one more on the way in January 2027. Follow along with my DIY fixer upper house renovations, design tips, occasional sewing and crafty projects, and de-stressing goals.

I show you how to create a beautiful home that still works with kids!

Subscribe to the blog below and join me on Substack here!
DIY gift
Showing posts with label DIY gift. Show all posts

12.07.2016

DIY gifts that are actually useful (DIY gift guide!)

Search "DIY holiday gifts" and you'll likely find a lot of options for hot chocolate in a jar, possibly even with pipe cleaner reindeer antlers and a red pompom nose. Another common DIY gift tutorial is the personalized coffee mug using Sharpie or other semi-permanent tool, but trust me, those do not hold up to many washings!!

I'm a pretty practical person, even around the holidays, and I don't love making, giving, or receiving cutesy gifts that aren't useful and I don't have a place to store or use. So over the years I've made a few really wonderful things that I like for myself and gift recipients, and that I think are useful to have as well as fun to receive!! My all-time favorites are my heat-up rice bag and flannel cases, which I've made for my mom, mother-in-law, and others, and my delicates travel bag sorter with cute labels for "wash" and "wear." 

But, I rounded up 10 DIY holiday gift ideas from around the blogosphere including a few others of mine and some I'd like to try!! (See all my DIY gift projects and tutorials here.) DIY gifts are more personal and special than storebought, and you can make them with friends on a cozy afternoon in December. Much less stressful than shopping at the mall.


10 DIY gifts that are actually useful


1. Pie potholder (or any custom shape you want! I love the idea of personal potholders this year.)

2. Pretty DIY serving tray from a cutting board. Brilliant!

3. Flavored infused olive oil  (& labels). Use a high quality olive oil and some pretty bottles, and print these free labels!

4. Pretty pearl string knot necklace. I am so proud of this one!

5. Essential oil epsom bath salts for sore muscles. Smells sooooo good and is great for an active person! I made some for my dad last year when he was doing a lot of construction on their rental unit.

6. Heat-up rice bag and flannel case. The classic. I have two for myself of different rice densities and they are so great for sore neck, low back, whatever or just for warming up!

7. Shibori tie-dye napkins. Looks a little tricky but so pretty and trendy, and would be so much more meaningful homemade!

8. Essential oil holiday room spray (& labels). These sound so delicious-smelling and are so cute!

9. Spiced soap for men. I would loooove to make soap, and it's hard to think of DIY gifts for men! Check and check!

10. Wash/wear delicates travel bag. I made this for one of my oldest friends for her bachelorette party and she brought it on her honeymoon. I made one for myself, too, and it's so handy traveling! The sewing part is easy and I made the cute labels and text with my Silhouette Cameo machine.

And a bonus--what better way to introduce your DIY gift than with these adorable free printable homemade gift tags!!

What are you favorite DIY gifts to receive, and go-tos that you like to make??


No comments

1.04.2016

A very pretty DIY! Pearl bead square knot necklace tutorial

Out of the blue, I got inspired for a jewelry project! I saw a necklace like this in a magazine photo and thought, 1, that's very pretty! and 2, I could totally make that and it's a shame I almost never do jewelry projects. I love the classic pearl look, preppy knot style, and more modern multi-strand composition!

If you want a very pretty project to work on some quiet winter day, try this necklace! And make a couple while you're at it since they'd be great gifts!!!

(I made mine over the holiday break while watching several ancient Friends episodes. It was a nice afternoon. ;) )

Very rarely do I pull out my jewelry-making supplies and so I don't have good stores of most of them on-hand. It took me two shopping trips to get the supplies I needed for this necklace! I should have just ordered them online.

DIY Pearl bead knot necklace tutorial


You will need:


Instructions:


1. String 1/4 of the beads onto the jewelry wire. Using crimp beads to secure, loop and seal both ends onto the loop side of the clasp.

Repeat with another 1/4 of the beads.
 

2. String other half of beads onto two other pieces of wire, securing only one side onto the peg end of the clasp. Secure other ends of bead strands with tape.

3. Braid bead strands into square knot shape before securing taped ends with crimp beads on peg end of clasp.

Wear proudly!

The finished necklace is about 17.5" long.

I just love it!!

No comments

12.15.2015

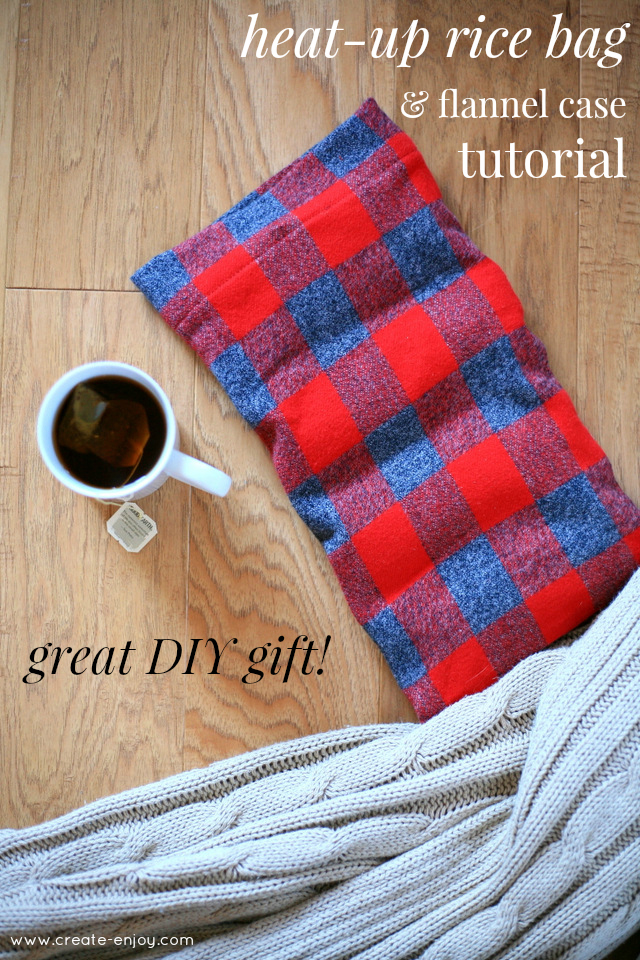
Easy heat-up rice bag and flannel case tutorial! Great DIY gift

This is one of the oldest DIY projects I've been doing because it's so practical and obvious. I've made several of them to give as gifts and for ourselves, and they do wear out (or burn) over time, so this time when I made us another one I took photos and wrote up these instructions so you can make one too!

When I was little my mom ordered a microwaveable barley-filled fabric pillow ("the barley bag") from some specialty catalog--for treating sore muscles, warming the end of the bed, etc. We loved it! We would microwave it for 2-3 minutes and use it sometimes just for comfort in the winter. Later we got one filled with rice, which was good because it had more weight to it so it would balance on your shoulders or neck.

Then I figured out how to make my own, to the exact size and specifications I needed! Plus I make these nice flannel pillowcases for them--cozy and washable so the bags stay nice longer.

They are an EXCELLENT holiday gift (one year I made them for several people, each with custom flannel cases for their style/colors) and so useful to have around the house! Here's an easy tutorial!


DIY Heat-Up Rice Bag & Case Tutorial


You Will Need:


  • 1/4 yard cotton canvas (doesn't have to be pre-washed)
  • 1/4 yard cotton flannel (pre-washed)
  • 1 package extra wide double fold bias tape (ideally matching the canvas--I didn't have any natural color! Oops!)
  • About 2 lbs rice

Instructions:


1. Cut out the bag and pillowcase. You can make them any size you want, but keep in mind you'll be using 1/2" seam allowances on three sides and covering the seam allowance on the top edge, so it'll be part of the finished size. For a neck wrapper bag, you may want a longer, narrower bag and pillowcase; for one to put on your belly or low back, maybe a more square rectangle. I recommend making the flannel case about 1/2" larger than the rice bag at finished size.

I cut my canvas piece 15"x8" and my flannel 18"x9".

2. Sew the short seams and bottom long seam of the rice bag, right sides together. Use a 1/2" seam allowance.

Trim corners and press seams open, then flip right sides out and press flat.

3. Measure and mark to divide the bag into four channels. (If you used my dimensions, yours will be 3.5" wide.)

Pin the front and back of the bag together to keep it flat.

4. Sew the channels closed, along the lines you marked and pinned.

5. Fill the channels about 2/3 full with rice. Pour carefully and keep the bag upright wedged between your desk and your lap or something. Careful!

6. Pin the tops of the channels closed and pin the double fold bias tape over, overlapping the full width of the tape. Lots of pins.

7. Sew through all layers. (I know this isn't how you typically use double fold bias tape, but it's really hard to sew the bag when it's full of rice so I use this method to save the stress of maneuvering it. Plus, this part never shows when you have the case on. And, ideally your bias tape and thread color will match your canvas!)

The rice bag is done!

8. Sew the long seams and bottom short seam of the flannel case, right sides together, with a 1/2" seam allowance.

Press seams open.

9. Press the unsewn edge under 1/2", then a deeper amount for the hem. Depending on your proportions, I recommend a 2" hem, which is what you'll have room for if you use my cutting dimensions. Pin in place.

10. Sew the hem.

Now heat up and enjoy this winter!

People love getting these as gifts!

No comments

12.03.2014

DIY ASOS plaid blanket scarf tutorial

This next tutorial is so. easy. and so fun for this season!

Inspired by that big plaid oversized blanket scarf you see on everyone nowadays... you know, this one?
source/source/source

It's this ASOS scarf, which of course is out of stock and was kinda pricey for what it was, to begin with. So... let's DIY!

The ASOS one is a loosely woven 100% acrylic, which is slightly icky to wear but also not a kind of fabric you can easily find in stores. But you probably can find a lightweight plaid flannel, probably 100% cotton, and I'm here to tell you that you can wear it as a scarf!

The original scarf is 59" wide (square), which is a little wider than most cottons but close to the width of this brushed plaid apparel fabric I found at JoAnn. You need as much length as your fabric has width to make a similarly sized square blanket scarf!

DIY ASOS plaid blanket scarf tutorial


You will need:


  • Lightweight cotton or acrylic plaid fabric, as much length as width (i.e. this was 54" wide fabric so I needed 1.5 yards (54")) plus some wiggle room for straightening--I got 1.75 yards.
Simple supplies list. So far so good, right?


1. Even out the fabric. This should be very easy with a plaid. As you can see, mine was not cut straight.

2. Cut or tear the excess away. This will make your perfect square (i.e. mine was 54"x54").

3. Press under a 1/4" hem on two (opposite sides); pin. On the selvage edges, you may not need to turn under twice. My selvage was smooth and I just turned under once for a clean edge.

4. Sew hem.

5. Repeat pressing, pinning, and sewing hem on other two sides. (On the raw edge sides, press under twice to conceal raw edges.)

Done! Yeah, that's all!!

It's super comfy to wear, and you can wrap it about 1,000,000 ways. It doesn't have the very short fringe of the ASOS version but I kind of like it better with smoother edges, since the fringe is kinda short and wimpy anyway. (Although I realize, you could fringe the raw edges if you liked, by running a straight stitch 1-2" up and unraveling to the seam!)

How to Wear DIY simple scarf! (Also, OMG it gets dark early this time of year!)

Hope you try it and love it!

Also a great DIY gift!

6 comments

11.18.2014

A very cool woven ribbon pillow DIY

This is quite the project! I have a very interesting tutorial for you today, one I tried without much practice or thorough thought before jumping in. You may know how that goes. But I learned as I went, and am happy to share my tips with you!

Here's my tutorial for a woven ribbon pillow.

I think the inspiration for this project was woven paper hearts I remember making for Valentine's Day as a kid. I think we made paper baskets out of them once? I don't know. I remember liking weaving the pieces together, and being very intent on matching the corners up tightly.

So when Offray reached out to me to celebrate the launch of their new website, and I thought about a cool project using ribbon, the over-under basic weave was the first thing I thought of!

Woven Grosgrain Ribbon Pillow Tutorial


You will need:


  • Grosgrain (or other) ribbon (pronounced GROW-grain, not GRAWS-grain) (I used two colors, two white pieces for every grey piece)
  • Sturdy home dec or bottomweight fabric for pillow base and back (Do not use knit or something lightweight, as it needs to hold up to lots of pins and still stay flat as you add each ribbon.)
  • Zipper (invisible recommended)
  • Pillow form

I used an 18" pillow form so I used an 18" zipper and less than 3/4 yards fabric.


Calculating ribbon needs:

Sometimes sewing projects = lots of math. To calculate how much ribbon you need, divide the width of the pillow by the width of the ribbon. For example I used 3/8" wide ribbon (0.375") on an 18"x18" pillow form and assumed 1/2" seam allowances on each side but no ribbon in those areas. For each direction:

  • 18" divided by 3/8" wide ribbon lined up perfectly = 48 pieces
  • 48 pieces, each 19" long for seam allowances = 912"
  • 912" divided by 36" = 25.3 yards
So 25.3 yards per side, so 50.6 yards total. 

(I did 2/3 white ribbon and 1/3 grey ribbon, so I used about 17 yards grey and 34 yards white.)

I'm pretty sure the fabric store is the most expensive place to buy ribbon, so ordering online is definitely the way to go for large orders like this. (Offray.com now has an online shopping feature.)

Instructions:


1. Prepare the pillow base. (I used the same fabric for the front and back.) If your fabric is all or mostly cotton, pre-wash it and press it before cutting. Once washed and pressed, cut two pieces to fit the pillow form. (I used 1/2" seam allowances for my 18" pillow, and wanted a snug fit, so I cut 19"x19" squares.)

Fold the pieces in half and notch the centers on all sides.

2. Cut ribbons. I started out cutting 10 or 20 pieces, then pinned some and cut more as I went. Kept them from getting too tangled.

My pillow was 18" with 1/2" seam allowances and I wanted a little extra room, so I cut 19.5" pieces.

3. Pin ribbons along one side. You can see my alternating pattern here--two whites, one grey. Put on a good movie or podcast! Lots of pinning.

Leave at least 1/2" at the side for seam allowance and wiggle room.

**If your ribbon is thicker like velvet ribbon, you may want to give each piece a few threads' worth of space to accommodate the bulk when you weave the other direction.

With each piece, on a flat surface, follow the ribbon piece to the opposite end and pin flat.

4. Baste ribbons down. You can use the longest stitch your machine has, since it just needs to take the place of the pins for now while you weave. Use about a 3/8" seam allowance.

5. Pin and sew ribbons on the perpendicular side. Pin only on one side, not across as well.

If you used spacing for thick or fluffy ribbon, match that spacing on this side.

Sew these pieces down with a basting stitch and 3/8" seam allowance as well.

6. Weave! With a consistent pattern, weave each piece through under-over-under-over-etc. all the way through.

My ribbon was stiff enough that I didn't need a needle or anything to weave it through the perpendicular pieces. I found that I could just fold each piece in half or so and use the loop as a pusher to get under the pieces as I wove through. I made a twisty mess most of the time, but the ribbon had enough body to bounce back when I flattened it.

I also found I could do up to four or five pieces at a time, under-over-under-over-etc. all together, but then just had a slightly harder time doing the next pieces individually.

The hardest part was keeping the weave straight as I went. Lots of pulling with my fingernails, pretending to be the pusher on a loom. At the end of each weave, pin the ribbon flat in grain.

Keep weaving until the very end. For the last TWO pieces, I pulled out a big tapestry needle and used it to help me.

But then I realized I had too many ribbon pieces for the seam allowances and I pulled out the four edge pieces (the outer one on each edge), which gave me more room to weave. (After I took this picture--sorry. Just trust me.)

Anchor the pinned edges of the bottom of the weave with a basting stitch and 3/8" seam allowance.

7. Assemble the pillow. As you would any pillow, install the zipper, then sew the faces right sides together. Clip corners, press.

8. Insert pillow form and display proudly!

Here's mine!

Really cool texture to play with as you hang around relaxing on the couch.

(Next to another DIY pillow, of course.)

Because it is so unique and takes more labor than a basic printing or painting project, I think these would make GREAT holiday gifts! I'm always looking for interesting DIY gifts, and this would be a great one. Particularly if you have someone who loves a specific color. Offray sells this basic grosgrain in like every color ever.

Do let me know if you try it!!

It's also a great DIY gift!

Thanks to Offray for sponsoring this post!

9 comments

SUBSCRIBE BY EMAIL

Get new posts by email:

Search

​
© Create / Enjoy • Theme by Maira G.