

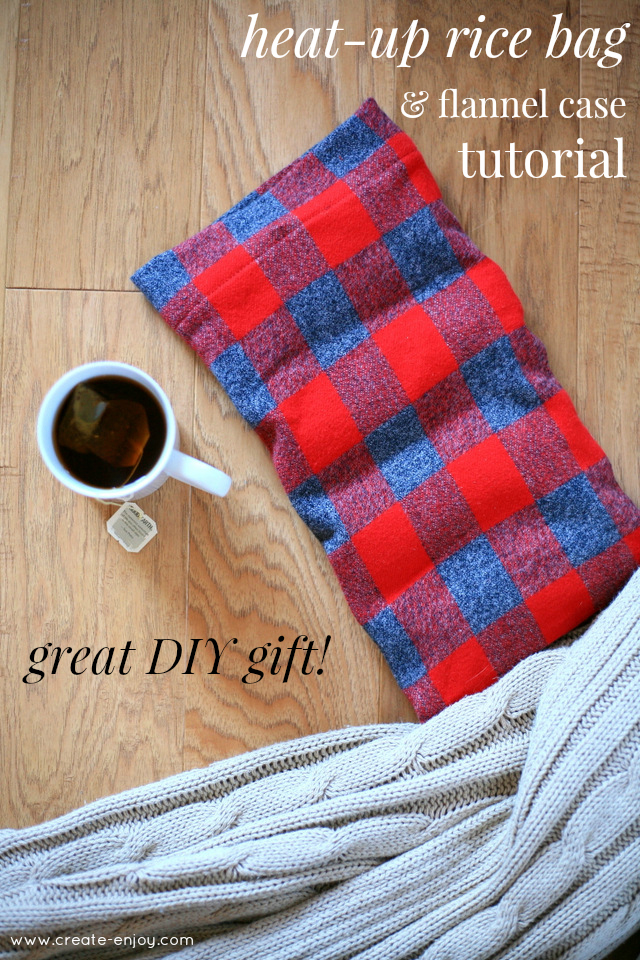
Easy heat-up rice bag and flannel case tutorial! Great DIY gift
When I was little my mom ordered a microwaveable barley-filled fabric pillow ("the barley bag") from some specialty catalog--for treating sore muscles, warming the end of the bed, etc. We loved it! We would microwave it for 2-3 minutes and use it sometimes just for comfort in the winter. Later we got one filled with rice, which was good because it had more weight to it so it would balance on your shoulders or neck.
Then I figured out how to make my own, to the exact size and specifications I needed! Plus I make these nice flannel pillowcases for them--cozy and washable so the bags stay nice longer.
They are an EXCELLENT holiday gift (one year I made them for several people, each with custom flannel cases for their style/colors) and so useful to have around the house! Here's an easy tutorial!

DIY Heat-Up Rice Bag & Case Tutorial
You Will Need:
- 1/4 yard cotton canvas (doesn't have to be pre-washed)
- 1/4 yard cotton flannel (pre-washed)
- 1 package extra wide double fold bias tape (ideally matching the canvas--I didn't have any natural color! Oops!)
- About 2 lbs rice

Instructions:
1. Cut out the bag and pillowcase. You can make them any size you want, but keep in mind you'll be using 1/2" seam allowances on three sides and covering the seam allowance on the top edge, so it'll be part of the finished size. For a neck wrapper bag, you may want a longer, narrower bag and pillowcase; for one to put on your belly or low back, maybe a more square rectangle. I recommend making the flannel case about 1/2" larger than the rice bag at finished size.
I cut my canvas piece 15"x8" and my flannel 18"x9".

2. Sew the short seams and bottom long seam of the rice bag, right sides together. Use a 1/2" seam allowance.

Trim corners and press seams open, then flip right sides out and press flat.


3. Measure and mark to divide the bag into four channels. (If you used my dimensions, yours will be 3.5" wide.)

Pin the front and back of the bag together to keep it flat.

4. Sew the channels closed, along the lines you marked and pinned.

5. Fill the channels about 2/3 full with rice. Pour carefully and keep the bag upright wedged between your desk and your lap or something. Careful!
6. Pin the tops of the channels closed and pin the double fold bias tape over, overlapping the full width of the tape. Lots of pins.
7. Sew through all layers. (I know this isn't how you typically use double fold bias tape, but it's really hard to sew the bag when it's full of rice so I use this method to save the stress of maneuvering it. Plus, this part never shows when you have the case on. And, ideally your bias tape and thread color will match your canvas!)

The rice bag is done!
8. Sew the long seams and bottom short seam of the flannel case, right sides together, with a 1/2" seam allowance.

Press seams open.
9. Press the unsewn edge under 1/2", then a deeper amount for the hem. Depending on your proportions, I recommend a 2" hem, which is what you'll have room for if you use my cutting dimensions. Pin in place.

10. Sew the hem.
Now heat up and enjoy this winter!


No comments
Post a Comment