

Modern traditional historic bathroom renovation REVEAL and cost! One Room Challenge Week 6
It is such a good feeling to finish a room!!! We've been renovating this house corner by corner over the past 2+ years and now almost all the hardest projects are done... and now we get to enjoy two beautiful bathrooms!
Over the past 5 weeks Jason and I have been working on our upstairs half bathroom as part of the One Room Challenge... it's been exciting, tiring, and satisfying. It is DONE now and I'm sharing the glamour shots, before photos, and total cost with you here!
New here?
If you're new to this blog from the ORC site, welcome!! I'm Suzannah, a longtime DIYer and design lover currently making over our 1937 Tudor revival style home, our second fixer-upper. I have a 2-year-old and newborn, but my husband and I have done almost all of the work on our homes ourselves! I've blogged about all of it so you can check out my tutorials page and room reveals to see. You can also follow along with me and my projects on Instagram! I also co-host the Your Home Story podcast!
See all my posts about this ORC here! And see:
Modern traditional historic bathroom renovation REVEAL
Where do I begin... if you remember from my Week 1 post with the before images and design concept, this is a half bathroom on the second floor of our 1930s home. There are two (and a half) bedrooms upstairs as well and we're moving our rooms up there this week!, now that this bathroom is done. We explored adding a shower which would have been a huge plus, but the cost and steps involved just aren't possible for us. That would not be a DIY project in this case and would involve reconfiguring a lot of walls and possibly the exterior.
So, we decided to just make this the best half bath we can!! Welcome in, I'll show you around!

It has a nice west-facing window and lots of storage, but was really neglected when we moved in. Here's the before.


Damaged flooring, rubber baseboards, cut-outs in the close trim to accommodate the sink, two extra holes in the wall under the sink from when the previous owner had the plumbing replaced and made the new pex lines come up through the floor... and that's not even getting to the aesthetic differences between this bathroom and my style. ;)
I always like to respect my home's age when I can, while still choosing things that appeal to my modern eye, so we kept the cute original sconce and traditional mirror medicine cabinet. (That cabinet might not be original, but it's old.)
I also chose the faucet and towel bars etc. from Kingston Brass in a style that was similar to that original towel bar you can see above the toilet, sort of geometric rather than rounded. They're the Metropolitan line in Polished Chrome (faucet, double towel bar, hand towel ring, toilet tank lever, toilet paper holder). Kingston Brass has a ton of different lines of products that all coordinate, so you can do midcentury modern, more Victorian, etc. and get all the pieces matching.

How cute is this faucet, with the tiny round knobs and HOT and COLD text? Really nice solid, heavy metal, too. We used Kingston Brass products in this bathroom reno too, I love them.
(P.S. didn't realize the mirror wasn't centered till I took this photo! Wonder what was going on when that was installed decades ago... :P)


Even though there's no shower or tub up here, there were two full-width towel bars in this bathroom before and it makes sense function-wise. After a shower downstairs, we'll need a place to hang a towel. We did a double towel bar in this bathroom reno too to save space and I LOVE it, so genius, so we did another one here.

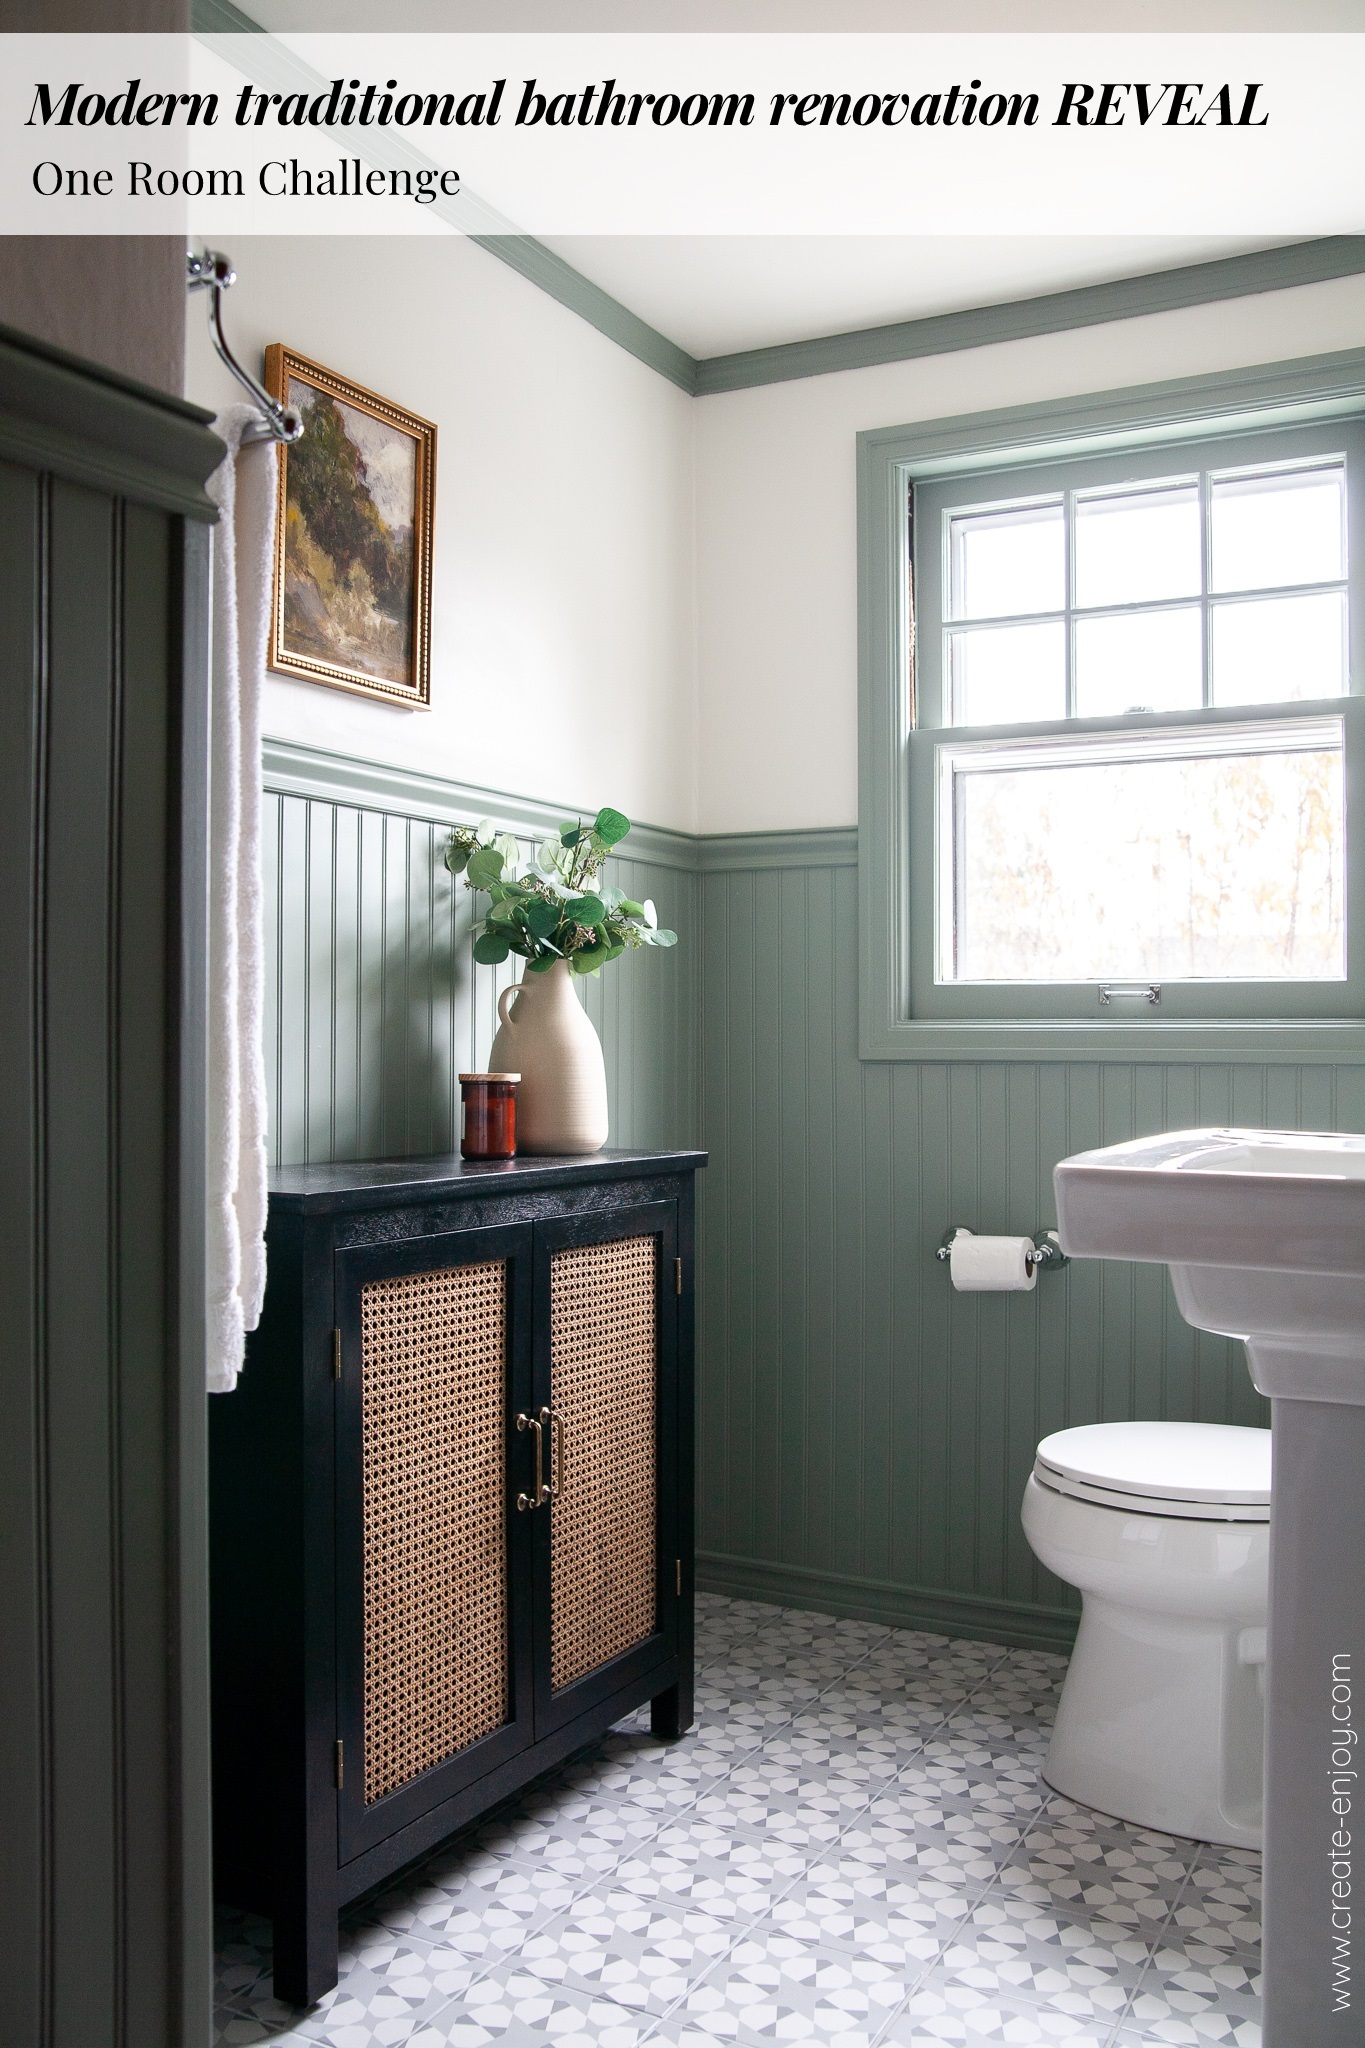
More on function... this bathroom has a TON of storage (2.5' deep cabinet with shelves to the right of the sink, you can see in the sink pics above), but still no good place to store toilet paper. There's plenty of room on the wall opposite the sink and toilet for a narrow cabinet and I had the perfect one sitting in an awkward place in our dining room already. I got this at HomeGoods on a whim because I loved it, and replaced the handles with these.


I think that's about it!!
Oh, except kind of the main statement of the room... we painted the beadboard green. No, that wasn't part of my original design for this room. I was on the fence about doing white or going with a bold but dusty, soft green or teal. I realized I would be bored by this room if the only fun thing about it was the patterned tile. I chose Sherwin Williams Acacia Haze in a Satin finish, not semi-gloss like we've done for other trim, because most of this is on wall paneling. It's smooth and silky and gorgeous. So happy with it! And I wanted to get a high-end, intentional look by painting all the trim in the room the same color, so we did the window, door, ceiling trim, and closet doors. We even painted the plumbing lines this green so they blend in. It is awesome!
Walls and ceiling are Sherwin Williams Alabaster (eggshell and flat, respectively), like the rest of the house.
Half bathroom renovation cost
I always like to share the cost of my projects (see breakdowns on other room reveals here). I keep a detailed spreadsheet that I start before we buy anything, and I update as we shop, so I know the cost pretty close to exactly.
In this case we reused the sconce, mirror cabinet, and black caned cabinet, but I found similar ones for anyone who wants to recreate this look. I plugged those in below for a "get the look" budget. So this list below is more than we spent, but is what you can expect to spend. I also noted below with * which items were provided to me as sponsored content for this project. The list below is what you could expect to spend if you did this project and had pretty similar conditions to us, and also did not hire out any labor.
Get the Look cost:
*Sink faucet: $155
*Double towel bar: $59
*Hand towel ring: $24
*Toilet tank lever: $38
*Toilet paper holder: $41
Sconce (similar): $139 (we kept the original)
Mirror medicine cabinet (similar): $178 (we kept the original)
Black cabinet (similar): $150 (I already had mine, from HomeGoods)
Toilet: $149
Toilet rebate: -$75 (from our water utility provider, for replacing with an efficient model)
Pedestal sink: $199
GFCI outlet: $20
Black outlet/switch plates: $4
Tile tools--grout saw, new diamond drill bit, new buckets, etc.: Already had or borrowed
Wainscoting: $69
Ceiling trim (baseboard part of same kit): $0
Trim paint (SW Acacia Haze): $49
Wall, ceiling paint (SW Alabaster): Already had
Other misc hardware store trips: $60
Tools: Already had or borrowed from my dad
Greenery: Already had
Vase: Already had
Candle: Already had
Gold frame above toilet: $3 at Goodwill, and I painted the watercolor
Black frame, Davinci print, mat: Already had
Towels: Already had
SOLD on Facebook Marketplace:
Sink: -$60
Toilet: -$20
TOTAL: $1,535

I think that's pretty good!!! It's more than our $391 half bathroom renovation at our last house (more than all of the bathroom renos at our last house, actually), but for real tile, new toilet and sink, wall treatment, beautiful new fixtures... you can do a lot with $1,500! When you do all the work yourself, that is!
I'll link all the items we used, or most similar (like the cabinet) below as well.

I'll share a video tour on my Instagram stories today, and other behind-the-scenes!
Thanks for following along! You can see all the posts about this ORC project here. Absolutely check out the ORC blog to see the other room reveals happening now! There are 20 featured designers plus tons of other guests like me!

No comments
Post a Comment