

100% DIY modern traditional full bathroom reno REVEAL and budget: Week 6 of the One Room Challenge!
This post is part of my series of 6 posts about the 5-week One Room Challenge. You can see all my posts about this project here. Previous posts so far:
- Week 1: "Before," design, and demo!
- Week 2: How to Lay Mosaic Tile Flooring
- Week 3: How to phase a bathroom reno, tons of wall tile, and painting tips
- Week 4: Lighting and hardware choices
- Week 5: How to replace a shower (wall, tile, doors)
- Week 6: REVEAL! You're here!
I was overwhelmed before we tackled this project, overwhelmed during it, and tired after. It was hard. It involved so many steps and DIY skills, I'm glad we did it after working on five other bathrooms and two kitchens! I feel exhausted but proud of this hard, but successfully completed, room renovation. Just being honest about it--the transformation pics are satisfying, but it was not an easy road!

DIY modern traditional bathroom renovation
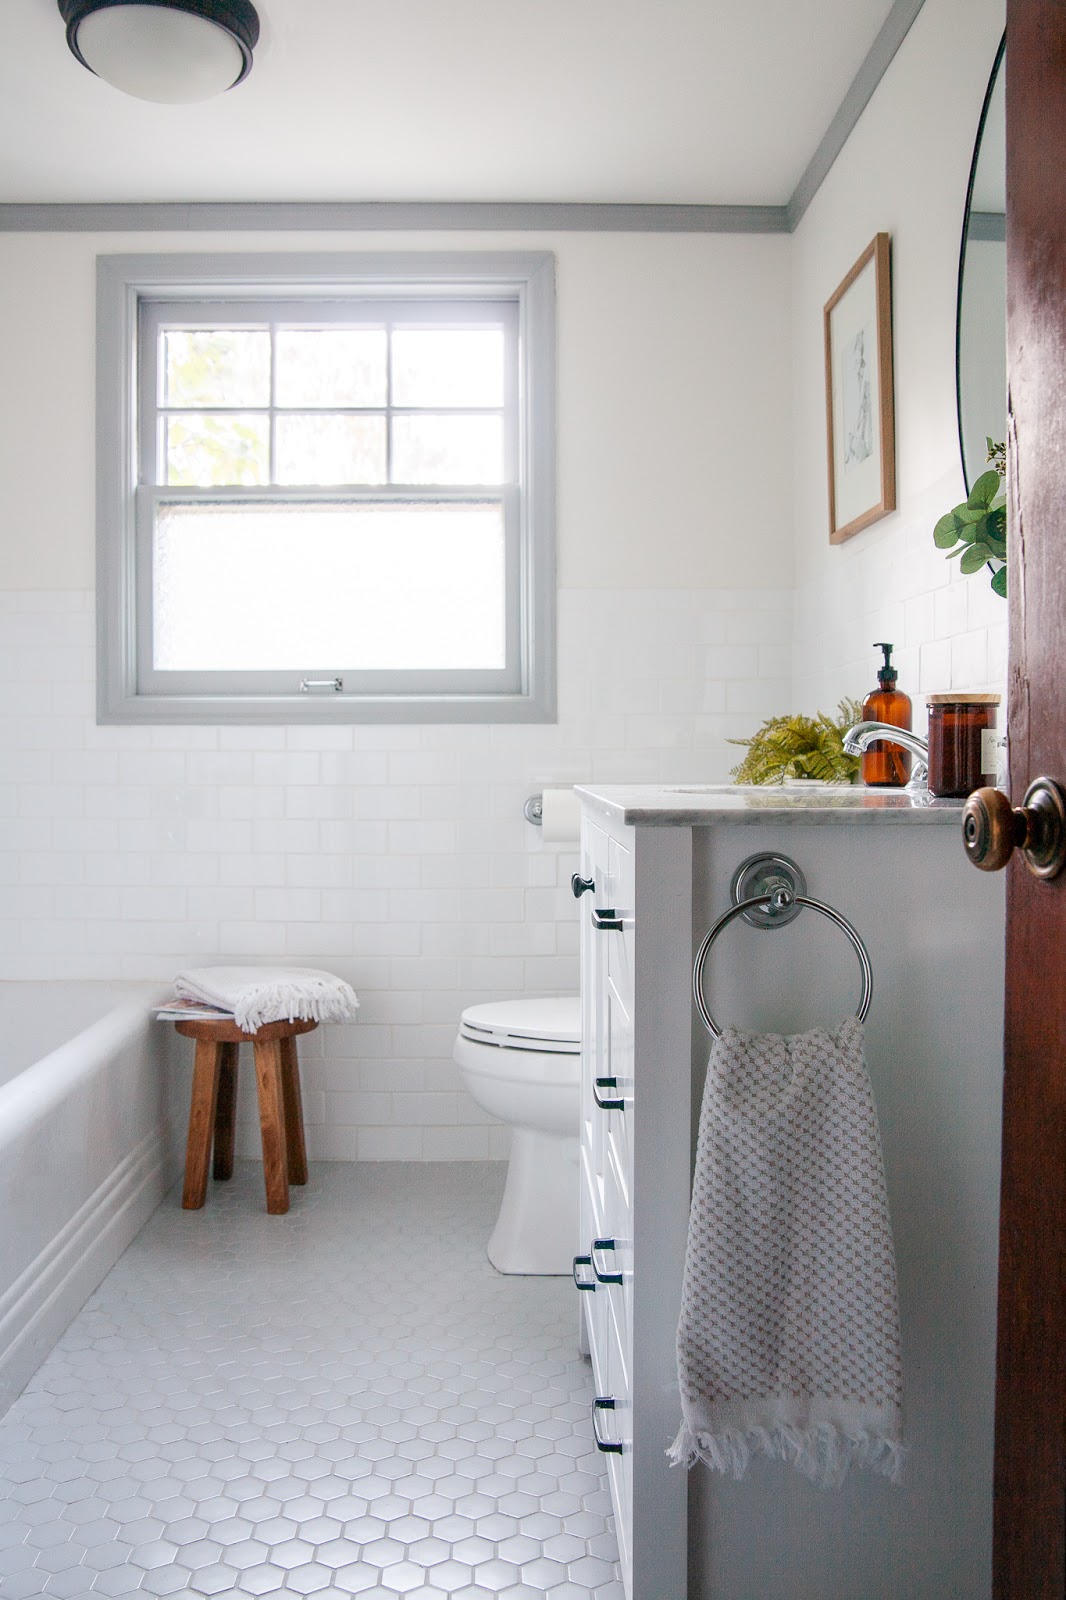
Welcome to the new bathroom! It is simple, clean-lined, and peaceful. Just what our Tudor revival-style home needed... something traditional-inspired, but updated, and place of calm after all the texture and depth of the old wood floors, trim, and texture everywhere.


A little reminder of the "before," anyone? (See more before pics here.)

We didn't change the layout at all, but added a much larger vanity (deeper as well as wider--36" instead of 24"). Despite the built-in cabinet to the left of it, we really need the storage. I initially was set on a vanity with a centered sink, but I found this one that fit all my other criteria (lots of drawers, widespread faucet holes, real wood, etc.) for under $600 and went with it despite the sink to the left. But, it's meant more counter space which is so useful!


Faucet is by Kingston Brass and I love the traditional shape and knobs. I shared more about it here... they have so many options for classic looking fixtures! And hardware to match, like the towel bar set we used.


We didn't change the floor plan at all, but the biggest change is we built up the wall between the tub and shower. The previous owners had built the glass block shower in the early 90's to let more light in from the window, which was nice, but then there were no good places to hang towels, and the glass block was no good. We replaced the door/glass block walls with the wall we built and these sleek frameless glass doors from Dreamline Shower. I love all their options for replacing dated shower doors (or building an entire shower) and they are incredible prices! This set is also under $600! (See the whole project in this post.)
We kept the shape and size of the original shower curb and pan, and just replaced the tile board, added waterproof membrane, and retiled it.


We built a little niche--so much more stylish than what we had before! We actually reused the shower faucets that we had previously--they are not pretty, but they are chrome, and the existing plumbing was done very well and the fixtures we picked out didn't work with the same base. Rather than call a plumber in or mess around with Shark Bite bits or welding, we left them as-is. (New shower head though.)

Another "before" comparison... we kept some original features, like the laundry chute door and old brass vent cover. The whole house has those original covers and I am sticking with them, patina and all. The door hardware (chrome inside with push button privacy lock, brass on the hall side) is also original. I added chrome sash lift pulls to the built-ins and window, same shape as others in our house.
Since we figured the plaster would be damaged under the old wall tile we retiled it all with white subway tile. It looks nice now, but... HOURS of work. Next time I might hire someone to repair the walls and just have tile above the tub, and in the shower, yikes!


The art was unfortunately an afterthought but I love this sketch I found and a wood frame to bring in some more warmth. Speaking of warmth... you may have noticed the paint color on the walls is warmer than the tile. That was not on purpose, but I like it now! It's Sherwin Williams Alabaster, same as the rest of our house, but the tile is bright white. It bothered me a little but grouting helped... our grout is called Pure White but is much closer to Alabaster than the bright white tile. That and the two shades of the same tone of grey in the floor and trim make it just a series of soft neutrals, and I love it! (The trim paint is Sherwin Williams Gray Clouds.)


This accent table practically makes the room for me. I love the look and tiny bit of rustic feel, and I'll use it for setting candles, books, etc. during a bath.
I am so excited about our new towels, too... I like the Turkish towel look but these are softer and thicker!


The prints above the bath tub are vintage, from Jason's grandparents. I've heard that every room needs at least one vintage piece... these are ours! They really help bring in beautiful color and warmth.

Other vintage-ey touches include the beautiful classic chrome two-light sconce above the mirror. Ohhhh, it is so perfect. When you look at bathrooms from the 1930's and 40's (our home is from 1937), there's a lot of elements I wouldn't choose today, but the lighting can be really cute. This sconce from Hudson Valley Lighting has so much style and yet is so simple and elegant. LOVE looking at it.


There are definitely things that didn't go as planned in this project. Even right out of the gate... the floor tile I chose didn't look nearly as pale online and I was hoping for a more saturated grey to break up all the white... so I chose to paint the trim grey instead of Alabaster! I'm really glad I chose that though!

All in all we are very, very proud and happy about this bathroom reno... and so glad to have it done, of course! Now we can focus on the exterior of the house in early 2020, and tend to some small things we've been neglecting while every spare hour has been spent on the bathroom.
THANK YOU!!
Huge credit goes to Jason for spending almost all of his weekend days alone working on this room the past several weeks, even after his classes started mid-October and he has school projects to work on, too. Thanks to my parents for helping out with the baby on weekends, so I could work too! Thanks to everyone on Instagram for cheering me on and being so excited about this project with us!
BUDGET and SOURCES
I am also sharing all sources plus the budget breakdown in this reveal post. I've included everything I could think of! Including our new towels, side table, etc.! But also the big stuff like tile, vanity, shower doors... it's all here.
Items with an * were provided to me in exchange for review or at a discount. Thank you so much to the great brands I worked with on this project--Dreamline for the elegant shower doors, Kingston Brass for the beautiful faucet and matching towel bars etc., and Hudson Valley Lighting for the incredible vintage-inspired sconce above the sink.
COMPLETE SOURCE LIST
*Sink faucet $135
Showerhead $22
*Towel bar set $125
Window handles (also used on built-in and laundry chute) $21
Semi-flush mount ceiling light $29
*Two-light sconce $260
Mirror $55
Side table $35
Fern $11
Vase $15
Candle $13
Art print above toilet (free download) $0
Frame for print above toilet $18
Vintage Japanese art $0
Cement backer board (floor and shower walls) $50
Cement board screws $23
Drywall and lumber $41
Drywall supplies $25
Niche $51
Bathroom fan/light $31
Ducting $11
Light switches, outlet, plates $30
Waterproof membrane $44
Tile tools--grout saw, new diamond drill bit, new buckets, etc. $45
Floor tile ($3.53/SF, 20% extra) $229
Floor grout $13
Wall tile ($1.29/SF, 20% extra) $203
Tile bullnose $57
Tile radius cap trim $44
Wall grout (4 packages) $46
Shower floor tile ($5.98/SF) $66
Vanity $540 (I had a coupon)
Pulls $14
Knobs $6
Towels $48
*Shower doors $570
Toilet $149
Toilet rebate -$75 (from our water utility)
Ceiling trim $50
Trim paint (SW Gray Clouds) $30
Wall, ceiling paint (SW Alabaster) $0
Other misc hardware store trips $100
SOLD AFTER DEMO:
Vanity -$60
Toilet -$60
TOTAL: $3,059
That's cheaper than the bills we'll have next spring for replacing our fence, panting the exterior, and of course the roof... I'll stop thinking about it. Point is, this is a large but doable project and SO WORTH IT!!!
Pin for later...

Thank you again for following along over this big transformation! Please also check out the ORC blog for the rest of the 6-week challenges revealing this week! There are 20 featured designers plus tons of other guests like me!


No comments
Post a Comment