

How to lay mosaic tile flooring!: Week 2, One Room Challenge bathroom reno with hexagon floor
Good news is, I've tiled FIVE bathroom floors now and the verdict is in: mosaic tile is the easiest to install!! I'm sharing a full tutorial for how we replaced our old linoleum flooring with hexagon mosaic tile below. You can totally do this!!
This post is part of my series of 6 posts about the 5-week One Room Challenge. You can see all my posts about this project here or listed below:
- Week 1: "Before," design, and demo!
- Week 2: How to Lay Mosaic Tile Flooring
- Week 3: How to phase a bathroom reno, tons of wall tile, and painting tips
- Week 4: Lighting and hardware choices
- Week 5: How to replace a shower (wall, tile, doors)
- Week 6: Modern traditional 100% DIY full bathroom reno REVEAL and budget
Tiling is a great skill to learn and starting with a nice, horizontal surface like a floor is a good way to learn. This tutorial will walk you through installing mosaic tile (that means sheets of smaller tile on a mesh backing) on a floor like a bathroom.
Start by demoing your previous flooring, down to the subfloor (usually particle board or plywood). I do suggest you do some research for the right base for your tile backer board depending on your previous flooring and subfloor. Also, note how much clearance you have under your door to the existing floor... we had sheet linoleum and 1/4" or so of clearance, so after we removed our flooring but added 1/4" of backer board, mortar, and 6 mm high tiles, we did need to trim down the door.
Project-specific conditions aside... on with the tutorial that you can use as soon as you're ready for tile backer board!
How to lay mosaic tile flooring! Tutorial
You will need:
- Tile cement board (we used the 1/4")
- Cement board screws
- Cement board scoring knife
- Oscillating tool if you need to undercut door frames
- Mortar (we always use this--it is heavier duty, works on large tiles too and can be applied very thick for uneven surfaces [like our walls later on!])
- Mortar/grout mixing paddle attachment for your drill motor
- Mortar trowel
- Tile (we used this grey 2" hexagon tile)
- Manual tile cutter and/or wet tile saw
- Grout (we used this sanded grout in Platinum)
- Grout float
- Grout sponges
- Grout/tile sealer
Instructions:
1. Install tile backer board. You'll start by measuring and cutting it to the size/shape of the room. Fit it in like a puzzle!

Screw it down with special backer board screws, one every 6-8". I have a good method for this--position them and tap them down with a hammer so they don't wiggle, then go through with a power screwdriver and screw them down all at once.

Note that it is pretty tricky to do small pieces with the cement board, so try to avoid situations like this!!

2. Cut down door frames. I highly recommend this instead of tiling around your door trim. It does feel a shame to cut into our home's original trim, but I promise, it will look so much better to put tile underneath it and hide the cut edges. To get the right height, put a tile on the backer board against the door frame and draw a line with pen right above it, to allow a little wiggle room for the mortar.
I use this oscillating tool for this purpose. (I undercut 17+ door frames at our last house when I installed our laminate flooring, I know this process well. It is loud and uncomfortable!)

3. Dry fit tile. This has a couple purposes... mostly, it helps you decide which direction you want the points to go, if you're using hexagons or something with an irregular shape, but it also helps you make sure you don't have any really awkward spots if you start your tile at the corner. (It also psychs you up).

4. Mix mortar and protect walls/tub. Mix mortar with a paddle attachment on a drill motor (I highly recommend you use a plug-in drill for this).
The protecting part is optional but I am a very messy tiler. I put sheets of cardboard (from the tile packages) against our tub to protect it from splashes of mortar, but I wish I'd used something thinner since it actually acted like a spacer and now I have a gap against the tub that is slightly larger than desired (since there won't be a baseboard or wall tile against that edge.

5. Lay tile! This part is hard to photograph because you should wear rubber gloves and it's hard to operate a phone. You can watch any tiling video or tutorial about spreading mortar with the trowel.
NOTE: the alignment you see below at the back edge is not what I recommend. Pushing the points of the tiles all the way against the wall means we had to cut about 25 tiny triangles and squeeze them in with adequate space and against the wall. Then they were barely even visible once the wall tile was on. Instead I recommend cutting all of your edge pieces from loose tiles, cut in half, then offset the first sheet of tile 1"-1/8" or so. Then you'll see partial tiles the whole length of the back wall. Those partial tiles will be much easier to cut.
 |
| I did all of this during naptime one day, hence the rush and lack of cutting tiles at the edges. But this shows you can make a lot of progress in just a couple hours. Imagine what you could do if you didn't have to clean up your tools and dirty clothes before getting a baby up!! |
Pull off tiles that get in the way of the toilet opening or any awkward turns in the wall.
I think the only tricky bit about using mosaic tile is working with the sheets--you need to do very careful eyeballing (or purchase spacers that match the spaces between the tiles on the sheets) to avoid visible lines where the sheets end/combine. (I hate to call anyone out, but you can see an example of this on the tile floor here [image source]).
One way to do this is by staggering the sheets (I did not do this)--you can cut some of them in half and start one row with full sheets, start the next with half sheets.
It will also be less obvious if you use a grout that matches your tile. (This is NOT recommended if you have white tile, though--white grout on a floor is begging for trouble!) I opted to just be really carefully with my eyeball-ing. There is also some flexibility on the mosaic sheets to squish one or two tiles around, like at the corners of a sheet, if your room isn't perfectly straight.

The fastest way to lay tile like this is working in whole sheets... as you can see I left the half pieces to cut later, but then had to scrape excess mortar out of the openings (otherwise it will dry too high to mortar/tile later). It is really better if you can do the cutting while you lay the tile the first time around!

You need to wait 24 hours before tile is ready to grout, but you can probably walk on it pretty safely several hours after this step if needed. Maybe... 10 hours after? I don't know, check yours. It does depend on the size of the tiles (mortar will set faster under small tiles with more air around it).
5./6. Cut partial tiles. If you did this at the same time as laying the big sheets, good job. If not... now, go around the room and identify how many of each size you need. I did this with labels and containers where I put the tiles to be cut.
We used a manual tile cutter for the floor, as these tiles are so small I was nervous about using the wet tile saw. But as you can see this was frustrating at times. We didn't have that many cuts to do, and some were able to look funky and not show in the end--if you're putting a baseboard over the edges you have more flexibility to use jagged edge pieces. Behind/under the toilet is also not as critical. We tiled the walls over ours so that hid the outer 1/4 or so.
Actually I think we did use the wet tile saw on the edge pieces that go against the tub (more visible).

It can get confusing knowing how many of each piece and where they go, so I really recommend labeling. I also recommend a partner system here--label and pass the pieces to be cut to the tile cutter, while you keep laying the big sheets and then the newly cut pieces!

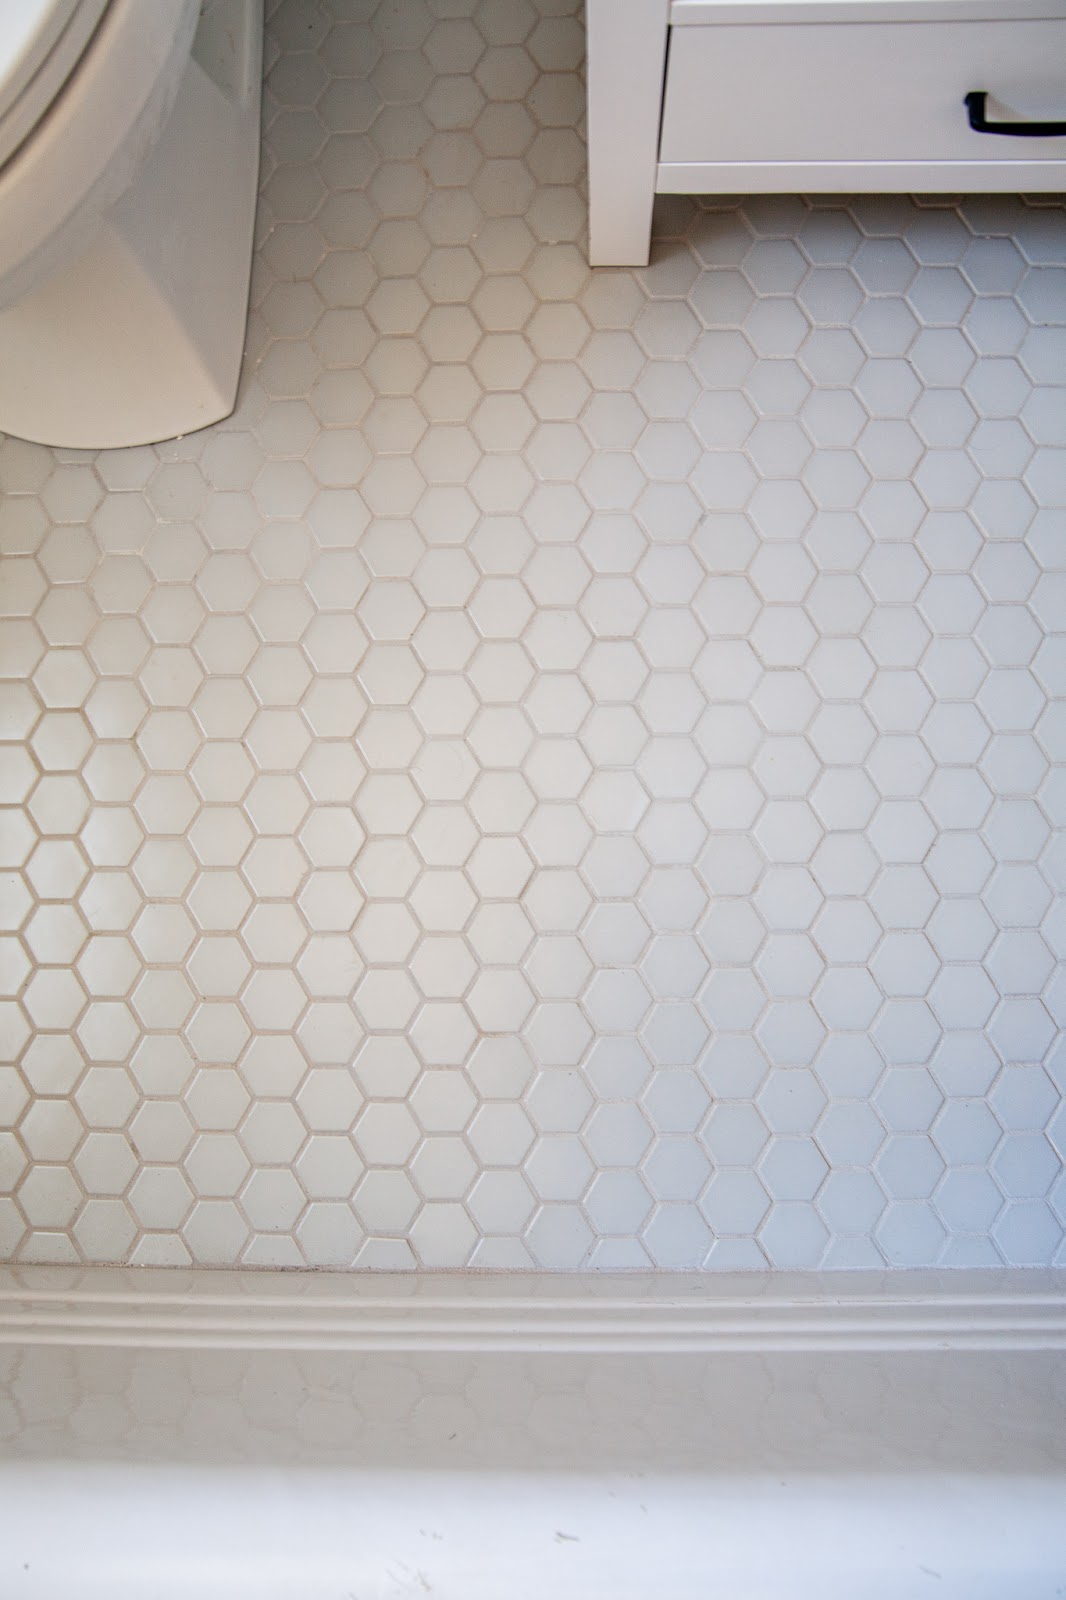
7. Grout. Depending on your tile and application, choose your grout. Sanded grout is pretty standard for floors and used when the gaps between the tiles are 1/8" or more. It worked well on this floor. We used the platinum color of this, which (when dry) matches the tile soooo closely!
Mix the grout with a paddle attachment just like you did the mortar. Spread it on with the grout float and make sure it gets in all the cracks.

Leave it on several minutes (follow the instructions on your grout), then wipe off the excess as best you can with grout sponge. You may need something a little more abrasive if you let the grout sit too long and start to dry on top of the tile. Grout is heavy duty, durable stuff, so make sure you get the extra off early.

8. Clean and seal. Once the grout is fully dry, even if you caught all of the excess you will still have grout haze. Scrub this off with a sponge or rag and get the floor really squeaky clean.
Then, apply grout/tile sealer and let dry. This one is easy to spray on, let sit, then wipe off. Now you have a clean, tiled floor!!!

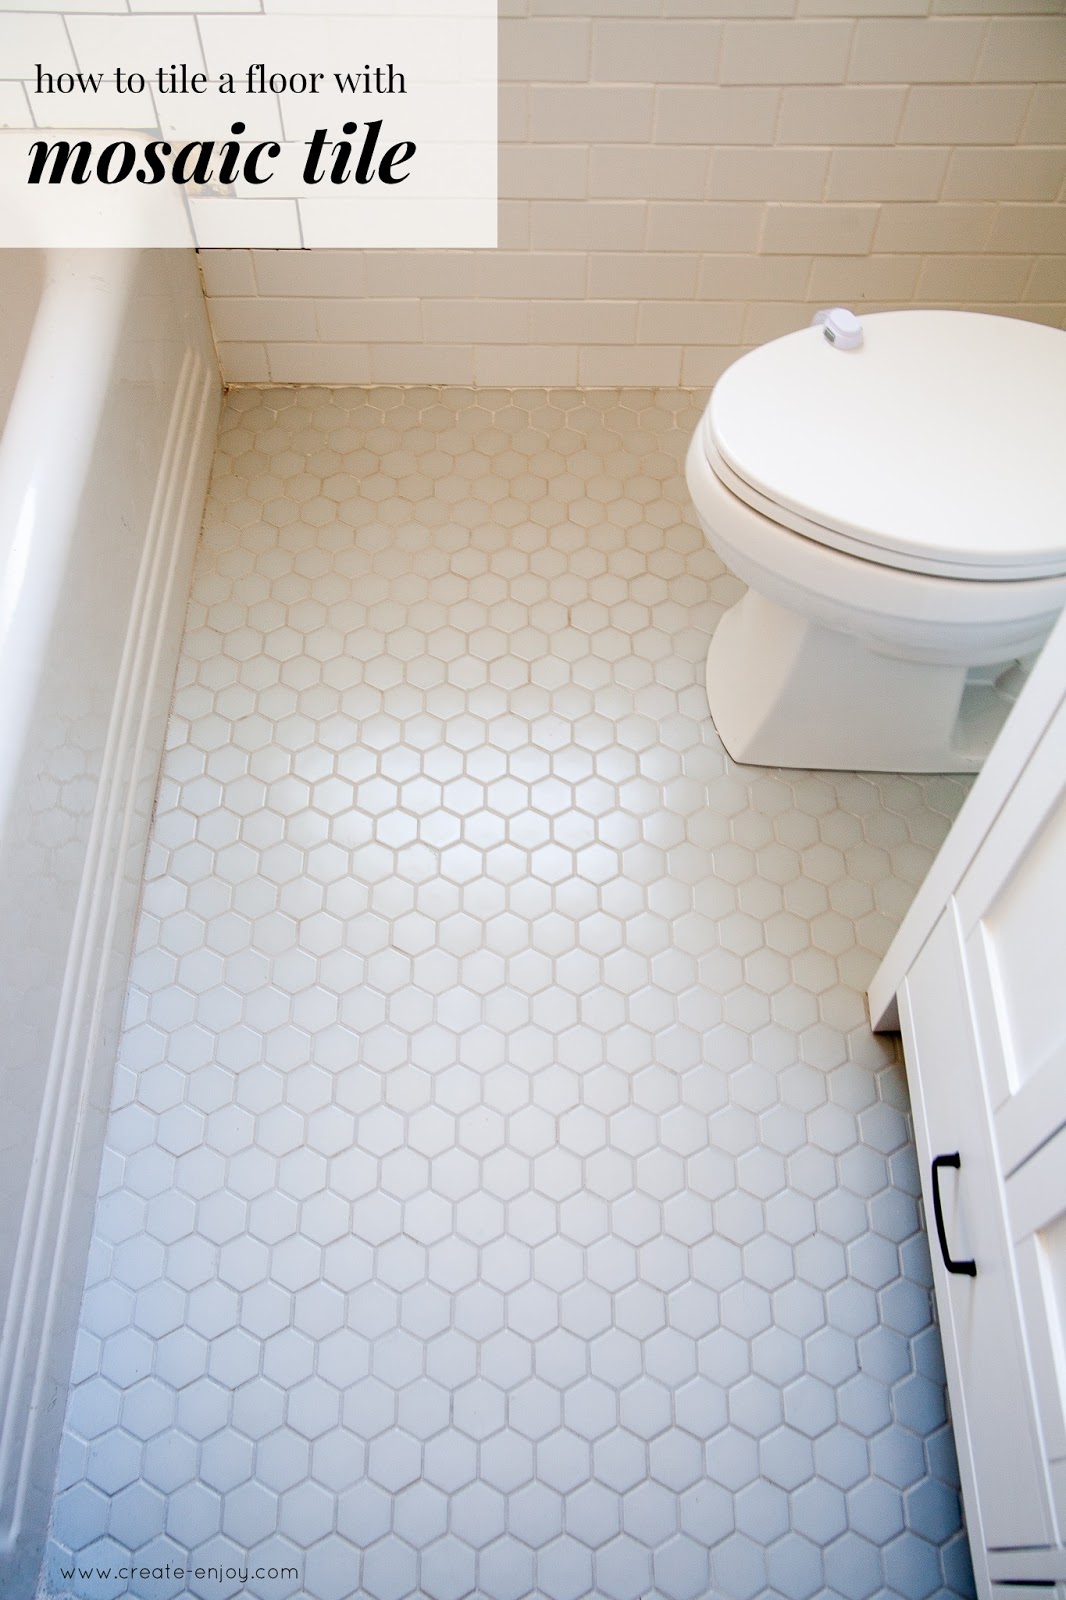
Finish with baseboards (like we did in our last house powder bath and guest bath with mosaic tile floors) or wall tile like we're doing in this bathroom. Now you can install your toilet again!!!!! Very exciting day!!
Hope this tutorial was helpful--tiling is a great skill and you CAN learn it and do it all yourself, with a few new tools and time!
Here's the floor in the room so far... as you can see we have lots more wall tiling to do, and of course the shower/tub side (not pictured!).


I'll be sharing lots more about this bathroom renovation over the next month or so! Subscribe to my blog and you'll get an email when a new post is up!
You can also check out the ORC blog for the rest of the 6-week challenges happening now! There are 20 featured designers plus tons of other guests like me!


No comments
Post a Comment