WELCOME

Hello! I'm Suzannah, a serious DIYer and mom of two little ones. Follow along with my DIY fixer upper house renovations, sewing and crafty projects, real food recipes, and de-stressing goals.
I believe you can love your home just the way it is, AND have the power to design and make big changes to make it better.
I'm also the author of DIY Wardrobe Makeovers!

12.29.2015

Winter must: rosemary balsamic roasted acorn squash recipe

We had a great Christmas holiday this year, and changed up tradition a little by hosting the very important Christmas Eve dinner and present-opening at our place. I made dinner and got to use our holiday table setting goodies, and had fun coming up with a menu for our family.

One of the dishes I made was this super easy, super savory and satisfying roasted acorn squash with the amazing mix of flavors not usually combined--fresh rosemary and balsamic vinegar. I'm not sure where I heard about this originally, probably flipping through a magazine a few years ago?, but I love to make it with this winter veggie as a unique, extra-interesting take on squash.

It's super duper easy and a great grain-free, gluten-free, Paleo side dish. Plus, squash is so affordable this time of year and we can usually get it from local sources!

Rosemary balsamic roasted acorn squash

Ingredients:

  • 1 acorn squash
  • 1.5 tbsp olive oil
  • 2 tbsp balsamic vinegar
  • Generous sprinkle sea salt
  • Fresh ground pepper
  • 4-6 sprigs fresh rosemary

    Instructions:


    1. Preheat oven to 425 degrees.
    2. Slice acorn squash. (I like to use the ribs as guides so each piece is concave like a little boat. Makes for easier scooping of the squash with a spoon or fork edge!)
    3. Pour the olive oil onto the baking sheet; add squash and flip so each open side of the squash is lightly coated with olive oil.
    4. Pour balsamic vinegar over coated squash pieces.
    5. Sprinkle with salt and pepper and add sprigs of rosemary under some of the squash pieces.
    6. Bake for 20 minutes, then remove, flip squash pieces, and sprinkle other sides with sea salt. Bake another 10 minutes or until squash pieces are soft.
    The balsamic will bead up on top of the oil before it bakes, but as it cooks it soaks in. Before baking...

    And after: roasted magic flavor combination goodness.

    Serve hot and impress your dinner party guests with how fancy this dish looks and tastes, despite how easy it is!

    No comments

    12.22.2015

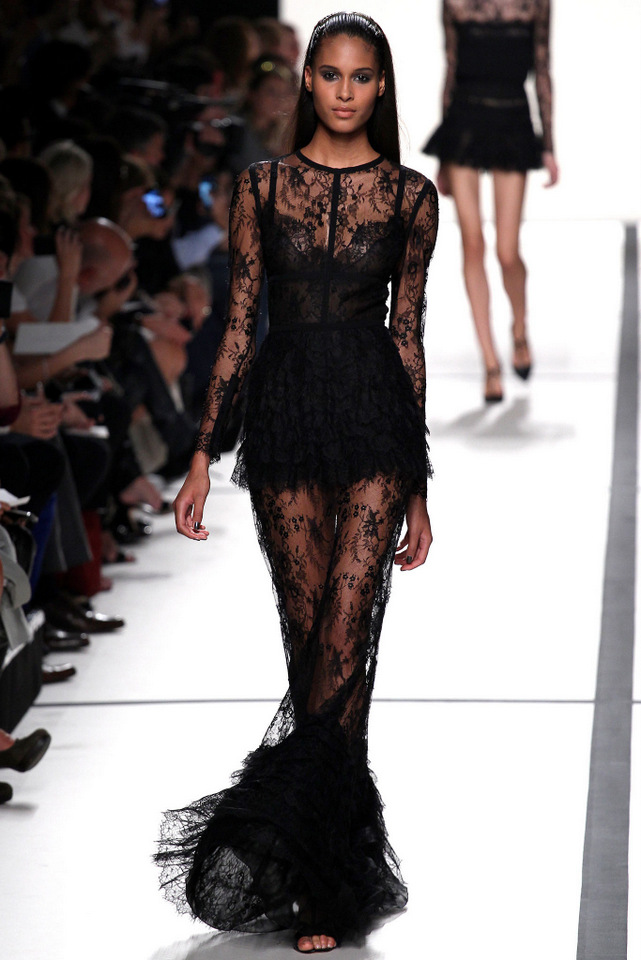
    A very special black lace party dress! (Of course it's good, it's inspired by Taylor Swift and Elie Saab.)

    I'm super proud of this one. I made my own version of an amaaaazing dress, and wore it to a murder mystery dinner party over the weekend! I had so much fun coming up with the modifications of the patterns I used and variation I wanted to do on the original, because as you'll see below, the real one is much more runway than real party! I love what I came up with and it felt great to wear for a glamorous evening of glitz and champagne!
    You may remember this one of Taylor's 21 outfits in the Blank Space video, this dramatic lacy lingerie-ey thing she wears with hair up and fantastic dangly earrings.

    It's hard to see what's really going on in the video, but the dress is by Elie Saab and appears to be mostly sheer in the bodice, with bias trim down the center front and on the shoulder and neck seams, as well as under the bust. The skirt is long and tulip-shaped but with a miniskirt shape of cascading ruffles of more lace.

    Here's the wonderful Blank Space video if you want to see it in action!

    Looking at the up close runway photo, I gathered that the shoulder straps are probably part of a bra worn under the dress. The other solid black lines come from some kind of band (I used bias I cut from the satin of the skirt and bodice base)... and I did try to do a horizontal band under the bust but it pulled the lace too much and I took it off. Ha.

    I used the bodices and skirt from Simplicity 1415 and added the sleeves from Simplicity 1913.

    I had some extra lace that I cut into narrow strips and gathered and rather than put on the hip area like the miniskirt shape of the original, I put on the bottom of the hem. I was actually kind of conflicted about this part, because I liked the skirt a lot just as it was!

    I took it apart several times to get the fit right (modern patterns are not flattering, usually) and cut down the bust so it was lower cut. I also added the sweetheart shape. It's not the bra shape of the original, but, uh, I'm okay with that.

    Dramatic Taylor Swift video face.

    The pattern I used for the bodice has princess seams in the lace overlay, which adds the seam allowances showing through. I'm not crazy about that part.

    I don't know what the back of the original looks like but I love the V shape of this one!

    I wished I'd had boning in the strapless bodice to keep it upright a little more... I might still add some before next time I wear it.

    I don't have massive gems hanging off my ears like Taylor did, but a fancy occasion + hair up is a great chance to show off fancy earrings!

    Patterns: Simplicity 1415 and Simplicity 1913
    Modifications:

    • Added bias trim down center of lace bodice
    • Added full lining to strapless bodice (plus facing)
    • Shortened waist of strapless and lace bodices
    • Cut down for lower-cut (and sweetheart neckline) on strapless bodice
    • Made higher-waisted by deepening/trimming waist/skirt seam
    • Added lace ruffle at hem
    • Added sleeves from Simplicity 1913, but made them as long as possible and a little snugger fit

    I haven't made a dress this fancy in a long time!

    And if you don't have time to make your own before your New Year's Eve party... here are 14 very similar ones, most of them under $100! (Even two romper options!)


    It was SO fun to wear such a special dress for a whole festive evening!

    No comments

    12.21.2015

    Dream kitchens and dishwashers, and learning more

    Tracking PixelWe're still thinking about our next house. Daydreaming about the perfect "cosmetic fixer" with great potential that's totally livable and well-maintained, just needs a few fun upgrades. In the whole house-selling and -buying process that we abandoned this summer, we've learned a LOT and continue to learn about being homeowners of our current place versus one that will need a little more work. (Helping my parents out as they remodel their rental bungalow has taught us a lot, too!) We're also learning about shopping for important home purchases like appliances!

    This post is sponsored by Sears Home Appliances and Services. For this post, I recently visited a Sears Home Appliances and Services store and learned about what to look for in a new dishwasher. Sears Home Appliances and Services has very knowledgeable staff to help customers navigate the appliance-shopping process and is the leading retailer of home appliances in the US (installing 4.5 million appliances each year) as well as #1 in home services, parts, and protection agreements. Great place for one-stop shopping and advice for homeowners looking to buy new or maintain appliances!

    First, some inspiration--just last week I found this amazing ranch home makeover on Jen's blog. Seriously, look at the before and after on this place!! I love how it turned out, with the open, white look and modern lines.

    Oh, I love kitchens...

    I love the stainless steel appliances in modern kitchens, but particularly the sleek dishwashers you see nowadays with hidden buttons and quiet, fast run time. Like this one below... I bet it's so much quieter than ours!

    When I went to Sears Home Appliances and Services for this post I talked to one of their appliance staff about shopping for a dishwasher. He was friendly and thorough, and knew more than I thought you could know about dishwashers. I asked about mid-price range dishwashers, stainless steel look, hopefully something quiet. Some things I learned...

    • Nicer newer dishwashers have stainless steel interiors which makes them much quieter than ones with plastic interiors (like our builder-grade one at home).
    • A lot of them have a food filter/trash area inside that you can easily see and clean out--so you don't have to rinse all the food off before washing.
    • Most models are extremely water-efficient... the Kenmore Elite models we looked at used only about 15 gallons for the express wash, and 30+ for the standard. Much more efficient than washing dishes by hand, too.
    • Some of the models have adjustable racks so you can raise or lower the top rack depending on what you put on the bottom! This would be so useful for washing bigger pots and pans!
    • There are a lot of very cool handles on dishwashers, with the buttons on the top (looks sleek but also keeps them from accidentally being pushed by kids or people squeezing past). Bosch's models have handle options for the same dishwasher models. I loved the industrial handles on this Kitchen Aid dishwasher.

    Click on over to Sears Home Appliances and Services to see the great prices and selection! And visit your local store if you have questions. They and their staff are "House Experts for Homeowners."

    Thanks to Sears Home Appliances and Services for sponsoring this post!

    No comments

    12.15.2015

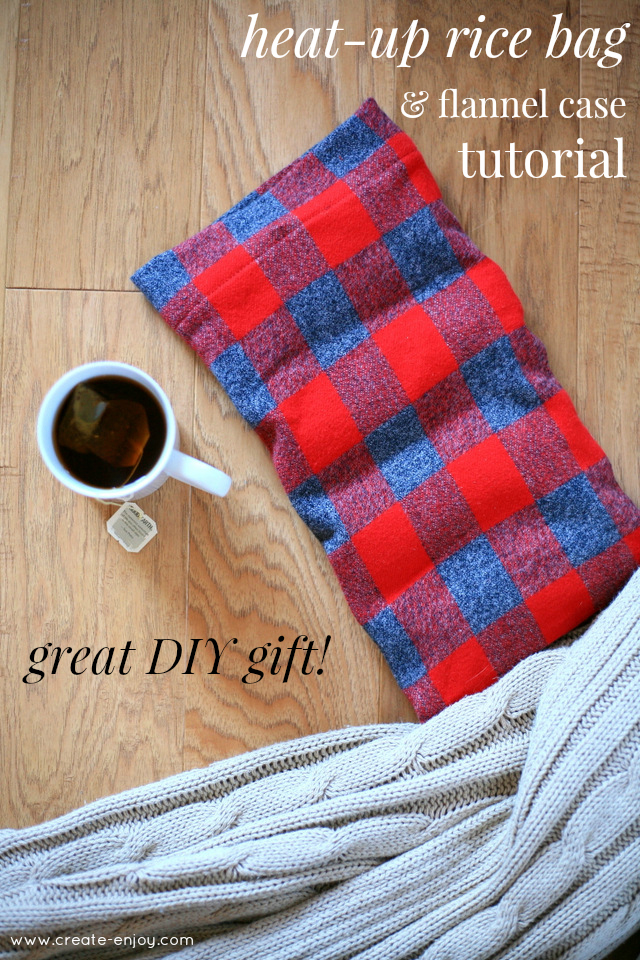
    Easy heat-up rice bag and flannel case tutorial! Great DIY gift

    This is one of the oldest DIY projects I've been doing because it's so practical and obvious. I've made several of them to give as gifts and for ourselves, and they do wear out (or burn) over time, so this time when I made us another one I took photos and wrote up these instructions so you can make one too!

    When I was little my mom ordered a microwaveable barley-filled fabric pillow ("the barley bag") from some specialty catalog--for treating sore muscles, warming the end of the bed, etc. We loved it! We would microwave it for 2-3 minutes and use it sometimes just for comfort in the winter. Later we got one filled with rice, which was good because it had more weight to it so it would balance on your shoulders or neck.

    Then I figured out how to make my own, to the exact size and specifications I needed! Plus I make these nice flannel pillowcases for them--cozy and washable so the bags stay nice longer.

    They are an EXCELLENT holiday gift (one year I made them for several people, each with custom flannel cases for their style/colors) and so useful to have around the house! Here's an easy tutorial!


    DIY Heat-Up Rice Bag & Case Tutorial


    You Will Need:


    • 1/4 yard cotton canvas (doesn't have to be pre-washed)
    • 1/4 yard cotton flannel (pre-washed)
    • 1 package extra wide double fold bias tape (ideally matching the canvas--I didn't have any natural color! Oops!)
    • About 2 lbs rice

    Instructions:


    1. Cut out the bag and pillowcase. You can make them any size you want, but keep in mind you'll be using 1/2" seam allowances on three sides and covering the seam allowance on the top edge, so it'll be part of the finished size. For a neck wrapper bag, you may want a longer, narrower bag and pillowcase; for one to put on your belly or low back, maybe a more square rectangle. I recommend making the flannel case about 1/2" larger than the rice bag at finished size.

    I cut my canvas piece 15"x8" and my flannel 18"x9".

    2. Sew the short seams and bottom long seam of the rice bag, right sides together. Use a 1/2" seam allowance.

    Trim corners and press seams open, then flip right sides out and press flat.

    3. Measure and mark to divide the bag into four channels. (If you used my dimensions, yours will be 3.5" wide.)

    Pin the front and back of the bag together to keep it flat.

    4. Sew the channels closed, along the lines you marked and pinned.

    5. Fill the channels about 2/3 full with rice. Pour carefully and keep the bag upright wedged between your desk and your lap or something. Careful!

    6. Pin the tops of the channels closed and pin the double fold bias tape over, overlapping the full width of the tape. Lots of pins.

    7. Sew through all layers. (I know this isn't how you typically use double fold bias tape, but it's really hard to sew the bag when it's full of rice so I use this method to save the stress of maneuvering it. Plus, this part never shows when you have the case on. And, ideally your bias tape and thread color will match your canvas!)

    The rice bag is done!

    8. Sew the long seams and bottom short seam of the flannel case, right sides together, with a 1/2" seam allowance.

    Press seams open.

    9. Press the unsewn edge under 1/2", then a deeper amount for the hem. Depending on your proportions, I recommend a 2" hem, which is what you'll have room for if you use my cutting dimensions. Pin in place.

    10. Sew the hem.

    Now heat up and enjoy this winter!

    People love getting these as gifts!

    No comments

    12.12.2015

    The new classic holiday cards! Plus a Minted GIVEAWAY!

    Our holiday cards = done. We cut down our tree the other weekend with friends and traded photos of each other at the farm. Cutting down a tree isn't something I grew up with (I'm an only child and my parents aren't too festive, and we bought our trees from the grocery store parking lot) but husband has been cutting one down with his family forever and it's a tradition I'm so happy to adopt now that we're on our own.

    I know it's not an original idea, but I really wanted to capture it and share with our family and friends on our Christmas card this year!

    Read on for details on how you can win a $125 giveaway to Minted to use on your holiday cards, wrapping paper/materials, art or home decor, party decor, whatever you want! They also have gorgeous non-photo holiday cards!

    The farm is so pretty!

    We tried some traditional poses...

    Plus our favorite party trick, trading piggyback rides...

    Then we actually picked out a tree...

    And tried an action shot! (Well, he was working, anyway. I just stood there and smiled.)

    I wanted to use a kind of goofy photo for our cards to send to family! It's not that interesting to see a photo of the two of us just smiling at the camera, not doing anything. We look pretty much the same as we did last year's cards.

    Minted has the greatest holiday cards, all designed by independent artists, and they'll help you customize the card with text placement, colors, etc. It can be hard to choose a design when there are so many good ones!! So I went simple and chose a nice white script over our photo of choice.

    Also, the GREATEST thing is that Minted can print your return address on the back AND you can upload a spreadsheet of all your recipients/addresses--so it barely takes any time at all to get them mailed!! (I whited mine out in these pics but you get the idea!)

    Enter the giveaway here!

    Good luck!!

    And if you don't win, check out the total order discount going on on Minted right now, plus free shipping deal!

    No comments

    Search

    © Create / Enjoy • Theme by Maira G.