WELCOME

Hello! I'm Suzannah, a serious DIYer and mom of two little ones. Follow along with my DIY fixer upper house renovations, sewing and crafty projects, real food recipes, and de-stressing goals.
I believe you can love your home just the way it is, AND have the power to design and make big changes to make it better.
I'm also the author of DIY Wardrobe Makeovers!

4.29.2013

How to Wear DIY: A summer dress for a springtime baby shower

Went to a baby shower this weekend! I've only been to one before and didn't really know what to expect, but the invitations were pale pink, and it's a baby girl, so... I figured it's be best to wear pastel colors and something girly, like a dress!

Turns out I don't have anything pale pink. Not really, anyway. I love pink, but have very little to wear in it; actually have a lot more pale blue things. I also found this pale yellow seersucker dress I made years ago. It's a perfect baby color, right?

To make it work for spring, I added my fave lightweight denim button-up and a wide belt. And--first time this year--open-toed shoes!!!
 Shirt: Target via Goodwill (similar/similar). Necklace and earrings: Forever 21
Sunglasses: ? Belt: Vintage. Shoes: Marshall's (similar). Dress: Homemade/DIY!

This weekend also marks the first day I got to wear shorts. Both gym shorts, and then denim ones. We had plenty of sunshine and 70 and 80 degree weather! Hoping for lots more before the rain comes back in June, like it often does.

Have you pulled out the open toes, shorts, or summer dresses yet!?

11 comments

4.26.2013

Little blogging tips Part 6

Part 6 of my loosely ongoing series of little blogging tips! One hobbyist blogger to others. Hope you enjoy these and get a little blogging inspiration!

Suzannah's blogging tip #16: Use the free blogging tools that are available to you--today's example, comment moderation systems like Disqus. I really appreciate how easy it is to use Blogger, and even WordPress, but let's face it--their default comment systems are not very good. If someone comments on a post asking a question, I can reply using Blogger's (relatively new) "threaded comment" layout, but the user doesn't get any kind of notification that I've replied. So they'd have to remember to check back to the original post! Not very helpful. I'd seen comment systems like Disqus on bigger blogs but hadn't realized until recently that I could use them, too! Disqus was easy to install and I love how simple it is to use. I hope you all (any of you who've asked questions in the comments to a post, anyway!) appreciate getting a notification when I reply!

Suzannah's blogging tip #17: Blog consistently--doesn't have to be every day, or 4 times a week or anything, just pick a schedule you can stick to and then stick to it. My husband has been blogging at his blog, Grassfed Geek, pretty regularly and I'm so proud of him, but he's still getting used to thinking about having an editorial calendar. His goal now is to blog twice a week, something he can fit into his schedule manage-ably and without too much stress (although it's still sometimes hard for him to remember to jot down post ideas and thoughts!). (Update: He's mostly stopped blogging for now. Bad example!! Haha.) Maybe later, you can blog more frequently, or with more in-depth posts, but if your goal is to have a bigger or fancier blog someday, you've got to start off with a piece you can chew on now so you can learn those skills for later!
My blogging view from last weekend--editing pics on one screen and watching movies on the other!

Suzannah's blogging tip #18: Hyperlinks. Put them in your posts when you talk about brands, organizations, other blogs, even new concepts (link to a Wikipedia page or other good source). A blog post with links is so much less static, more interactive, more engaging, than simply a post of plain text and maybe some photos. Reach out to the world with your posts, and encourage your readers to learn with you!

Helping my hubby out with his blog has got me thinking about some of these recent blogging tips. What have you been ruminating on lately?? Learn anything new, like I did with Disqus??! Any other comment systems work better for you?! (Always learning!)

Happy weekend!!

9 comments

4.24.2013

Pretty pictures of summer West Elm and Market goodies

Last week I went to a super fun event put on by West Elm for media and bloggers--and am so honored to be invited! Our local store hosts these to launch their new lines, and I've never been able to make it before, but I am SO glad I did last week. Not only did we get a fun tour around the store to look at all the pretty new summer line (and new Market line amazingness), we had a great time chatting and ended up talking blogging and PR and brand partnerships and social media... met some great ladies, with the store and their PR firm, and some other Portland bloggers!

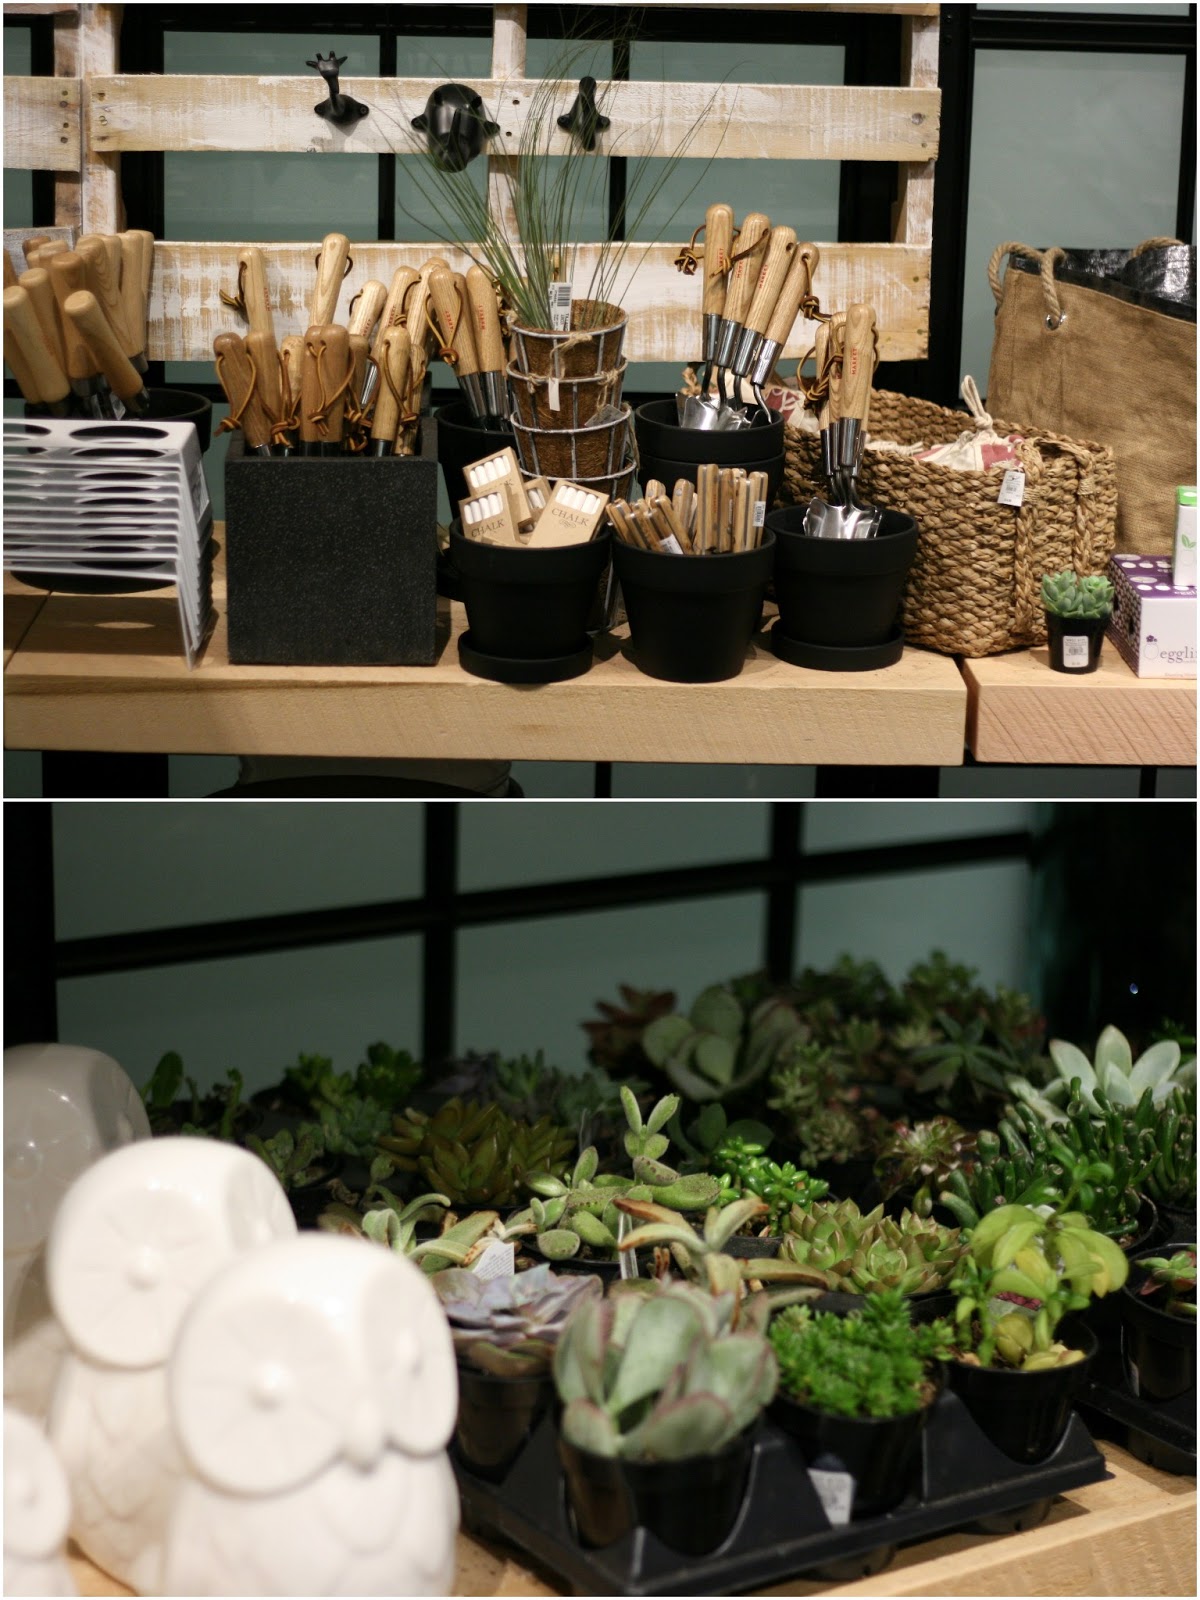
It's no secret that I love West Elm, so I love checking out their new stuff and hearing about their brand. I brought my camera and took some quick pics to remember it by! Here are some summery faves...

I just absolutely loved their gardening stuff. I have virtually no gardening skill but I'm learning, and I really love the fresh look of all the gardening stuff in the store, especially since I hadn't been there since around the holidays! Look how fresh!

Then we got to check out the Market line. Portland is one of only a few stores with this line, so we're lucky... brand new collection of, as the West Elm PR gal described it, "everything you'd expect at the neighborhood general store." With some vintage flair, definitely.

My coworker who lives in a cute '20's house with a tiny kitchen loooooves the Smeg fridge, and I could seriously need one of the old-fashioned canvas aprons.

The Market shops at different stores are going to carry local products for those regions, too, which is super cool. So if you have a favorite brand of artisan food product (we have so many in Portland!!), they're taking recommendations at your local West Elm Market!

Definitely got me inspired for clean, simple pieces in our house, and excited for some container gardening and indoor plants. And love the vintagey looks, too.

Also, I'm so glad I went to the preview event and so excited by the example West Elm has created with their blogger, author, and other partnerships. It's so cool to talk with local bloggers and PR pros about blogging and collaboration ideas!

1 comment

4.22.2013

Sweater into Peter Pan collar top makeover

It's been a while since I did a sweater makeover... I did this one on a whim and pulled this sweater out of my Goodwill pile, but it's a super nice one--100% wool!--and I'm glad I found a new use for it.

I went a little bias tape crazy since Kollabora sent me some for my book and I had a few extra colors... this 1/2" double fold bias tape in bright, almost neon red was almost perfect for the sweater! So I figured it was meant to be, and used it on the armholes and on the separate collar... photos below. I also used lightweight Heat N Bond iron-on from Kollabora to interface the outer piece of the collar.

Here's the "before" and materials--turned these into a fun shell sweater with a sort of Peter Pan collar!

Before/after!


Want a tutorial?


First I trimmed off the sleeves carefully and used the double fold bias tape to finish the armhole edges, sewing once to the narrower side and then "stitching in the ditch."

For the collar (which is not quite a Peter Pan collar, actually, my bad... I guess I gave it just some subtle points.), I used the sweater as a pattern and cut out the shape I wanted on the fold (tutorial for that process here), and cut two of the collar fabric. Then cut one of the fusible interfacing and ironed it on to attach it.

Trick for making the collar lay flat is to TRIM a tiny wedge off the center back of the collar when you press it flat after sewing wrong sides together--since it's hard to understitch such a tiny item, you have to just press really well and clip so that the bottom piece is actually narrower than the top. This way it won't roll out from the bottom and show at the seam edge.

I used the bright bias tape as a super quick and easy binding for the collar.

Then I hand-sewed it in the inside neck edge of the sweater! And gave it some serious stitches at the center front where the bias ends overlap--to keep it from separating as the neckline stretches. Luckily it does still fit over my head!

I like the cute collar look, and adding it to the garment makes it easy to wear! (I also did a tutorial for a detachable Peter Pan collar here, very fun too if you want to switch it out with different garments!)

4 comments

4.19.2013

How to Wear DIY: Printed jeans and dyed wedges

This outfit, featuring those jeans I printed and the amazing wedges I dyed (is it too early for open-toed wedges and mint???!) is about the shape. Straight legs, short, puffy sleeves, tucked in... in my mind, I'm channeling Kendi and Rachel Bilson with this one. Seriously like years ago, someone printed this photo of Rachel Bilson in a tie neck short, puffy-sleeved blouse tucked into straight jeans. Remember?


Source: Cannot find original source!!!


It's bugging me that I can't find the original photo source, sorry 'bout that... I did try. But here are a couple pins that get at the same look!


Blouse: Gap via Goodwill. Necklace: Forever 21. Belt: Charlotte Russe.
Jeans: DIY printed! Wedges: DIY, dyed!

Hope I can bring these jeans, which I did in January, into spring!

So, uh, is it too early for wedges and mint??

5 comments

4.17.2013

Skirt surgery! The remade neon pencil skirt

I have been craving COLOR this spring! So when I found a neon candy apple green pencil skirt at Goodwill I bought it even though they didn't have my size. They had a bunch donated from Target, tags still on and all, but they were all larger than I wear. But I loved the bright color!

So I did some skirt surgery. Truly, surgery. Took it apart, extracted some stuff, put it back together. Here's the rest of the story...

Okay, so this is super embarassing and I'm sorry--I don't have a "before" pic of the skirt. How is this possible?!!?! Again, so sorry. But, Target still sells the skirt in different colors so you can see it on their website... here it is in blue and orange.

The "before"! Sits low on the hips, flat front.

Source: Target Merona skirt

I did take a pic of the back. Weird, I know. So here's the BEFORE (back only, oops!!)/AFTER:

I took in a LOT from the waist and hips!

I took apart the front waistband at the center front and side seams, took a vertical dart in the waistband (outer and lining), pressed, sewed back together. Then pleated the excess on the sides.

(It was still too big...) so I took in the side seams, too. Tapered down to the hem. Made it sit a little higher on my waist, too.

If I made it sit much higher, I'd need to deepen the darts on the butt, but I think it's okay for now. I love the color, and like it more now that it's a little shorter since it sits higher! And it's unique! ;)

I highly recommend practicing your skirt surgery skills on some skirts for spring!!

6 comments

4.15.2013

Made myself a classic striped dress

Another new dress for spring! I think I've been dreaming about this one for a while, actually, looking back through all my fun dress inspirations on my dresses pinboard...

My navy and white stripe dress inspiration goes way back to the beginning of my Pinterest days! See what I mean?


So it's very exciting that I was able to bring these dreams to life with some fabric from Kollabora--they sent it to me for my book but it didn't make it in to any of those projects. So instead, I whipped this dress up using Simplicity 1873 and the short sleeves from Simplicity 2444.  The fabric is a knit jersey, but I figured I could use it for a fitted dress! So it ended up very comfy and soft, but still keeping its shape just fine.

Front/side/back!

As seen in my pins... the classic striped dress is great with a belt. I grabbed this one from my closet. With/without...

Now for spring weather! Hope I can wear this with a lot of things this spring and summer... any ideas!??

14 comments

4.12.2013

How to make fresh coconut milk--from a sweet young coconut!

I'm so excited to share this today, and so proud of my husband for [blogging at all and] posting this awesome photo tutorial (photos by yours truly) on how to make your own coconut milk (fresh, sweet, and preservative- and filler-free!) with a sweet young coconut--rather than dried coconut. No boiling water involved!

I've seen people make coconut milk at home by mixing dried coconut flakes with hot water, or even by chopping up a mature coconut and mixing with hot water... blended in a blender, then strained. But in my raw vegan days, I learned a much better way!!


Sweet young coconuts are MUCH, MUCH easier to open than mature coconuts--no hammer involved at all. ;) And their meat is soft and delicious! And they're filled with sweet, fresh coconut water, like the kind you can buy in soda cans at the store only sooooo much better. Sometimes we open them and drink the water and snack on the meat. Yummm.

But, sometimes we make our own coconut milk, as my husband demonstrates in the tutorial on his blog this week.

P.S. I'm pretty proud of my photos. I'm learning!! Love my 50mm lens, which made these pics possible. ;)

Hope you enjoy the tutorial!!
7 comments

4.11.2013

How to make a peplum top out of any dress pattern! Two ways...

I know that peplums may not be the first trend you think of when you think "spring"... but I definitely look forward to a chance to wear a top without several layers under and over it to keep warm, and I've really loved wearing the peplum tops I made last summer! (See all my peplum projects here!)

While I'm pretty sure you can find a pattern for a peplum tank these days, I've never used one or needed one. You can easily use any natural waist dress pattern and add a short peplum-length skirt instead of the skirt the pattern calls for! And, dress patterns tend to have a better fit than a tank top or blouse pattern, which are usually even looser and hard to fit.

Here's some examples. I've used two methods for converting fave dress patterns to top patterns.

Peplum Top Method 1: Circle Skirt


You don't need a pattern for a circle skirt. There are some great tutorials out there, so check out this or this and cut a 1/2, 3/4, or full circle skirt for your top! The length only needs to be about 8"-10", usually, depending on your height and how long you want the top to be.

Circle skirts are kind of a pain to hem, so for mine I've twice done a lining of self-fabric or coordinating fabric and sew right sides together along the long (outer circle edge) side. Then just sew right sides together on the outer fabric to the bodice, and finish your seam allowance inside.

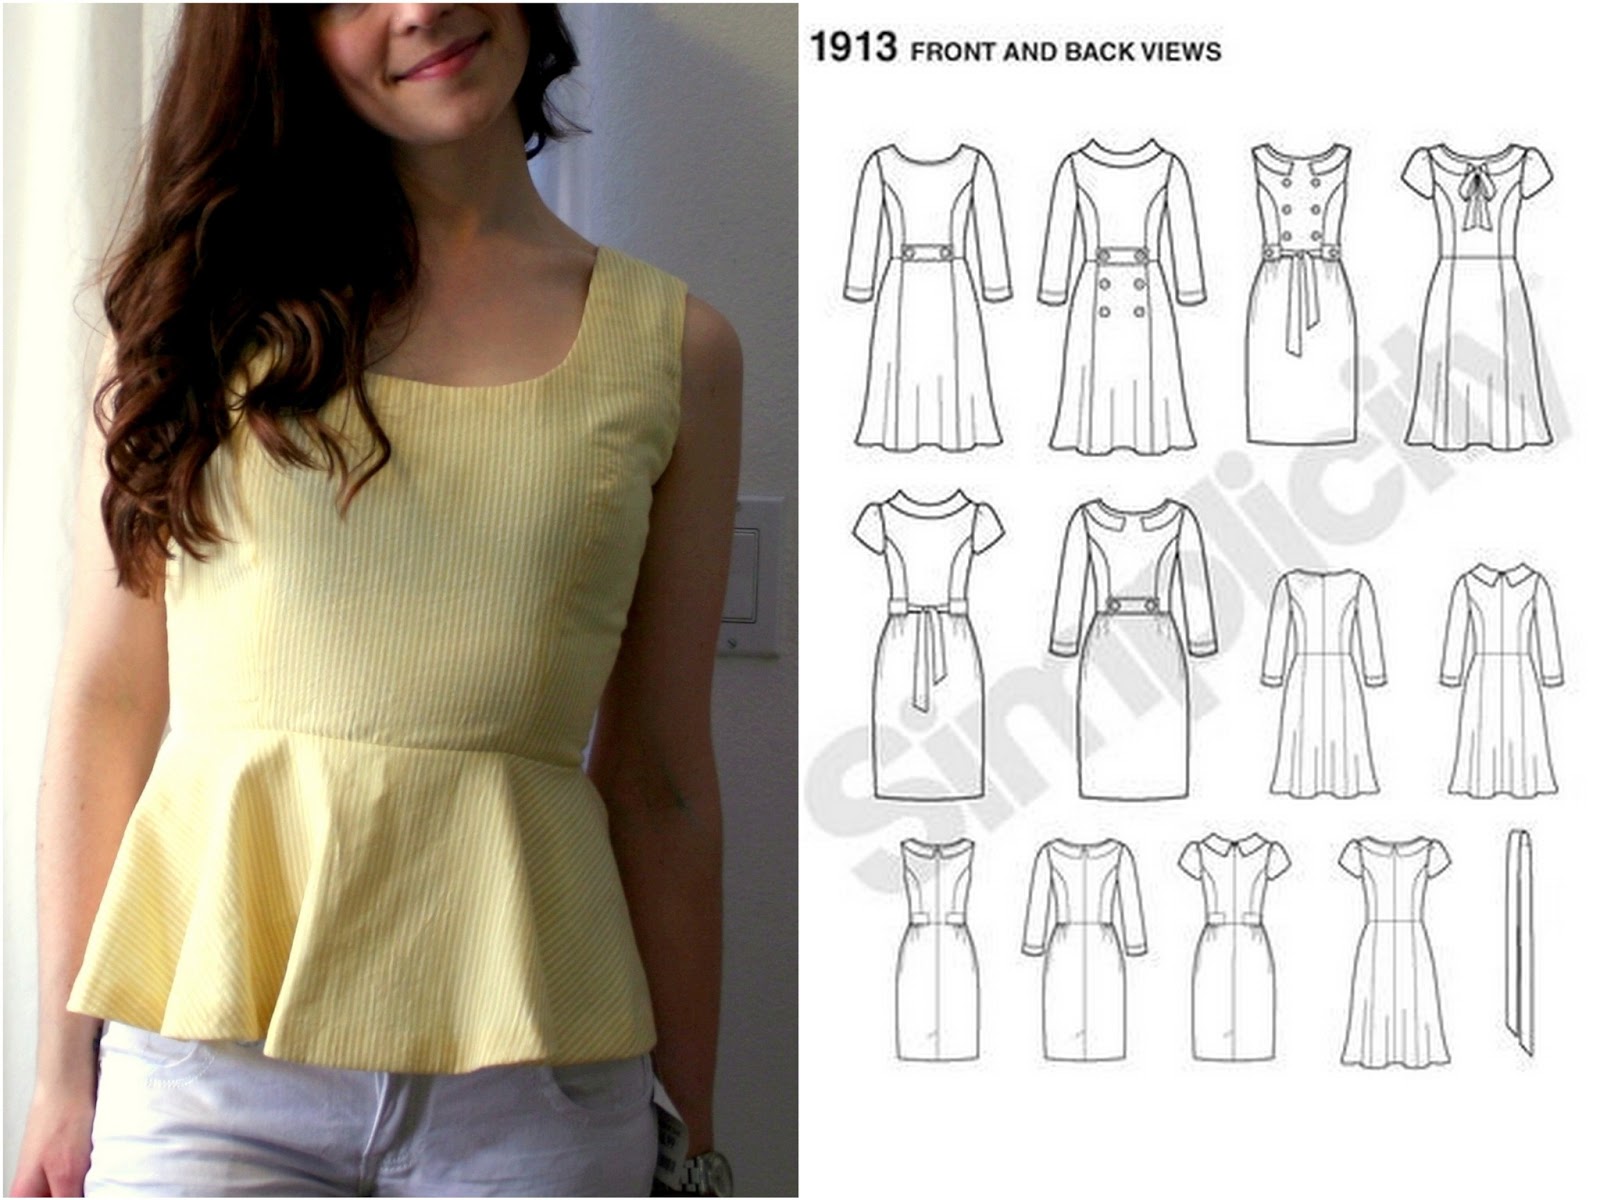
Circle skirt peplums work well on a fitted top like one of these...

My seersucker princess seam tank and Simplicity 1913


My pleated front bodice from Simplicity 1873


This one actually was a dress first, then a top, made with Simplicity 2444

Peplum Top Method 2: Gathered Skirt


Even easier than a circle skirt is a gathered skirt. Seriously snip along the selvage of your fabric about 8"-10", or whatever length you want, and tear across to the other selvage. Now you have a rectangle approx. 10"x45", for standard fabric, and once you sew the selvages together (at least at the hem, maybe leaving an opening at the top for your zipper) you have a wide tube. Then hem the bottom edge and gather the top edge. Then sew to your bodice the same way you would anything with a gathered skirt or cuff!

I love the look of the gathered peplum with a double peplum (pepla plural? no...) or with a looser top. Here's some examples...

My recent experimentation with a looser peplum top

And some inspirations for future projects! For these double peplum tops, you'd create two peplum tubes, one shorter than the other, then hem... pin together at the top (raw) edge and gather both as one. Then sew to bodice.

Source: pinerly.com via Suzannah on Pinterest
Source: pennypincherfashion.com via Suzannah on Pinterest

Ready for some springy top-sewing?? Anyone do any great peplum inventions lately?!!

9 comments

4.08.2013

How to Wear DIY: Blue skirt from Megan Nielsen pattern, and DIY shoes

After a couple weeks of deceptive sun and high '70's temperatures... we've had some rain recently. So, my attempt to look springy despite a cruel bit of rain over the weekend.

I'm craving COLOR!! So I pulled out the bright skirt I made last spring from Megan Nielsen's Kelly Skirt pattern I got to test out. I'm slowly pulling the summer clothes out of the guest room closet, and this was one of those pieces. Paired with a baseball tee and a glam necklace for fun!!

Oh, and I guess this outfit is a two-fer of DIY pieces... also wearing those wedges I spray-painted and love so much more now. They're super versatile and easy to wear! I need more wedges, I think...
Tee and necklace: F21. Clutch: Target. Watch: Ross.
Skirt: DIY, here!Shoes: DIY painted!

Hoping for some sun soon!

6 comments

4.02.2013

Super easy Paleo-friendly chocolate cupcakes

I used to be quite the baker. In high school and college, I played around with my favorite cake and cookie recipes, kept a binder of the best magazine pages and printed notes, and had even recreated the world's best chocolate chip cookies, as determined by The Splendid Table.

But, three years ago I became raw vegan and stopped eating grains and anything baked in an oven! I had no problem replacing baked flour and sugar with ground, frozen and dehydrated nuts and dried fruits. Then, four months ago, after much research and deliberation, I adopted a diet full of healthy fats and clean animal products, and lots of veggies but way less fruit sugars.

There are tons of amaaaaazing raw vegan dessert recipes out there, but so many of them involve agave or dried fruit, neither of which I eat any more. I don't need to find a ton of super sweet dessert recipes that I can make (since now that I eat enough fat I don't have crazy sweet cravings anymore...), but it's nice to have a couple of options for healthy, hearty baked goods I can make and have available when I want a little something extra after a meal or something. (Also nice to have another vessel for grassfed butter when I'm hungry for fat!)

So, I dug around a little but got kinda overwhelmed by the tons of awesome Paleo sites out there, although some of them go a little overboard with the high fructose fruits and other not-everyday-healthy dessert ingredients, too.

Paleo cupcake recipe search


I wanted something chocolatey--brownies or cupcakes, I guess. I used to make raw vegan brownies all the time and keep them in the freezer--basically homemade energy bars. But almost all the Paleo brownie and cupcake recipes I could find used coconut flour, which is awesome in theory, but... I'm sorry, I don't understand how much else you'd have to use to make it not super dry and yet greasy at the same time!! I did some coconut flour experiments early into this Paleo journey that were hard to eat without lots of creamy almond butter or just butter on top... then I read the bag and saw that you can replace up to 1/8 or something of the flour the recipe calls for with it. Not the whole amount. Oops!!

So I found this recipe for "chocolate Paleo mug cake," and, having never made conventional mug cake, wasn't looking for a single-serving dish, and definitely not something microwaved. But, I loved the simple ingredient list (almond flour, cocoa powder, eggs, honey, vanilla, salt, cinnamon) and figured I could try modifying it.

After trying some variations on that and coming out with thick cupcake batter, I combined it with this cupcake recipe and ended up with a great almond/coconut flour Paleo cupcake recipe to share.


Grain-free/Paleo cupcake recipe!

Makes 8 cupcakes.

Dry Ingredients:
1/4 cups almond meal/flour or sunflower flour (you can use up to 2 tbsp coconut flour as well if your batter is too thin)
1/4 cups cocoa powder
1/4 tsp salt or to taste
1/4 tsp baking powder

Wet Ingredients: 
1/3 cup honey or coconut palm sugar
4 eggs
1/2 cup coconut oil or butter (I softened mine in the mixing bowl in the oven while it warmed up!)
2 tsp vanilla extract

They are as easy to make as traditional flour/sugar cupcakes! Preheat the oven to 350 degrees first. Get out your standard muffin tin and paper or silicone liners.

1. Blend the dry ingredients. I like to use my food processor when cocoa powder is involved, since it often seems to end up forming some pretty serious clumps of dry, chalky cocoa powder among the smooth, rich batter. Breaking them up very small, mixed in with the flour, helps a lot.

2. Mix the dry ingredients in a mixing bowl. Stir them up thoroughly...

3. Combine wet and dry ingredients in food processor. Pulse until mixed. The mixture will be very thin. (Here's where I added 2 tbsp coconut flour to mine to make it a little thicker.)

5. Pour 1/4 cup batter into cupcake cups and bake! About 15-20 minutes at 350 degrees.


Top yours with any homemade frosting recipe - any of these would be great! I used a variation on the coconut cream icing recipe - I sweetened mine with honey and it was ridiculously good. Like, magical flavor/sweetness.


I'm sure some of you have far more experience than I do in gluten-free baking. Any tips on using coconut flour???! Or almond flour?

10 comments

Search

© Create / Enjoy • Theme by Maira G.