

Trend & DIY: high neck tiny ruffle tops (with tutorial)
So early this season I went to Gap.com and saw in their list of early fall must-haves, among the jeans and sweaters: "5. The Printed Blouse (with a ruffled neckline that's oh-so-pretty." It was a boxy, loose top but indeed the neckline was interesting! I then saw a couple similar ones in other places. See??

The Gap top has elastic at the neckline, while the others have different shapes including yokes. The tiny ruffle detail looks good on a lot of tank shapes! I figured I could give it a shot.
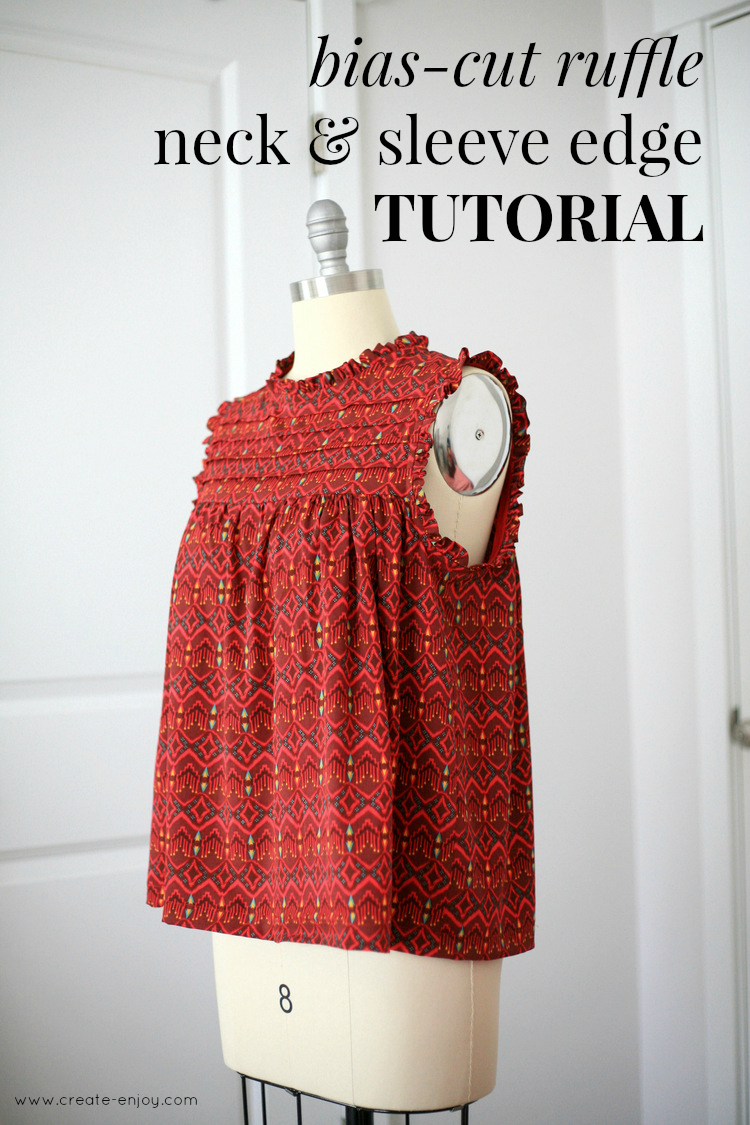
Tiny bias-cut ruffle trim tutorial
You will need:
- Top pattern of choice (I used McCall's M7095)
- Fabric yardage needed for pattern plus 0.5-1 yards for bias strips
- Coordinating color single-fold bias tape
Instructions:
1. Cut out the pattern as desired. I cut the armholes and neck opening a little narrower than the pattern called for since this trim method uses a 1/2" seam allowance on them rather than the 5/8" most patterns call for.
2. Cut 2" wide strips of bias. I cut about 140" and used all but about 20" of it.
3. Sew the bias strips together at the ends and press seams open, creating one very long strip.
4. Press the bias strips in half and pin in place.
2. Cut 2" wide strips of bias. I cut about 140" and used all but about 20" of it.
3. Sew the bias strips together at the ends and press seams open, creating one very long strip.
4. Press the bias strips in half and pin in place.

5. Run a long stitch and gather the bias strip, using a 3/8" seam allowance.

6. Sew the ruffled bias strip into the arm or neck opening, using a 1/2" seam allowance. At the side seam of the armholes, cut the corner so the bias strip curves and no raw edges are exposed.


7. Open your coordinating single-fold bias tape and sew on top of the inside crease, also leaving a 1/2" seam allowance on the top side. (I didn't have any single-fold so I cut apart some double-fold I had, hence the extra width.)

8. Snip into the main bodice side seam allowance in the curves of the armholes.

9. Top stitch the bias tape trim edge, concealing the seam allowance. (I did this from the outside to make sure everything stayed flat. You could do it from the underside if you're concerned about the seam allowance staying in position and being concealed.)
See the center seam point I was talking about above? The bias strip ends curve down so the raw edges are absorbed.

Ta-da!


This could work on all kinds of top or dress styles! Pin it to save for later!
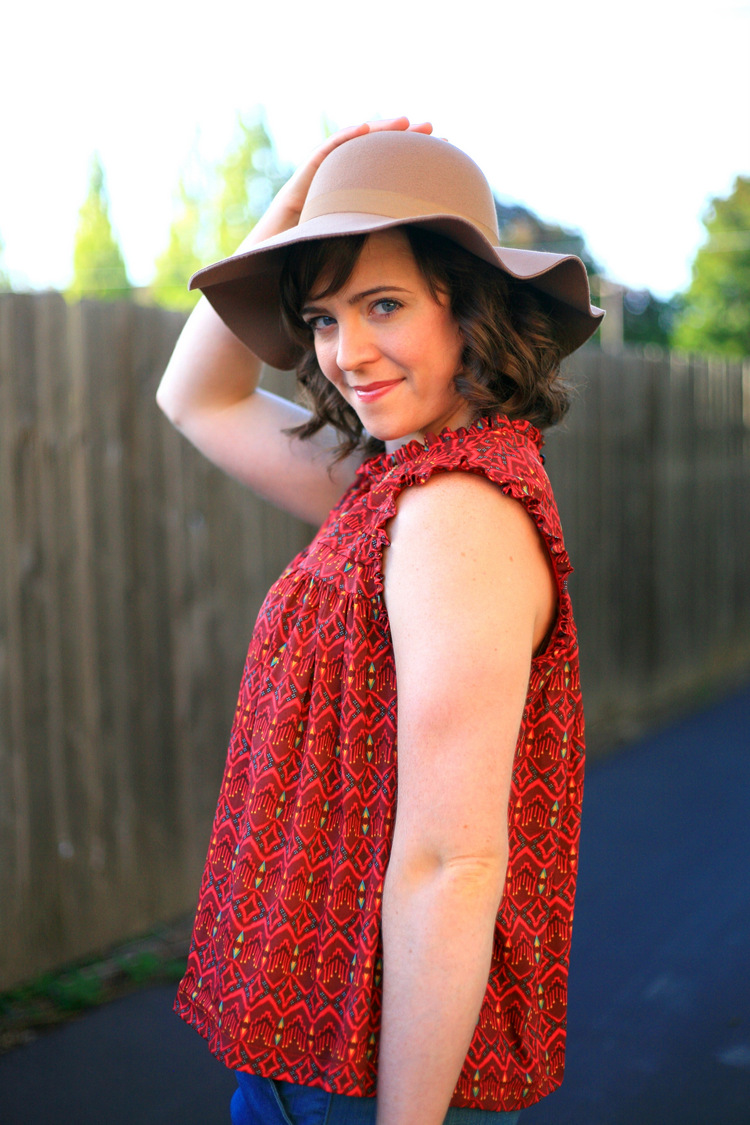
A little more about the top I made... as I said, I used McCall's M7095 but I modified it a ton. I didn't do the front opening; instead I added the shank button closure at the back. I also really liked the look of the Anthro top with the tiny pleats across the yoke! So I cut my yoke piece extra long and added some 1/4" pleats evenly spaced.
I didn't realize it would have a 70's vibe, but turns out it does!


The pattern is not printed straight on the fabric, which I corrected on the yoke when I made the pleats but I couldn't really correct across the whole bodice. So it looks sort of slanty. Less noticeable on me than on the mannequin, I hope!


Pattern: McCall's M7095
Modifications:
- Did the bias ruffle trim rather than the neck facing and bias armhole treatment called for
- Added four tucks in the front yoke
- Did not do the neck opening at the front; instead added a placket and button with bias tape loop
I actually really like this pattern with all those modifications! The bodice is SO loose, I might try cutting it way narrower if I do this again. I recently saw a cute top at Gap Factory made of a plum knit in a similar shape with embroidery on the yoke but they didn't have my size... would be a fun DIY! (Here it is!)
If you aren't up for sewing your own but like this look, shop some of the inspirations here!
No comments
Post a Comment