WELCOME

Hello! I'm Suzannah, a serious DIYer and mom of two little ones. Follow along with my DIY fixer upper house renovations, sewing and crafty projects, real food recipes, and de-stressing goals.
I believe you can love your home just the way it is, AND have the power to design and make big changes to make it better.
I'm also the author of DIY Wardrobe Makeovers!

ORC Spring 2019
Showing posts with label ORC Spring 2019. Show all posts

5.16.2019

MCM-inspired black and brass bathroom reno BUDGET!

I love to share a budget breakdown of my projects because I track the costs so carefully myself, and am usually very budget-friendly, so want to inspire you that you don't have to be swimming in money to remodel a room in your home!!

I recently completed the design, some DIYs, and posts about this full bathroom reno for the spring One Room Challenge--literally everything changed except some of the drywall. This was not my home, and my clients/friends chose to hire out some of the work like replacing the window, so it's not exactly apples-to-apples if you choose to do something similar in your home, BUT I can still share so much with you about what costs to expect on this kind of project!

If you like budget breakdowns, you can also check out these, all DIY, most from my last house:

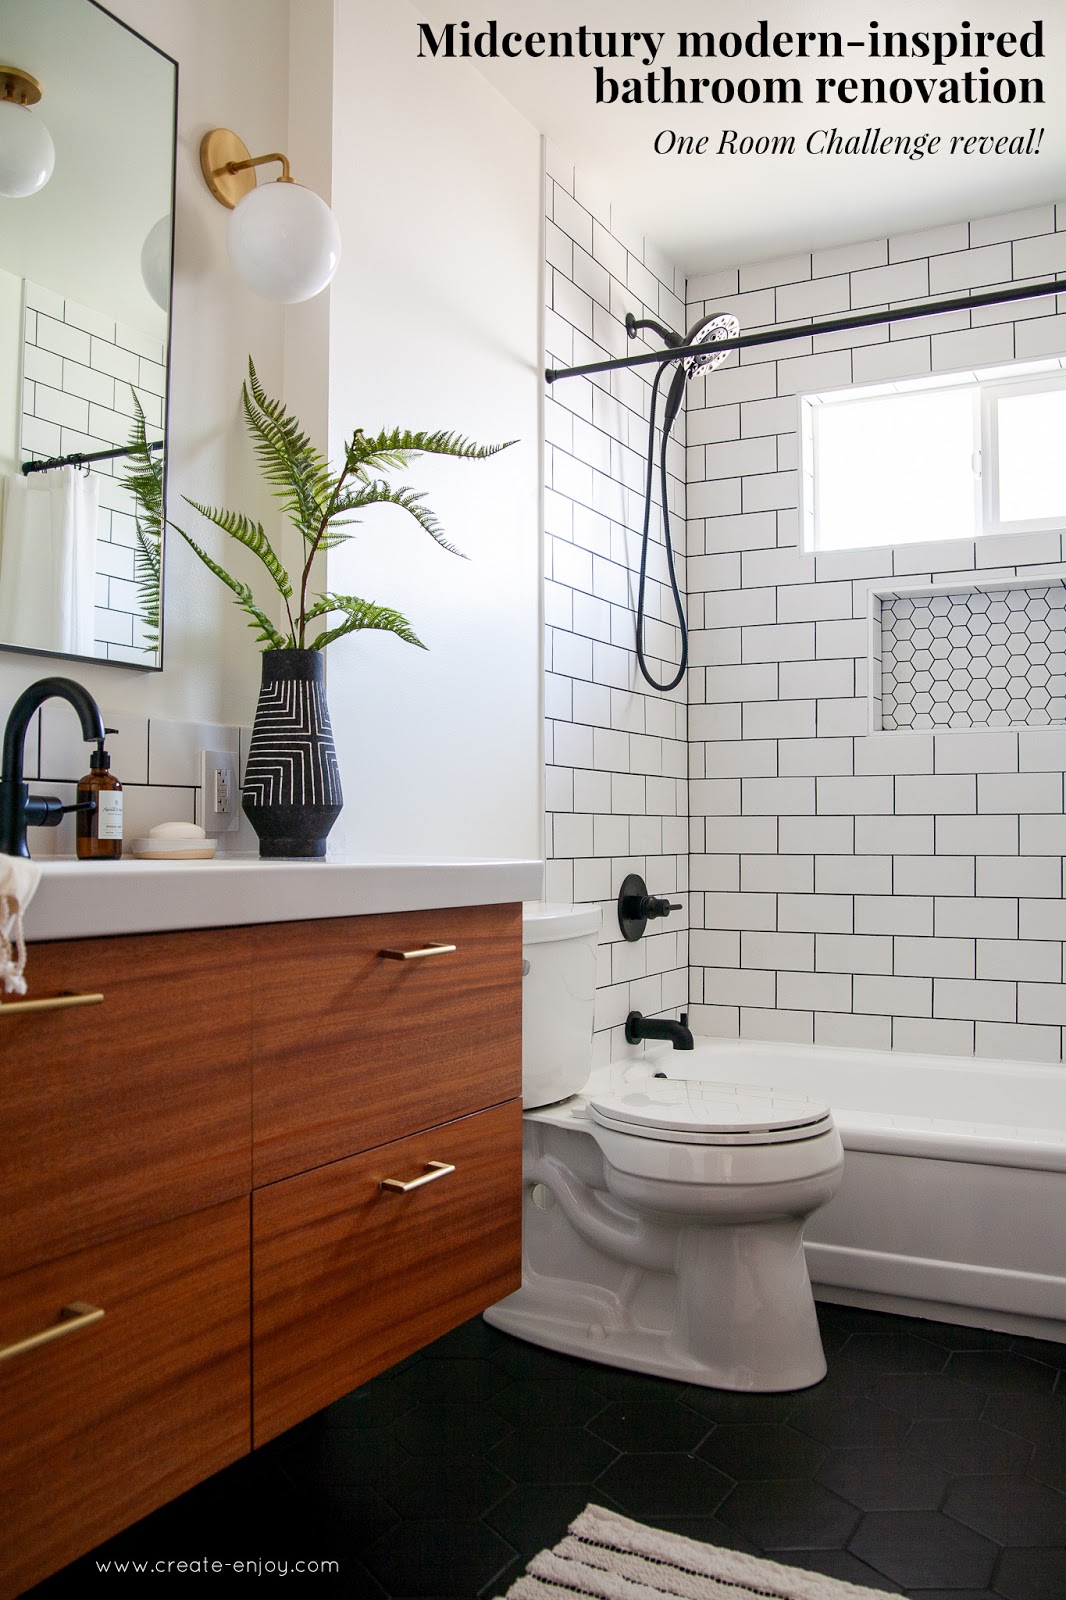
So, welcome to this bathroom! (You can see the full reveal post here with more details.) We tiled the floor and shower, replaced the vanity, mirror, and lighting, resurfaced the tub, and more.
No comments

5.10.2019

Favorite 6-week room makeovers from this season's ORC

This is such a fun week!! Hundreds of designers and bloggers have revealed their One Room Challenge room renos and there are TONS of inspiring ideas and pretty pictures to look at! (Here's my bathroom project reno reveal!) People who participate in and follow along with this event are also so supportive of each other and I love to shout out others who joined in!

There are 20 "featured designers" each ORC and this spring, I really loved a lot of them!! There is usually a great mix of styles but this season I though there were a lot more real-life home design inspirations! Check out all of the featured designers here.

Then there are the guest designers, like me--almost 200 of them! Check out all their reveals here. 

Favorite ORCs Spring 2019


First, the featured designers...

I LOVE this kitchen by House that Lars Built. So fresh, but such warm colors!
No comments

5.08.2019

Modern bathroom renovation REVEAL: The finished One Room Challenge!

The past 6 weeks I've been working on (well, my clients/friends have been doing most of the work on) a complete bathroom renovation! New flooring, new shower tile, new electrical and lighting, turning this pink and red 1960's bathroom into a dreamy modern space!

This was a BIG project with several hiccups and lessons along the way, so I am extra proud and excited to reveal it today!

Remember, you can find all the posts about this One Room Challenge here:
No comments

5.01.2019

Custom-look vanity for less with Semihandmade doors for Ikea cabinets!: Week 5 of the One Room Challenge

The One Room Challenge project bathroom is looking almost-functional! Floor and shower tile are in and grouted, baseboards are in and everything is painted, and the vanity is even installed!! This week I want to share with you why we chose the vanity option we did and how it's working.

It is really hard to find a high quality, real wood, modern designer-look bathroom vanity for a reasonable price. Even in a smaller size like we needed for this project (48"), we had a really hard time finding good options in a warm walnut- or mahogany-look wood, midcentury modern or other clean-lined style.

One great choice I'd seen around other blogs and designers' projects is Semihandmade custom fronts for IKEA cabinets and vanities. Semihandmade has a genius business model--because the options for kitchen cabinet and bathroom vanity fronts at IKEA are so limited and not real wood, Semihandmade was born to offer WAY more options of fronts that fit perfectly on the IKEA systems.

Thanks to Semihandmade for providing these vanity cabinet drawer fronts for our review.

This is week 5 of the 6-week One Room Challenge! See the other posts about this project here: 

This week, the vanity!

No comments

4.24.2019

5 (preventable) reasons DIY home reno projects fall behind schedule: Week 4 of the One Room Challenge

This week's One Room Challenge update is a little different... I do have some progress to share with you, but mostly I want to talk about why DIY home improvement projects like this one can fall WAY behind schedule--and how you can prevent it!

I'm working with my "clients"/good friends Matt and Gabriela on this project at their home. I'm the designer and consultant, and I've been going over at least once/weekend to help with labor like laying tile, but they're doing most of the work themselves (and have a contractor replacing a window). Matt and Gabriela are new homeowners and doing awesome projects around their house--they completely overhauled their yard last year and saved thousands by spending all their weekends tilling and demoing for a while!--but they're new to interior projects and have been nervous about this project.

If you haven't been following, here are the previous posts about this project, including where we're starting and more about the scope. It's a big project! 

And there are a lot of steps, scheduling, planning, and hard work that are going into it. And to be honest... we are making progress, but more slowly than I'd planned--we are several weeks behind the schedule I initially put together, which had us finishing a week early and not working much on weekdays. 

It's common for projects to have small delays and unexpected surprises. But, there are ways to avoid those changes affecting your overall schedule. With my friends/clients' permission (and contributions to these tips based on their experience this project!), I'm sharing 5 preventable reasons that DIY home reno projects fall behind schedule, and how you can avoid them on your project!
No comments

4.17.2019

How to lay big hexagon tile!: Week 3 of the One Room Challenge

We are making big progress on this bathroom reno!! I have been sharing updates in my Instagram stories, but wanted to dive deeper into one of the major elements of the project.

One design element that was essential to my clients from day one was larger scale, dark hexagon tile. Almost all the bathrooms they were inspired by featured black or grey 5-8" hexagons!

I had never laid large hex tile before--I've done mosaic hexagon tile, big squares, and subway tile--but I knew we could do it! It took some extra math and design, but DIY installation for my clients' beautiful off-black hex tile was totally doable and not that much harder than laying square tiles!

I also have to say... I did some googling on this and it seems there is a serious lack of tutorials for how to lay large hexagon tiles! I apologize if I missed any, but it seems like this post is needed! A lot of the tutorials are for mosaic hex tile, which is a different (easier) animal. (We used 1" and 2" mosaic hexagon tiles in two bathrooms at our last house--you can see a video about how we did both at the same time HERE!) There are also some cool videos out there, including this time lapse of a previous ORC and this contractor's entire process with some similar tiles. But I'd like to share the steps we used to lay these hex tiles carefully!

How to lay big hexagon tile


This tutorial will show you how to lay individual hexagon tiles on a bathroom floor!

For preparation, like you would do for any floor tile application, prepare your surface with backer board or other tile base. We used Schluter®-DITRA instead of concrete backer board to keep the tile well under the door swing. We also replaced the subfloor with a lower profile subfloor. (Read about our preparation in this post.) In the past I've just laid concrete backer board over the old particle board subfloor and it has worked fine. Do some research into the tile base that will work best for you depending on your floor construction!

Once you have your tile surface ready...

You will need:


Instructions:


1. Lay out your design. We did this using Adobe Illustrator, but you can use any graphics program and create your own scale. We did this in a few steps:

  1. Using a hand-sketch of the bathroom layout, we created an Illustrator base that is to scale, so 63" by 80". One inch in the graphic = one inch in the bathroom. (No conversions!)
  2. Then we added the notch of the wall, and 4" separation for the floor vent, dimensions for the toilet distance, etc.
  3. Then we created our tiles (ours were 7"x8") and a row of tiles with 1/8" scaled spacers, and copied it over and over again to fill the room.
  4. Once the room was (over)filled, we could scootch the whole tile layout up and down to play with where the cuts would land at the edges, focusing on the bathtub and door threshold as prominent areas.

This step was SO useful because it allowed us to see the ripple effects of lining up the tiles at any of the sides. We wanted both the tub edge and flooring threshold to look the nicest, as they'll be most visible, and just because of the size of the room that meant it didn't work to line up a full tile at either side.

We also played around with direction, though--these tiles are not symmetrical like a square or circle and so it gives a totally different look (and math) to turn them 90 degrees. Take a look at our options!

Option 1 looks cool, but check out the cuts around the floor vent and toilet. Also, if we used the edge of the tiles at the tub, we had a very tiny (hard to cut) row at the door (shown in red).

No comments

4.10.2019

Serious demo, and bronze vs. black fixtures: Week 2 of the One Room Challenge

As I shared last week... we will be making over a dated bathroom in just 6 weeks! We're midway through week 2 now, in the "it gets worse before it gets better" stage hands-down. MAJOR progress has occurred over the past week, including all the demo and looking at a ton of drawer pulls and faucets! We are having a hard time choosing black or brass fixtures, read on for that...

Plus, one of the issues that came up in this reno shows an example of how sometimes, the newbie DIYer route actually results in a higher quality project!

All the posts about this One Room Challenge:


My clients have a contractor coming in later this week to replace the window and plumbing, drywall, and tile around the shower. First, they had to demo that area, and we had originally planned to get going on the floor tile.

The first step was removing the vinyl flooring--not only to get it out of the way but also to see what was under it. Removing it was pretty easy. (Note: we know that the previous owners installed this flooring in the past 10 years, so we did not have to test it for asbestos.)

No comments

4.03.2019

1961 pink and red bathroom makeover!: Week 1 of the One Room Challenge

Today's a big day!!!!! Announcing a big project--I'm going to make over another room in just 6 weeks for the spring 2019 One Room Challenge! It's the 1961 pink and red main bathroom of my good friends Gabriela and Matt. Their home is clean, freshly painted, and well-maintained... but this bathroom still has the original PINK sink, tub, and toilet!! And needs a window replaced and some plumbing fixes as well. We are going to turn it into the modern midcentury-leaning space of their dreams!!

Read on to see the "before" pictures, inspirations, and design plan!

First, some eye candy. Gabriela and Matt are drawn to the warm woods of midcentury modern design, but lots of black and white. Below are some of their favorite inspiration rooms for this project. Note the dark hex floors, brass and black fixtures and mirrors, and teak-ey/walnut-ey vanities.
Source
Source
Source

No comments

Search

© Create / Enjoy • Theme by Maira G.