WELCOME

Hello! I'm Suzannah, a serious DIYer and mom of two little ones. Follow along with my DIY fixer upper house renovations, sewing and crafty projects, real food recipes, and de-stressing goals.
I believe you can love your home just the way it is, AND have the power to design and make big changes to make it better.
I'm also the author of DIY Wardrobe Makeovers!

2.13.2017

Moulding and the nail gun, estate sales, and the SWEETEST rug. #stanley90sreno week 18 progress

We are getting geared up for installing baseboards soon, but started out with some trim updates this weekend! And I went to 6 estate sales (we had 8 on the list but you know how it goes) and got the most fabulous vintage rug. OMG.

First a sneak peek of the rug. I cannot believe I own something this cool.

Okay, the trim project. So we need to install baseboards throughout the house now that the flooring is mostly in, but haven't bought it yet and am definitely dreading that project a little bit. I did want to get my feet wet a little though and we had a few pieces of trim that we had to remove to fix some drywall so we started out with the nail gun on those. My dad came over Saturday with his compressor and nail gun. We put the pieces back so now our sliding glass door and family room window finished (minus baseboards!).

I do need to fill and paint the nail gun holes, but... that is a pretty darn low priority compared with all of the other work we have to do around here. Womp womp.

Also, I NEED TO WASH THESE WINDOWS. WOW. SORRY.

We also made some big progress on our master bath--we are moving the functioning door from the toilet room (we will be tearing out that wall soon) to the entrance to the vanity room which leads into the closet and toilet room. It was formerly just a doorway with no door, so whoever's sleeping gets light shown into their eyes when the other person uses it. Not a great design.

So we removed the door opening trim...

And installed it in the main bathroom entry opening!

Now I need to fill those holes and prime and paint the whole frame--then we can install the door!!

Meanwhile, I'm still shopping. Everywhere. Online, on Craiglist, Facebook, and at 6 estate sales and a couple quick Goodwill stops this weekend! But my biggest purchase was this antique rug from someone on Craigslist. It was definitely more than I was hoping to spend for the family room rug, and we weren't sure if we might want a larger one, but the colors were SO perfect and it is absolutely insanely cool.

It's a nonstandard size, about 6'x10' I think, so we ran it the long way of the room and are still not sure where the couch is going to go so it may be perfect for how we use it. I finished up the throw pillows for this couch last night as well and they have blues and reds that will tie in nicely.

After online window shopping for SO MANY rugs I still can't quite believe I took the plunge and bought this one, and it was a lot of money (though still a good deal compared to other vintage rugs I've seen online)... but already we've enjoyed this room more with this cool item in here and I hope it kicks off some decorating ideas for the family room. There has been talk of hanging our guitars on the wall, getting a cool vintage media console for the grandparents' record player, and some art ideas. It has been too much of a blank slate for those ideas to materialize just yet but I think the rug helps!

No comments

2.10.2017

How to convert a can light to a pendant light! Non-electrical tutorial

We are making progress on the kitchen and one more exciting recent updates is making the old can light over the sink into a really pretty pendant light!

I don't mind can lights for general kitchen lighting and spreading out light over big areas, but above the sink is an opportunity to highlight a really cool fixture! I thought about having an electrician move the power to the wall above the window so I could do a cute brushed brass sconce... but, that costs money, of course, and then we would have more drywall repair to do which I am soooo over after our big drywall patching project when we moved into our fixer upper!

So I started getting into really beautiful pendant lights! See all my kitchen inspirations here--there are SO many cool options that really add to kitchen design!! I started to really lean toward the midcentury mod-inspired clear glass globe look. Some inspirations, plus the one we picked...
Sources: 1, 2, 3, 4, 5

I knew I could switch out the can light for a pendant since I'd done it at our townhouse over that kitchen sink. We had pretty high ceilings in that kitchen and it really made it more interesting to bring a fixture lower! I had pretty much no memory of the process of the can light converter switch, though, so I had to re-learn and I ran into some issues this time that I must not have had last time! So I wanted to put together this tutorial to walk you through what worked for us.

Of course I am not an electrician and only know enough to replace and wire fixtures safely in our home. We've done it many times but that's the extent of my knowledge. These instructions are meant to supplement the electrical instructions in the kit and your light fixture!

We did it with this pretty pendant light, but you could use this kit before installing a flush mount or chandelier, too!

How to Convert a Recessed Light to a Pendant or Flush Mount


You will need:


Instructions:


1. Shut off the power to the light at the panel.

2. Remove the old can light and bulb. Mine hadn't worked since we moved in, I realized because it had a broken light bulb stuck in it! So charming. I removed it very carefully.

3. Mark the holes for the brace by stretching it inside the opening and tightening the middle screw to make it the right size. Sorry, no pics of this part, but you can see a black permanent marker mark inside the opening.

4. Drill the holes. The video I watched didn't use this step; the guy in the video just used a very powerful driver and these "self-driving screws" that come with the kit. My drill did nothing with these screws and I couldn't make holes in the two layers of metal with anything I had on hand. I tried nails, other screws, several sizes of drill bits... barely a dent. So I went to the hardware store and they suggested this hard metal drill bit, which worked.

5. Screw the screws into the bracket and opening.

6. Install the power cord mount into the light bulb opening and attach the rest of the bracket. At this point you also attach the green ground wire to the side of the opening.

7. Install the metal plate from the kit and the mounting hardware from the light fixture. Put the cords through the opening.

8. With the white decorative plate in between, wire the light fixture to the cords in the converter kit and install the rest of the light fixture.

Done!!!

What a satisfying DIY project and incredible difference in a kitchen!

P.S.--I will definitely take some more photos once we get the tile backsplash installed and show you the rest of the kitchen!

Below I linked the converter kit, pendant light, and light bulb we used, plus the cute flush mounts that we used in our hall!


No comments

2.07.2017

Last week's goals: creativity, delicious food, and fun! And getting ready to sew. #Stanley90sreno week 17

I went into last weekend feeling pumped!! So ready to decorate, do some thrift shopping, and make lots of delicious meals for the weekend and week since I had just stocked up on veggies and been flipping through a new cookbook. I gave myself the weekend off from laying flooring. Last weekend was for FUN stuff!

I started by hitting up a few Goodwill stores with a friend. Didn't find the fabulous mid-century dresser or beautiful antique rug or cute matching nightstands I was looking for, but did find some pillows that have added nicely to our living room decor.

Also, as I've mentioned, I could basically be a professional Craigslist rug shopper at this point and have spent seriously hours checking for used rugs as well as scrolling the Wayfair and Amazon selections and saving my favorites. Never actually making a decision. We went to Home Goods last week, too, to look at theirs--they do have some nice ones but very little selection in the 8'x10' or larger range, which is what we need for the living room, family room, and spare room.

But all my online hunting and page-refreshing paid off, and we just bought this jute rug on Craiglist for a good deal before anyone else could! Now we have a big enough rug in the living room and it's wonderful!!

But more about the living room later. Back to the pillow talk. (I didn't mean that as a joke, but look, there it is.)

I've been feeling a little antsy and inspired to sew lately, which is an issue since the sewing room/office has been a landing zone for unpacked dusty boxes coming in from the garage. (Half of them are of art. So much art. Why do we have all this art???!) But anyway, I am so excited to use some pretty fabrics that Fabric.com sent me for throw pillows, I decided I must make the sewing room usable soon so I really, really tried this past weekend. I got as far as finding, setting up, and turning on the iron and the sewing machine, and finding my tools and cutting out the pillow covers. And filling up the ironing board spray bottle. Progress!!!

(Ready for some embarrassing photos?)

I also played around with the fabrics on the pillows--trick I learned from a friend years ago is to bring your goodies home from the fabric store and try them on different pillow sizes and locations in the row to see how they feel! I also arranged my extra down pillow forms to get the sizes and spacing right.

Those are gonna be cool when they're made!

Oh, hey, I should ask--what should we do to our living room? With the new rug in the space I played with moving around some furniture, but I am still totally stumped on art in this room and I think we may need to get a coffee table!! We haven't had one in years. (Also this couch is pretty tired and will be getting a couch cover and probably replacement legs sometime soon, so don't pay too much attention to it.)

Moved pillows and plants around and put this fabulous wicker chair in the corner. I put my DIY home body pillow there too since it matches in color but I think this room wants to be more boho ad maybe it doesn't belong here! (That black pillow on the left is also just fabric wrapped around a blank pillow form! I will make it soon, too!)

I don't know what to do for art in this space. The only piece I currently have that I think might work is this huge square grey and black canvas my brother-in-law did for us years ago. It, too, matches in color... but there is quite a lot of black and grey going on in here! What would you put above this couch?!?

We also installed this ceiling mount curtain rod in the front window. It adds just a little bit more privacy (that is a BIG window and the top part wasn't covered) and decorates this strange rectangular wannabe bay window space a little.

Also, never sure what to do with these chairs...

Unfortunately my weekend didn't turn out to be the perfect all-creative-food-fun-productive one I had dreamed of but I am SO excited about this rug and getting the sewing room set up is a huge accomplishment too. Bodes well for future sewing and creative pursuits.

Would love to hear your decor thoughts about our space!! I need some help!

Shop these and similar house goodies (some great deals on Target pillows right now!) below!


No comments

2.03.2017

The eeeeeasiest curtain rods (that are elegant and affordable, too!)

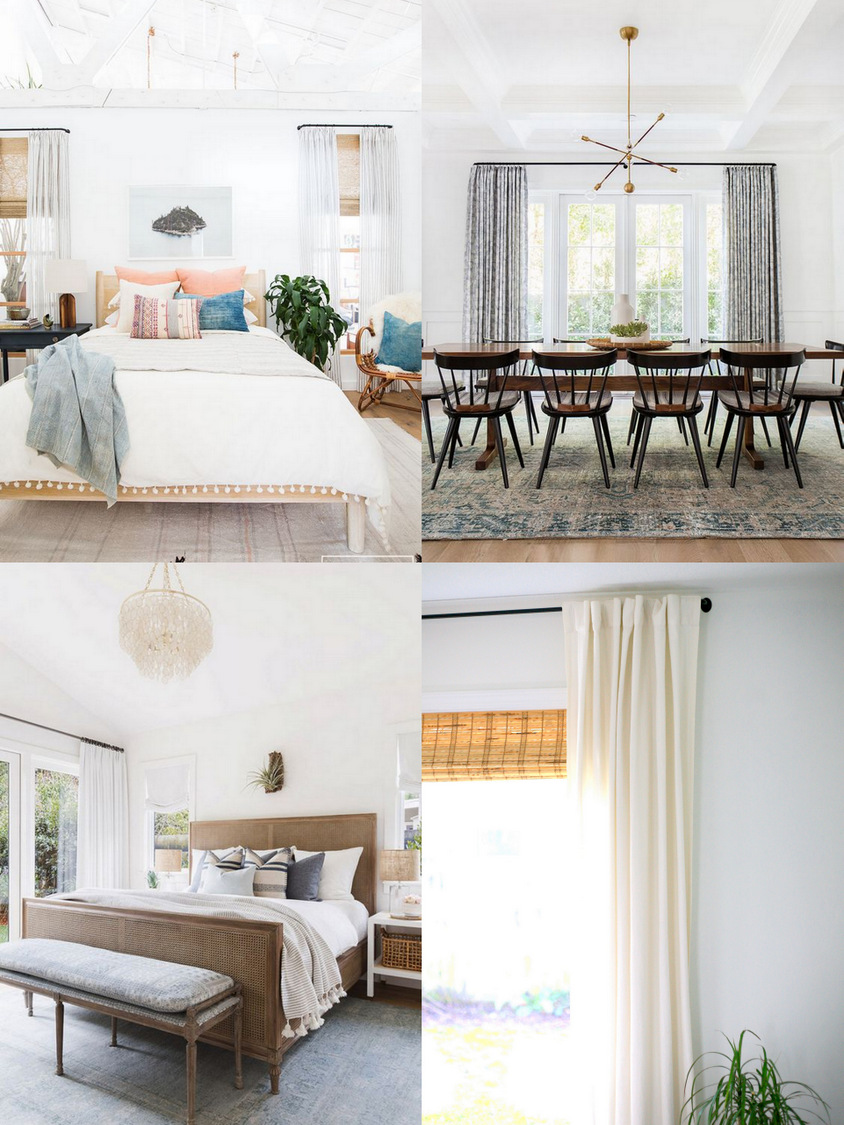
Are you a curtain person or a blinds person? Or a blinds-with-curtains-on-top person? I have always been a curtains-only person, but in the new house, we have some huge windows and some closer neighbors--so I've opted for both!

Getting blinds and curtains up was essential to making our house feel livable. I put curtains up as soon as I could! I ordered all one type of curtain rod, a black "room-darkening" model, and they were SO easy to install and so affordable, and they look and function so well, I just have to share!

When you start looking for details in designs you like, you start to notice patterns. Most of the rooms I've been inspired by, when they have curtains, have black curtain rods with small or no end finials. I found this modern curtain rod that had the simple lines I was looking for, but it was out of our budget. Other than that I really couldn't find traditional curtain rods I liked online!

Until I stumbled upon this one. It's marketed as a "room-darkening" style, and while that's a quality I appreciate in our bedroom for maximizing sleep quality, it wasn't what I thought I was looking for. But turns out the finial-less curtain rod look is modern and sleek, and provides extra privacy and ease of use (no rods sliding around in the brackets).

Here are some of my inspirations, plus what I ended up with!
Source 1/source 2/source 3

I seriously ordered 8 of these and used them on most of our windows, even though I don't have all of the rooms designed yet. For about $20 each, I figured I would like them enough for a while and if I want to change later, no problem. But what I didn't realize was that they would be SO easy and look SO good!

Here's why they are so great. What are the worst things about installing curtain rods?

  1. Getting both screw holes on all three brackets marked and level
  2. Using drywall screws for all six holes--you know they will pull out after a couple years of use and you will be left with large holes in your drywall and you'll have to buy bigger drywall screws and bigger screws and keep messing with them forever.
    1. Or you have to install the curtain rods on studs which limits you to right on the edge of the window (so the curtains when open will still block light) or 12-18" outside (will the curtain rod be long enough for that??)

These curtain rods eliminate both of those problems. First, each bracket only has one hole. All you have to do is measure equidistant from the ceiling in two locations, then hang the rod and mark the holes for the center bracket. SO. EASY.

Two, we have low-ish ceilings and installed all of the rods right at the ceiling line, which you can do on these because you pull the rod straight out rather than up and there's no finial to bump the ceiling as you pull up! So, we were able to install the brackets right at the ceiling joist so no matter where we installed them (distance out from the window), we drilled right through to wood. No more drywall screw disasters! Such a good feeling!!

I think they're best when hung with curtain clips (I ordered a couple packs of these to match), but my curtain-hanging has been pretty haphazard so far and I hung these through the tabs since they were about the right length. Soon I'll get the sewing machine set up and hem them shorter so I can use clips here, too.

I also installed two of them touching each other over the large family room window which is very close to the sliding glass door. It's always a bit of a head scratcher on what to put over sliding doors, right? We removed some ancient, filthy, broken vertical blinds on our slider when we moved in so I was not interested in replacing them with more blinds any time soon! Installing two of these rods and matching white IKEA curtains next to each other almost makes it look like we have a wall of windows.

(Forgive that disgusting fence in the background--this is a fixer upper, after all.)

Before we hung these I was dreading hanging 8 curtain rods and figuring out heights and leveling and blah, blah, blah. But these curtain rods (plus my blanket decision to hang all of them at the ceiling height, spaced out so that the curtains when open don't block the windows) made it so fast and easy. Also, don't the curtain rings look classy on these rods??

If you need to upgrade your window treatment situation and want an easy, modern, affordable solution, I highly recommend checking these out! Shop the exact rod and rings I bought here!


No comments

2.01.2017

Black four-poster beds, and a $40 DIY and tutorial

I have always loved bedroom decor. Bedrooms can be so pretty and personal. That means I love playing around with our decor at home!

Unfortunately for my husband, who likes things to stay the same... I have often been a serial bed owner. Until I did the pro tufting on the headboard my dad built for us, we owned several beds, several versions of that tufted headboard, lots of Craigslist updates and nightstand changes to go with. I loooooooved that grey velvet headboard but in our new home, I wanted to change more than just the bed. A whole new look.

I've gravitated toward the mid-century natural wood look, but this fab bed from West Elm is not quite in the budget right now. Maybe someday. I also found this black four-poster bed look and just fell in love! It's way more traditional than most of my favorite bedrooms, but somehow totally fresh and clean, too. 
Source

I found a couple black four poster beds online, but nothing fabulous. I scrolled Craigslist and actually found several cool ones, usually for less than $100! It looks like Sears made a lot of pine four-posters in the 90s that are now available on the used furniture circuit and may have a few scratches or missing finials, but are just great for this purpose. 

I found this one for $40 and transformed it! Here's how I did it!

Painted Four Poster Bed Makeover Tutorial


You will need:


  • Wooden bed frame
  • Wood filler (if any scratches/dents)
  • Spackle knife (if any scratches/dents)
  • Sandpaper
  • Primer (tinted if you will be using a dark color of paint)
  • Semi-gloss or satin sheen trim paint (I used Benjamin Moore Advance in Black)
  • Painting tools including small roller

Instructions:


1. Lightly sand down the bed (not to remove all of the finish, just to rough it up and even out small scratches). Brush dust off with damp cloth.

2. If you notice any scratches or gouges, apply wood filler with spackle knife. Let dry and sand and brush down. It's amazing what wood filler can do for dents and imperfections, especially when you're going to paint over it!

3. Prime bed pieces using an angled paint brush for the corners and inside areas and a small paint roller for the flat sides. Again, tinted primer if you're doing a dark paint color. Let dry. I did this step once for each side, flipping all of the pieces over about 24 hours after priming the first side.

4. Paint the first coat of paint, again doing the corners first with the brush and then the large, flat areas. I used a full size roller for the first coat but it was a bad choice. I used a small foam paint roller for the primer and second coat, much easier!! Let dry. Repeat second side.

5. Paint the second coat; let dry. Repeat second side.

6. Once fully dry, assemble bed.

I found that this was a great weeknight project cause I could do one coat in 30 minutes or so and then easily wait 24 hours for it to dry. And I don't have enough energy to do much else house project-wise on weeknights so it was nice to have a small project I could work on!

This particular bed was once an actual canopy bed, with a metal frame that has since been lost. It came with four wooden pegs that go in holes on top of the posts. They're plain disc shapes, but I did shop around online for decorative finials. I even ordered some, but ended up liking the posts just as they are so I didn't use them!

I did find a similar bed online for less than $400--if you're not into DIYing. I linked it and the other products we've decorated the bedroom with so far in this post! (This rug was an awesome price and we actually have it in blue in the dining room and tan in the bedroom.)


No comments

Search

​
© Create / Enjoy • Theme by Maira G.