WELCOME

Hello! I'm Suzannah, a serious DIYer and mom of two little ones. Follow along with my DIY fixer upper house renovations, sewing and crafty projects, real food recipes, and de-stressing goals.
I believe you can love your home just the way it is, AND have the power to design and make big changes to make it better.
I'm also the author of DIY Wardrobe Makeovers!

Sewing Circle: Easy-to-move-in dress patterns, like for nursing mamas

11.11.2013

Sewing Circle: Easy-to-move-in dress patterns, like for nursing mamas

A very specialized Sewing Circle question today! Got this one from Bobbi and I'm hoping you all can help her out with more first-hand experience than I have!

Q: You seem to know patterns and such so well! I'd love to make a dress; my challenge is I'm breastfeeding a 3 month old. Any fun, easy (I'm a beginner) patterns that would you would recommend for my situation? I'm a smaller frame, 5'1" tall.

A: Great question, Bobbi, but I have absolutely zero experience in this! I'll contribute what I can.

Some very pretty maternity and nursing patterns...


My first thought was that fellow sewing blogger Megan Nielsen has a seriously awesome pattern line including quite a few maternity patterns. I looked them up and sure enough, she has nursing top and dress patterns as well! I've made one of her patterns before as a tester and it was definitely beginner-friendly. Very clear instructions and a simple pattern (just one style in the envelope, easy to use).

Megan is also one of the sweetest people ever, so I'm glad I get to talk about her here on the blog! Her slogan: "where you make fashion and sewing is cool." Yay. So let's look at Megan's patterns first!

This simple lingerie pattern might be a great one to start with!
Source: Megan Nielsen Patterns

Then maybe try the Pina Dress and Top, also a deep v but more versatile for everyday.
Source: Megan Nielsen Patterns

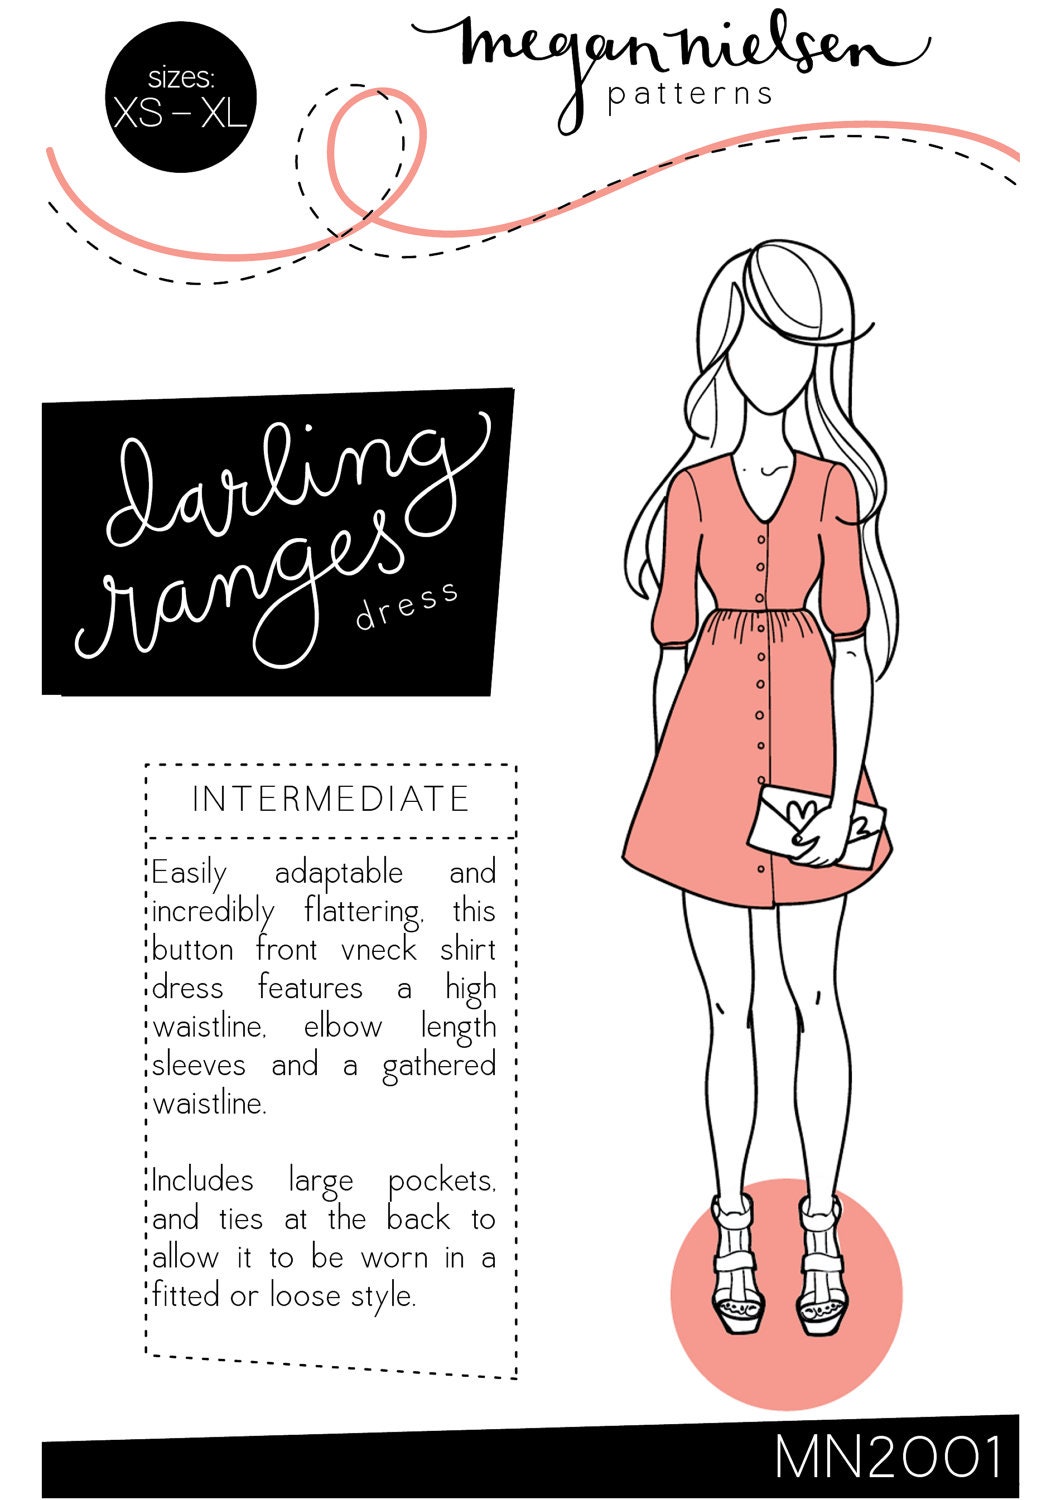
You also could definitely use a non-maternity/nursing dress pattern like the popular Darling Ranges dress, because it buttons down the front. It is really cute! (But then you have to sew button holes. ;) Trade-off.) It's super versatile, too--you can change the neckline, change the sleeves, whatever.
Source: Megan Nielsen Patterns
She also has a nursing top, The Perfect Nursing Top pattern, so you could try out some techniques with that, too!

Typical dress styles for nursing?


But there are probably a million dress patterns you could make work for nursing. In general I think you'll want to look for styles of dresses that you tend to buy for your current nursing state; that probably means deeper or crossover necklines, or something with a placket. So look for those shapes in conventional sewing patterns you may already own as well. (I think you could also probably get very fancy with horizontal openings hidden somewhere, but I really don't feel qualified to recommend any of those.)

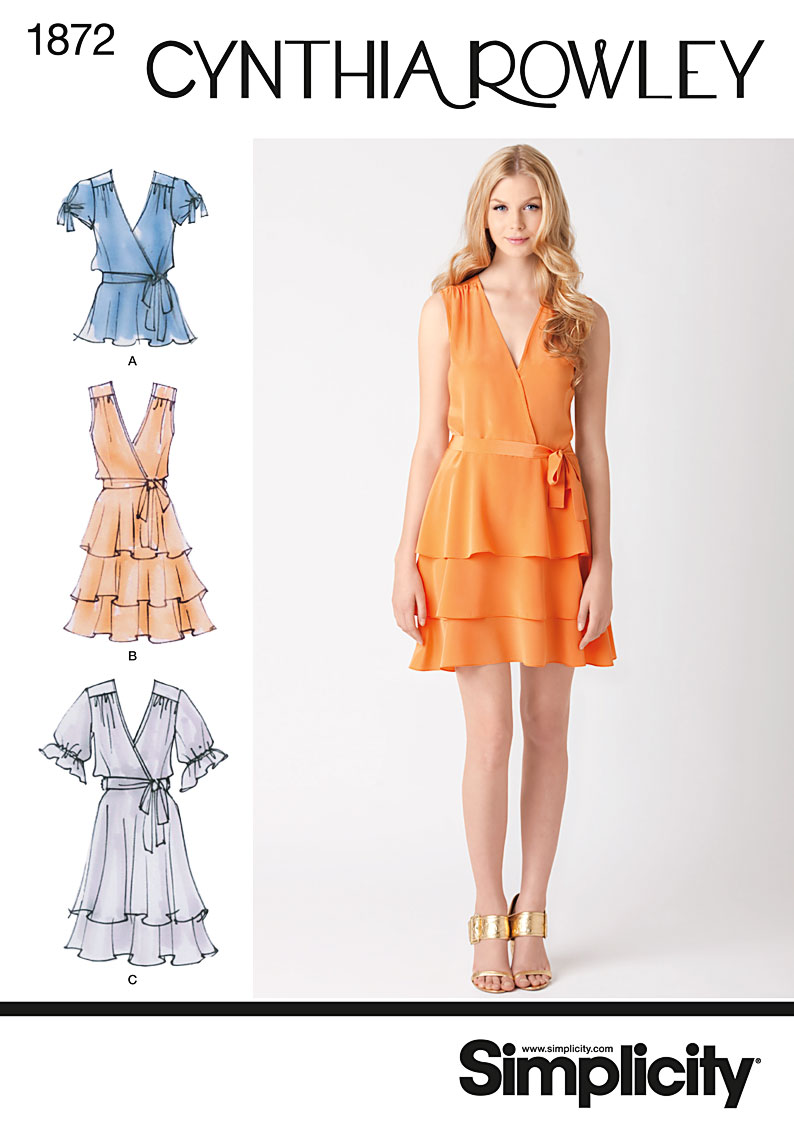
For some slightly dressier styles, try more tailored versions like Simplicity Cynthia Rowley 1872 or Simplicity Cynthia Rowley 2215.


Fabric types for nursing dresses - knit vs. woven


One thing to think about is that knits are probably easier to manipulate when nursing, but they can be a little harder to sew on than wovens. (See a previous Sewing Circle post of mine with tips for sewing on knits.) One of these crossover dresses from McCall's (M6752, M6760, or M6694) could work well.
McCall's M6752

Other ideas?


Readers, if you have experience in this department... what styles do you find are best for nursing, and have you ever sewn your own?? What advice do you have for Bobbi?
15 comments

11.08.2013

Weekend Inspiration: Early holiday season resistance, decorating, and DIYs

Happy Friday! This week's Weekend Inspiration is a bit resistant, because somehow it's mid-November already and the holiday season is approaching. I have mixed feelings about this.

I guess time flies when you have a warm, dry late summer and early fall for the most part. I feel like I blinked and summer was over at head turned to this grey, rainy weather and Christmas commercials on Hulu already. It's a little unsettling. (Aren't we supposed to wait for Thanksgiving first?)

But, I know from previous years' experience that I love the Christmas season, and will probably want it to last as long as possible. So I thought I kick off the weekend with a little bit of early holiday season inspiration. Get you into the good stuff about the holidays – soft, warm things; gold and sparkly and candles; doing projects indoors. =)

Weekend inspiration for the pre-holiday season


So, what to do this weekend to welcome the dark days and rain, but not go overboard with holiday commercialism and candy canes??

I'm willing to bet Christmas ideas are already FILLING your Pinterest boards, like they are mine. Here are a couple home feed views if you haven't visited yours recently. ;) And then, some of my fave pins!

Some of my favorite [early] holiday season pins!! This weekend I'm inspired to...


DIY...
Make some naturally wonderful-smelling firestarters. Try them out in your fireplace and maybe make some more as gifts!
Source: Henry Happened via my Pinterest
Wear BRIGHT red, but no green or gold. (I wore a tomato orange-red J.Crew wool pencil skirt yesterday with tights and boots, and it was awesome. Bright is good!)
Source: The Shine Project via my Pinterest

Think about snowflakes, but only the modern black/white edgy kind. 
Source: Etsy via my Pinterest

Try these peppermint chocolate macaroons made with only a few simple, real food ingredients. And tell me how they are, k?? I've got to try this sometime!
Source: Against All Grain via my Pinterest

Spray paint something gold (in your garage, maybe. Where it's not freeeezing already!). Like these paper mâché letters I spray painted ages ago and have hung in our bedroom and office. A little gold never hurt anyone (year-round), but will make your home feel a little more bright and festive for winter!
Source: My home tour

My actual weekend plans ;)


Those are my inspiration images this time of year. I may not actually do more than wear bright red and think about snowflakes. ;) But, I do have some pretty fun plans with friends, one of which may involve some crafting for Christmas gifts. ;)

I'm super excited to try out this DIY deodorant recipe (can you call it a recipe? or is that gross?) with a friend of mine who has experience with homemade lip balms and lotions and things. I ordered the beeswax pellets and vegetable glycerin and essential oil on Amazon and everything! I feel so prepared, but intimidated because I've never done this kind of thing before! Any tips?

What are you looking forward to this weekend? Are you fighting the holiday joy that's creeping in on us, or are you doing holiday shopping already??
10 comments

11.07.2013

Ooh, faux fur!! A super easy tutorial to freshen up your décor

We're all aware of the fur trend, right? Faux fur vests, furry throws, faux fur holiday décor... it's super fun!! I've been a fan of the plush white fur look for a while now... tossed over elegant chairs and ottomans in Elle Décor home tours... siiigh... Here's just a few examples:
Source: Rue Mag via my Pinterest
Source: The Everygirl via my Pinterest
Source: The Glitter Guide via my Pinterest
I could keep going through my inspiration pins, but I really ought to write the rest of this post. :/

So yay faux fur throws, right? But what if you could DIY?? 

I got this white faux fur that WholePort sent me ages ago, because I was into the trend and knew I wanted to do something with it for our home. I ended up folding it on top of the trunk under our console table, just to admire it at first, but then I realized that was a great place for it! But, it was just yardage, and had raw edges if you unfolded it, and I was worried about fuzzy pieces flying off if we moved it. And it's not like it was usable.

So, I decided to finally sew something with it, and here's the tutorial for you! So out of that fur, I made... a fur blanket!!! It's a super easy and fun project, but I need your help at the end!! You'll have to advise me on the last (optional) step. I could use some inspiration.

Faux Fur Throw Tutorial


This project is super easy and involves almost no cutting. You can do it on your office floor, like I did! Bonus!

You will need:
  • Faux fur (WholePort sent me mine, 1.5 yards of 66+" wide. You could do up to 2 or 3 yards though!)
  • Backing fabric (either the same width or wider as your fur, in which case you'll need just a tiny bit more yardage, or, if it's narrower, get twice as much and piece a strip like I did)
  • Sewing machine, scissors, pins, the basics.

1. Lay your fur out and the backing fabric on top. Cut the lining fabric at least 1" larger on both sides to allow for stretching and pulling, and you can always trim off extra if needed (do as I say, not as I do in this picture! I could have used an extra inch or two). Snip at the center fold of the backing fabric.

2. Cut or tear the backing fabric. Now you should have two panels, the backing slightly longer than the fur, but possibly narrower.

3. Unless your backing fabric was as wide or wider than your fur (I think the furs are often super wide), you'll need to piece the back. This is easy--just cut or tear a panel only 1" wider than the gap you have (see below, I allowed a little more than 1" overlap for a 1/2" or 5/8" seam to join the pieces).

4. To "piece" the backing together, sew right sides together along the selvage edge and the new piece.

5. Press seam open. Now, you have two pieces almost exactly the same size: fur and backing.

6. Pin the selvages together on one side of the throw, right sides together.

7. Sew right sides together; you can use a large stitch. My backing puckered a little since it was on the bottom. If you're worried about this, try sewing with the fur on the bottom, or use a walking foot or freeze your feed dogs to lessen the pull.

8. Do this on both sides (selvage edges). You'll then have a tube, as long as the fabric yardage was, with raw edges at top and bottom. On both the top and bottom edges, mark your centers with a notch and line them up (still right sides together.

9. Sew along top and bottom edges. At "bottom" edge, whichever you choose for that, stop sewing about 3-4" from the center notch and pick up again 3-4" after. This opening will allow you to turn the blanket right side out once you've closed all the other edges.

10. Snip all four corners; turn blanket right side out through the 6-8" opening you left.

11. Use a corner turner to make the points pointy. It's hard to iron the backing because the iron will melt the fur, but using the turner will help make the corner sharp, at least.

12. Close the 6-8" opening, however you please. Hand-sewing a whip stitch would work, or I just pressed under 1/2" on the backing fabric and folded over the fur 1/2" and machine top-stitched. (I switched to a qhite bobbin first, to blend in with the fur.)

See?

Okay, the blanket is "done"! No raw edges, totally usable as a throw, but... I have a question for you on the next (optional) step.

Here's where I need your help. The blanket is usable, but the backing is loose and I wonder about ways to bond it to the fur piece, like how a quilt is quilted. I toyed with the idea of giving the wrong side of the fabric a light coat of spray adhesive, but I could only imagine the terrible mess of fur pieces and perma-stickiness on my hands and, inevitably, the floor. No good. And who knows how that would hold up. I also thought about just top-stitching around the entire thing, all four edges; I mentioned it's hard to iron because you don't want to melt the fur, but a row of top-stitching would hold the backing in place at least at the edges. There's also tie-quilting, or maybe just tying tiny knots in white thread that would blend in on top. I could do that starting at the middle, hope that the fabric is cut straight enough not to pucker!, and add several rows.

It's going to be hand-sewing season soon (winter, dark out, movies, you know the drill), so I may actually get to it soon! What's your recommendation? Have you ever done this kind of thing before with success?

In the meantime, it's back in its happy home, but much more presentable with no raw edges! See?

(Other DIYs in this shot: the Louis XV chair on the left and the gold starburst mirror (aack! Why isn't it centered?! Must fix this weekend...). And the books and the purse? Temporary storage. ;)

So, what's your vote to settle the layers and make it an even more usable throw??
13 comments

11.04.2013

How to Wear DIY: Early holiday season brunch uniform

How to Wear DIY this round: a dress I made last Christmas, worn for daytime! Add leggings, light jacket, big scarf, booties--the perfect November daytime weekend outfit, and a great kickoff to the holiday season.

And I'm pretty sure this is the Portland holiday season brunch uniform, after going to the PNW Blogger Holiday Party on Sunday. Hanging with 65 Portland- and Seattle-area crafty and style bloggers (Check out the hashtag on Instagram--what a bash!!), and trust me, dresses with leggings and booties was pretty much THE thing to wear. ;) Bonus for including some fake leather.

So I highly recommend it! Combine your full-skirted dress, too cold or too fancy to wear bare-legged, and pull out the booties!
Jean jacket: Nordstrom Rack. Scarf: DIY into infinity scarf, here! Bag: Old Navy.
Leggings and booties: F21. Dress: DIY, here!

I highly recommend it!
8 comments

11.01.2013

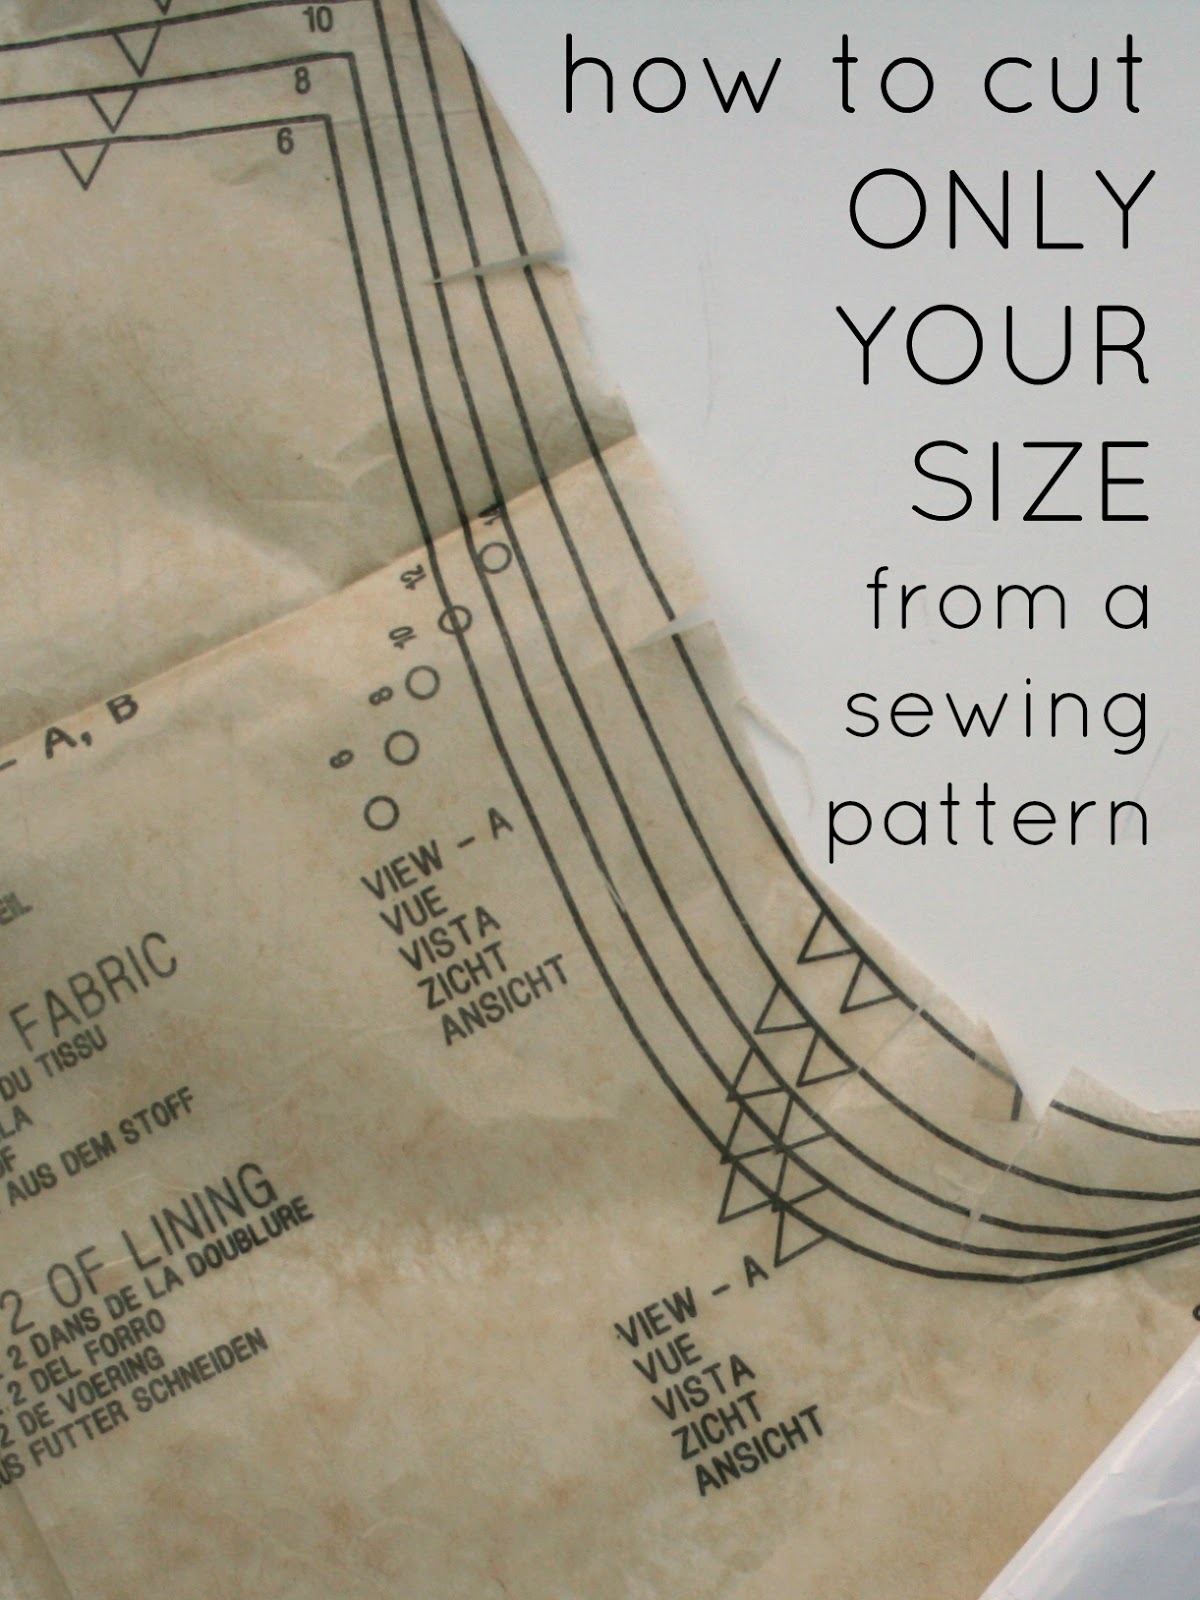
Sewing Circle: How to cut out your size from a pattern and leave it intact

Got a great Sewing Circle question from a reader the other day! There are so many things I wonder myself, but never ask, so it's great that she wrote me with this question:

Q: Hi Suzannah, 
When you are using a pattern, do you cut out your size or do you try to "preserve" the pattern by leaving all sizes in tact and trying to cut under/around/ in order to cut your size? I am obsessive about leaving the pattern in tact "just in case..." but I am finding it more difficult as I get in to more detailed patterns. I was hoping to get some perspective from another dressmaker! Thanks!

A: Hi Michelle,
Funny question, I love it! 

I leave the pieces intact and fold back the edges along the size I'm cutting. It's worked well for me, since I've changed sizes a couple times since I started using my fave patterns a (some of them quite a few years ago ;)). I don't think there's a right or wrong way, though. Folding is pretty perfect except on the curves like armscyes--there I often snip into the curve a couple places and fold in chunks. 

This question got me thinking, though, and I took some photos of my favorite patterns and demonstrating what I mean. So here goes: How to cut out your size from a sewing pattern, leaving the rest intact!

I also should note that this is different from others of my top Sewing Circle questions, like:
So check out those if you're new to using patterns. 

Like I said, this is a very specific question, that many people (like me) have never thought to ask out loud before!

So here's one of my all-time fave patterns, McCall's M5849. (It's out of print, but Simplicity 4070 is nearly identical). I've used this pattern so many times, but because of the straight lines and princess seams, it's so easy to fold over in a straight line to cut my size. In fact, I opened it up this way--I guess I've left it folded to my size!


When I get to the notches on the folded side, I usually lift the pattern piece a little and do my best snipping triangles of the approximate size and location. It works for me.

Here's another example, and a little trickier one because of the curved armscyes. This is Simplicity 1873, a relatively new fave pattern. This is the bodice back.

(I recommend that you do this more carefully than I did.) On the curve, where it's impossible to fold exactly along the black line for my size, I snip into the pattern to the line in a few places (using paper scissors, of course--not the fabric ones I may be holding at the time!)

There you have it! How to preserve a pattern and cut out your size.

Now, how about an unofficial survey--do you cut your exact size out of the pattern, or do you fold or have some other method?!?
39 comments

10.31.2013

A Grimm Fairy Tale Halloween party -- And our favorite costumes!

Happy Halloween!!!!!

This sure is a fun holiday. I don't put much thought into it most years, but every time I go to a party I get so excited to see everyone's cool costumes and the creative creepy decor and the first festive foods of the year.

This year was particularly special--over the weekend we went to "A Grimm Halloween Dinner Party" hosted by my super pro party thrower friend Jenni of A Well Crafted Party. The theme: Grimm's Fairy Tales with a dark, modern twist. (There's also a great hashtag for the party!)

Last year, for the first time ever, really, I made an awesome Halloween costume for myself and an on-theme one (accessory) for the husband. We were Black Widow (ScarJo!) and Tony Stark from The Avengers movie. I put a lot of work into it, bough the right kind of fabric, spray painted all my accessories... it was fun but a lot of work to wear the thing for one night! And while the costumes were pretty cool last year, husband and I are both much healthier this year and we look more like the actual characters! (A little on our health story here.) So, we WORE THEM TWO YEARS IN A ROW. Is this sacrilege? I hope not. I really like my Black Widow costume!!

I did want to wear something fairy tale-ey, to be on-them with the Grimm night, but the dear hostess Jenni pointed out that The Avengers is sort of like a modern-day fairy tale! Aaaw, thanks, Jenni.

It was chilly but dry and clear, so we ate outside at these gorgeous candlelit tables. I love the string lights and candles to light everything!

Everything was so magical and pretty and spooky. Jenni sure can set a table!

And make Paleo slow cooker chicken drumsticks (our contribution) sound festive!!

Here we are in our costumes, looking even more badass than last year!
Photos by me and Bee

We'll make something new next year, I swear. ;) Maybe something a little more on-theme with the party of 2014! I wonder what theme it will be. You'd think, with my sewing background, I'd make myself costumes more often! I guess I just run low on inspiration sometimes.

Have you been to any great Halloween parties this year? Do you usually make a costume?
12 comments

Search

© Create / Enjoy • Theme by Maira G.