

3.30.2012
Girl's World, lovely book--a dress and a review!
A while ago I came across a mention of Jennifer Paganelli's book that just came out--Girl's World: Twenty-One Sewing Projects to Make for Little Girls. I loved the cute style and bold prints (Jennifer is a fabric designer and owns Sis Boom, so they're all her own!), and am usually excited about new sewing books. Jennifer sent me a copy of her book and some beautiful yardage of her yellow print, for me to try out and review for you! Of course I don't have any little ones to make things for, but my cousin's 3-year-old got a new dress out of the deal!
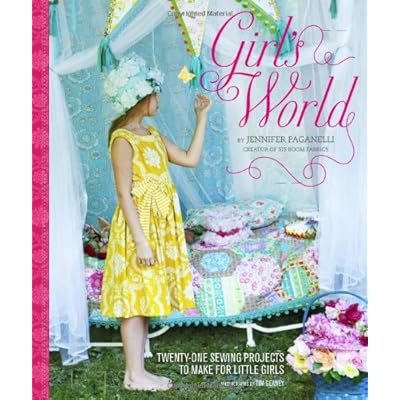
So here's the book:
I love the bright colors and florals. Here's a look inside the beautiful book...
Comes with all the patterns in the front...

Such fun for little girls!


Got all the essential tips and diagrams in the beginning...


Here's the dress I made, the Josie dress. So sweet!

The book has all kinds of projects in it, too. Aprons...


I LOVE this pillow. Now I have a pattern for it!

More home dec projects...


And of course the patterns are a good quality paper, and they're all included. Here's some of the Josie Dress pattern I used.

The instructions were totally simple and easy, even for me when I've pretty much never made a little girl's dress before. A few things are different than for women's dresses! But I followed along just fine with the pictures and descriptions. And enjoyed having the beautiful book at my side in the sewing room.
I cut out the smallest size, the XS. Brenna is only 3 but she's very tall for her age, and while I don't know her actual size in storebought clothing, I think I had some basic measurements from her mom. Kids aren't hard to fit clothing on, I guess... they're sort of barrel-shaped, so as long as the lengths and basic circumference are right... of course, I don't have kids so I don't really know. But, the XS fit her perfectly and the ties at the back took it in a teeny bit so it fit more closely.
Also--this is not your average cheap-o quilting fabric. The Sis Boom yellow Carrie print was so substantial and smooth, even after I pre-washed it! It held is shape really well and did feel suitable for a dress, when I almost never use quilting fabric for clothing. I used a pink homespun cotton I've had for a while for the midriff panel and ties.
And it turned out great! Here's my lovely model enjoying her new dress! Thank goodness we got some beautiful days last weekend and it was actually warm enough for us to take these pictures outside.
However, disclaimer: as cooperative and sweet as Brenna was to model her new dress after I gave it to her, she WOULD NOT allow her hair to be re-braided, taken out, or touched at all. I got a little lesson in three-year-olds when I tried. Not happening. She still looks cute, though!


18 comments
So here's the book:
 |
| Girl's World: Twenty-One Sewing Projects to Make for Little Girls
|
Comes with all the patterns in the front...

Such fun for little girls!


Got all the essential tips and diagrams in the beginning...


Here's the dress I made, the Josie dress. So sweet!

The book has all kinds of projects in it, too. Aprons...


I LOVE this pillow. Now I have a pattern for it!

More home dec projects...


And of course the patterns are a good quality paper, and they're all included. Here's some of the Josie Dress pattern I used.

The instructions were totally simple and easy, even for me when I've pretty much never made a little girl's dress before. A few things are different than for women's dresses! But I followed along just fine with the pictures and descriptions. And enjoyed having the beautiful book at my side in the sewing room.
I cut out the smallest size, the XS. Brenna is only 3 but she's very tall for her age, and while I don't know her actual size in storebought clothing, I think I had some basic measurements from her mom. Kids aren't hard to fit clothing on, I guess... they're sort of barrel-shaped, so as long as the lengths and basic circumference are right... of course, I don't have kids so I don't really know. But, the XS fit her perfectly and the ties at the back took it in a teeny bit so it fit more closely.
Also--this is not your average cheap-o quilting fabric. The Sis Boom yellow Carrie print was so substantial and smooth, even after I pre-washed it! It held is shape really well and did feel suitable for a dress, when I almost never use quilting fabric for clothing. I used a pink homespun cotton I've had for a while for the midriff panel and ties.
And it turned out great! Here's my lovely model enjoying her new dress! Thank goodness we got some beautiful days last weekend and it was actually warm enough for us to take these pictures outside.
However, disclaimer: as cooperative and sweet as Brenna was to model her new dress after I gave it to her, she WOULD NOT allow her hair to be re-braided, taken out, or touched at all. I got a little lesson in three-year-olds when I tried. Not happening. She still looks cute, though!


You can see the bright turquoise zipper I gave it peeking out! I was inspired by Jennifer's beautiful bright colors that somehow all go together--thought the color would be fun, and I had it on hand!

Aaaaaaw!
After making this I seriously think I need to carve some time out of my schedule to make this little cutie some more dresses. It was so fast and easy (did I mention, not counting cutting time, this little dress took me just over 1.5 hours to make?!!?!?!), and she's so cute in it!
So, if you have any little girls to sew for, definitely check out Jennifer's book and amaaaazing fabrics. Have fun!


