

DIY pinch pleated curtain dyeing tutorial!
I am really having fun with our bedroom decor now!! I just did a possibly risky, but actually very low-risk, project and dyed our curtains to turn them from the plain beige cotton IKEA ones I got many years ago to a beautiful rich green, and added pinch pleat tape and hooks for a more high-end look!
I'd been considering doing something like this as a way to bring in more color and then one of my friends on Instagram @ciarakenaston did the same thing, a very similar green, for her living room and they look great! She reminded me that Rit has a bunch of formulas on their website so you can choose from any number of colors and they tell you, for the size of item you're dyeing, how many bottles or cups of each color of dye you need to get the exact color you want!
Curtain Dyeing Tutorial + Pinch Pleating
The soft color and extra width from the pleating even when closed really add a lot to our room!
(Don't mind the un-trimmed, just primed window... that's on the project list.)

DIY pinch pleat dyed curtain tutorial
You will need:
- Cotton curtains, pre-washed/soaking wet
- Pinch pleat tape (enough length for the width of the curtains--I got 3 yards for my two 50" wide panels)
- Pinch pleat hooks (I use the long neck ones. IKEA has some as well but they only have two pleats and these more traditional ones have three)
- Dyes in the colors you want (see RIT formulas here). I did "Vintage Green" but obviously also used curtains that were tan to begin with, so they are probably a bit more taupe than the recipe. (I found the best price for all colors is here but you can find some colors for less here)
- Salt
- Dish soap
- RIT ColorStay Dye Fixative (I needed 2 bottles for a pair of curtains)

Instructions:
1. Prepare the dye bath. HOT water, salt, dish soap, and dye in the proportions the formula says. I actually turned up our hot water heater the day before doing this project cause we usually keep it on the lower side.
You can do this in a large plastic tub as well. We need to resurface our bath tub anyway so I wasn't concerned about potential staining, although it didn't actually end up staining. (I've used the washing machine method before for large items and had terrible success! Tub worked way better!)


3. Rinse till water runs clear.
4. Repeat the bath process--HOT water, curtains, and the dye fixative. When done with that,
5. Wash and dry. The color will be a little lighter after washing.
6. Hem to correct length if not already right. Mine had been hemmed before for different windows so needed to be shortened, but I took the length off the top since I'd be adding the pinch pleat tape up there anyway.
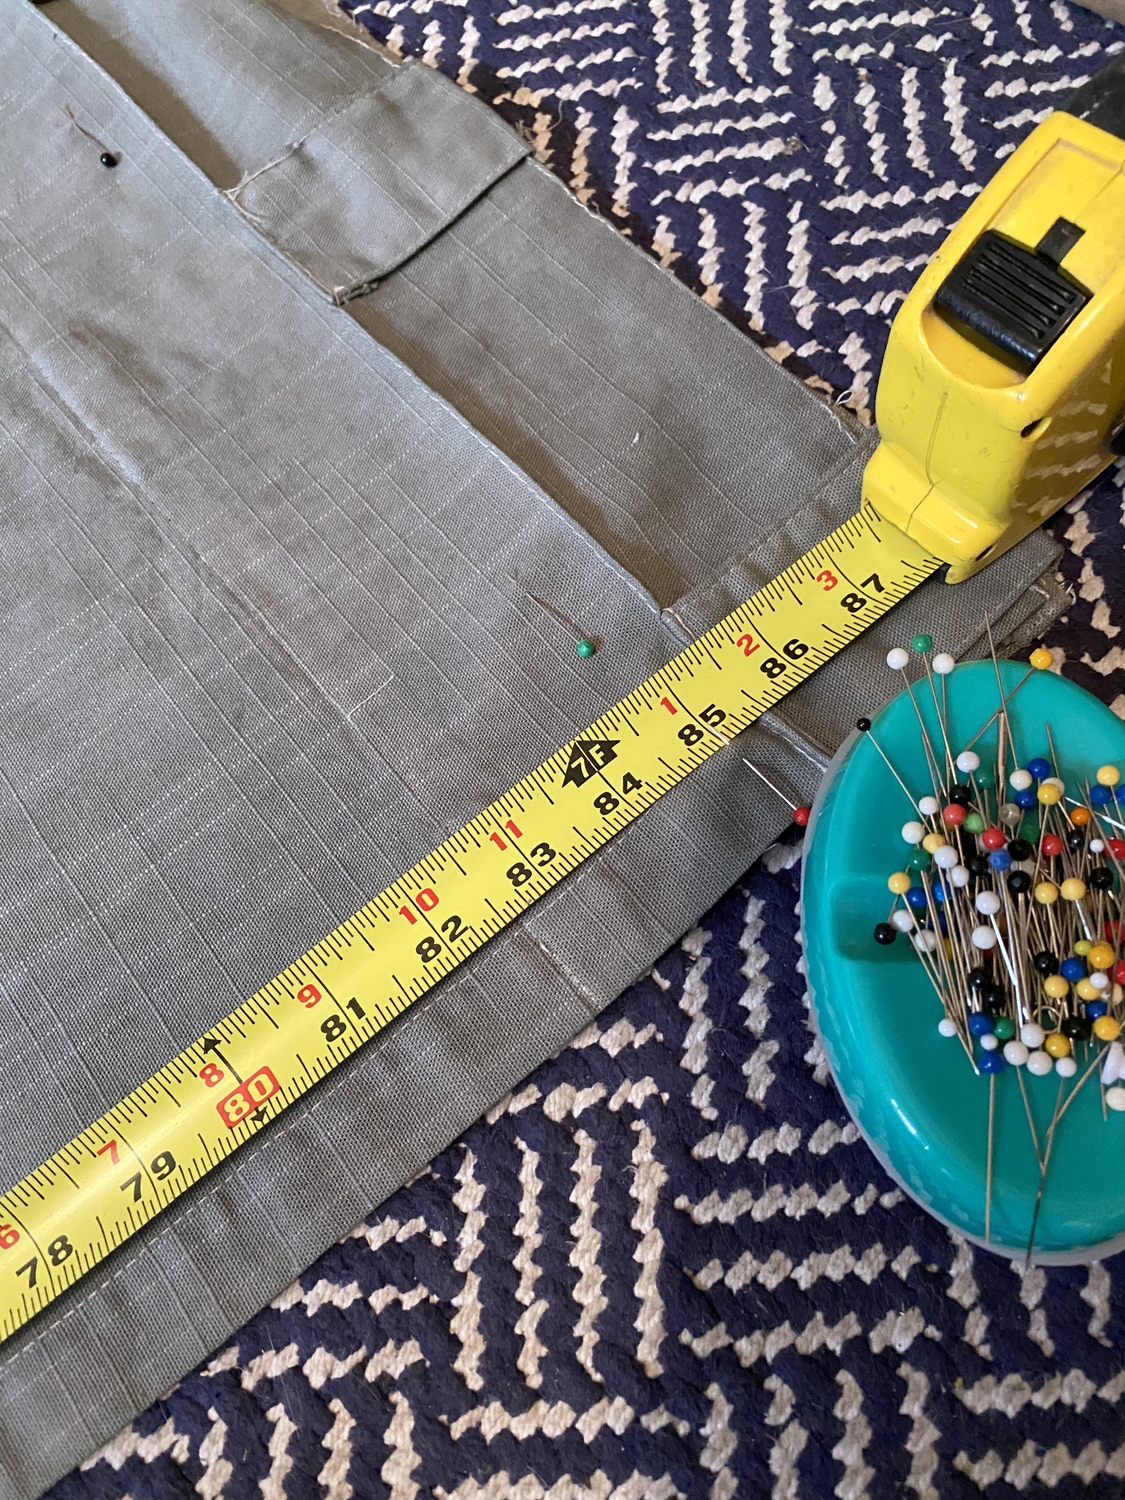
7. Sew on the pinch pleat tape. I did one row of stitching at the top of the tape and one at the bottom, and made sure I started the tape at the same place on the repeat on both panels so they were identical.
Note: a lot of IKEA curtains, like the 100% cotton linen-look white RITVAs, already come with pinch pleat tape. I've use that too, with the Dritz long-neck pleater hooks, in our downstairs bedroom. I sewed two panels together for each side of that super wide window.


Done! Hang with rings for curtain hooks. (I still need to order some, so I just used my old clips. Be more thorough than me!)
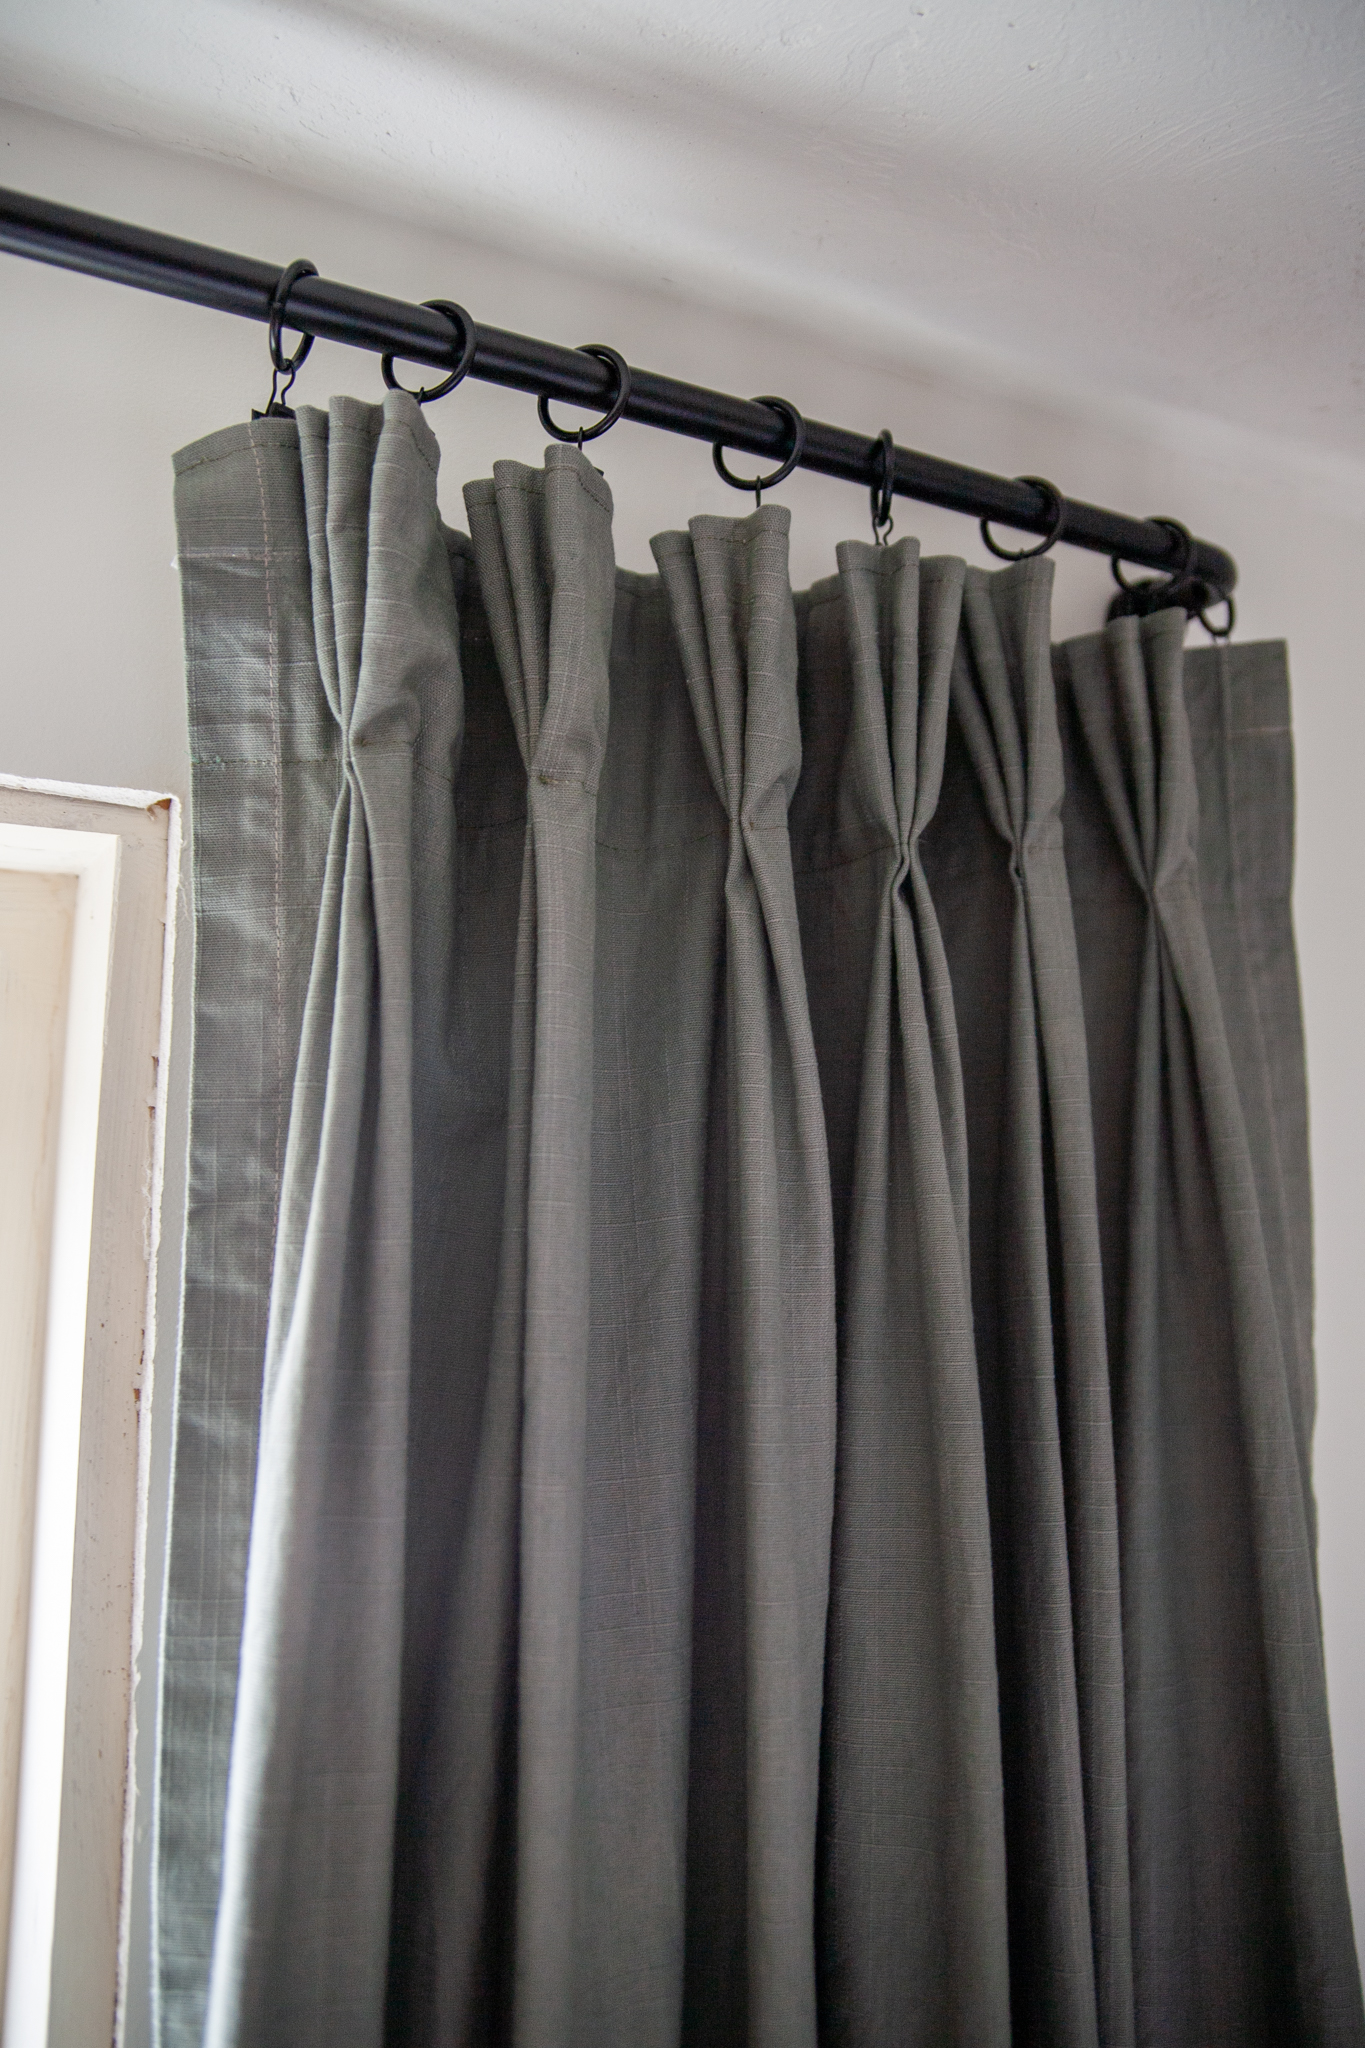

So happy with these!

No comments
Post a Comment