

DIY upholstery: designer-look white & wood chair tutorial
I knew I wanted a light color, but that definitely made me nervous with a toddler in the house. I did some research and decided that the only way I could get the color I wanted would be by making my own sewing my own covers out of a durable, stain-resistant fabric.
I had heard of Sunbrella fabrics for outdoor use, but they have tons and tons of options on the website of stain resistant, washable indoor upholstery fabric stew. I reached out to them and got some great swatches for a light-colored fabric for these chairs that will be durable and easy to clean!
Thanks so much to Sunbrella for providing this fabric for my review and sharing with you in this tutorial!

I looked to several high-end retailers to get inspirations for the exact look of the chair I wanted. Here are a few...
 |
| Image source. Also sold here |
 |
| Image source |
 |
| Image source |
Those are $1,200 and up! Not in the budget. I was able to find this affordable option (under $250), but didn’t like any of the colors. There is a similar one that comes in white, but it sits lower to the ground and I thought the shape of the wood was a little too boho for our more traditional home--plus it was sold our for a long time.) So I figured... I could buy the $250 one with the right shape, and recover it!
Update: since doing this project Target has come out with TWO similar chairs that come in white: this and this. But hey, this is still a great skill and DIY project to get the chair you want in a custom fabric!
I’ve done simple upholstery projects before, as well as sewed custom covers for some similar rectangular chairs multiple times. For this chair project, partially because the original fabric was a dark color and I was covering it with something light, but also because multiple layers of fabric can cause awkward friction, I decided to go all out and completely recover these chairs with a permanent new upholstery fabric.
I chose Sunbrella interior upholstery Canvas in Natural (you can buy it at a fabric store near you, using their retailer search, or online here). It is a warm but pure white and has a tightly woven fine canvas texture. I got 7 yards total, but each chair took less than I estimated so I did have a good amount left over. Here are the steps for simple upholstery on these affordable chairs!
DIY Upholstery Tutorial - Recovering Chairs
1. Take apart chair cushion pieces from chair arms. If you buy these chairs with the purpose of doing this project and don’t assemble them yet, obviously you won’t be able to do the step and will just recover them before you assemble that.

2. Remove staples and black lining fabric on bottom of chair pieces.


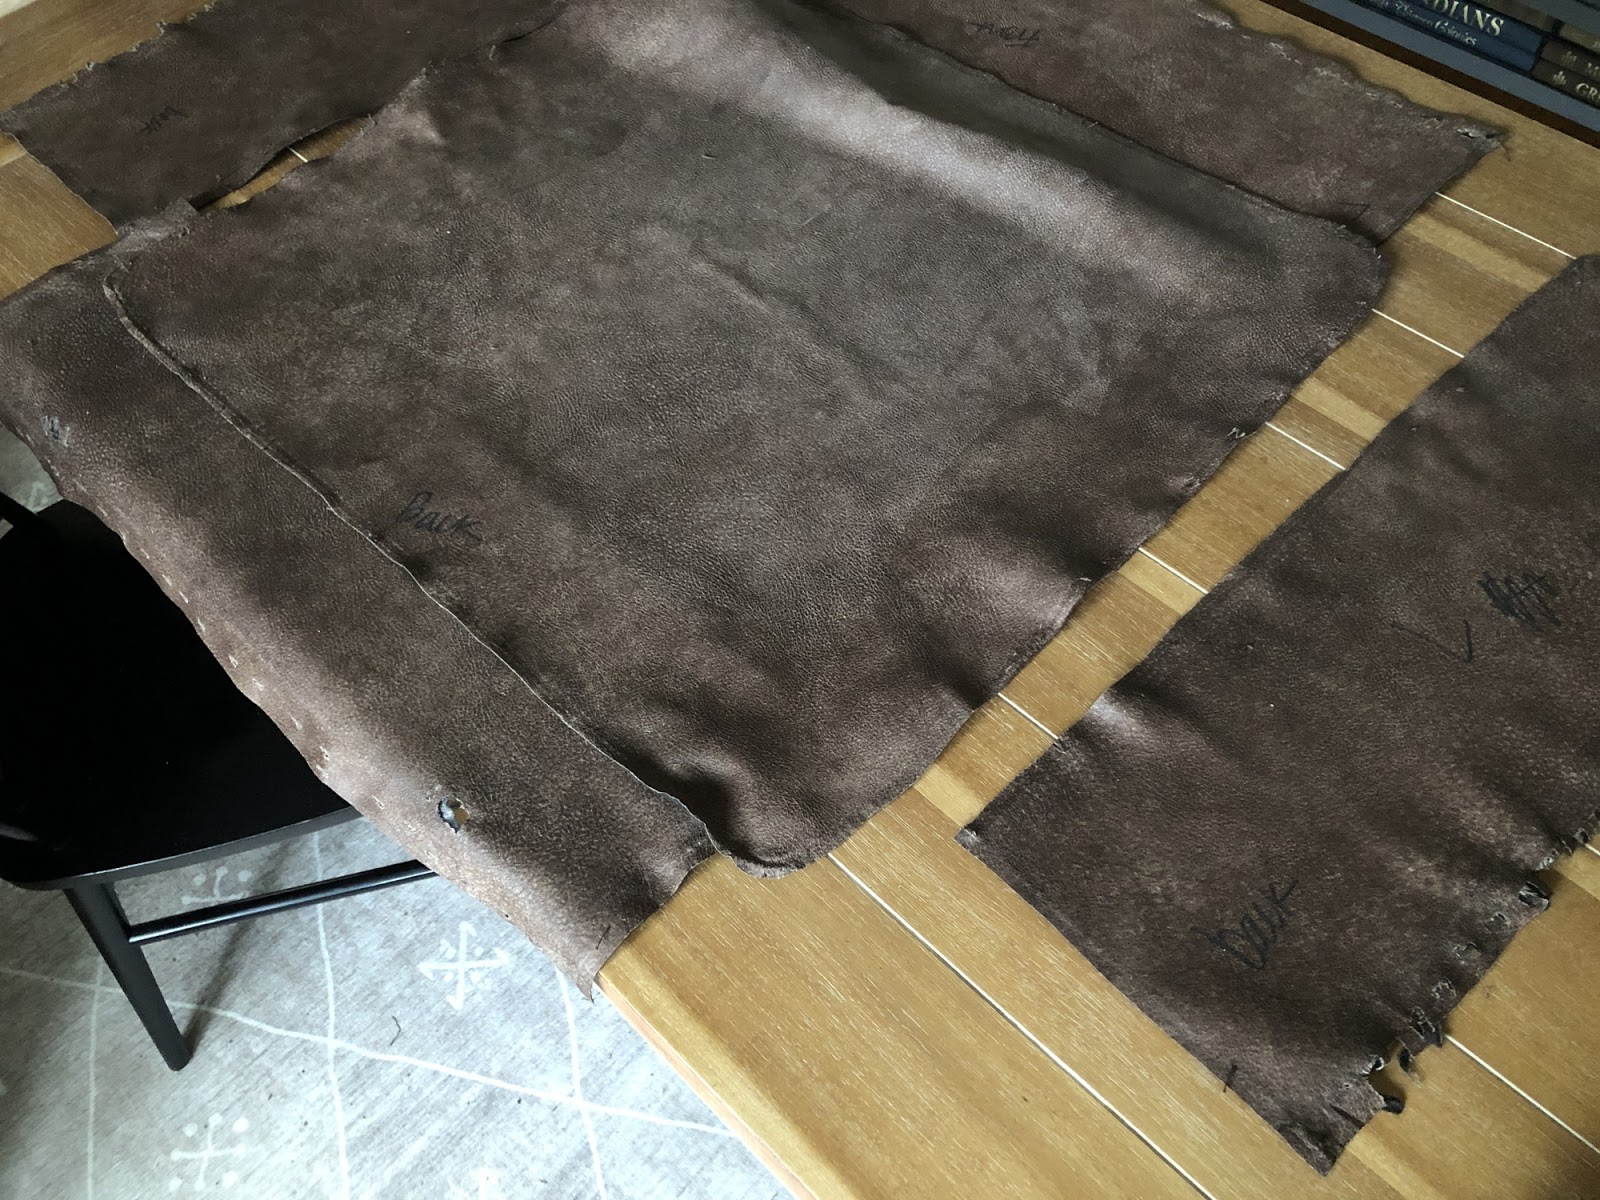
3. Make pattern. Cut around each staple and/or tear previous fabric, leaving it as intact as possible. You could choose to remove all of the staples around the fabric layer as well, but removing the stables is slow and painful work especially when the thickness of the fabric is there. You can get almost the same result (just leaves some extra staples behind) by cutting/tearing instead.


Once fabric is removed, iron it flat. Label each piece with top, bottom, left, and right.

4. Cut out from new fabric. In my case this worked out very nicely because the width of the fabric was just about twice the width of the chair and I was cutting out, so I cut out the pieces for both chairs at once. If you’re only doing one, obviously don’t fall the fabric when you cut out the pieces. After you cut, keep your pattern pieces together with the fabric so you can keep them straight.
These have a few features like sets of holes where the bolts go--make sure you copy those onto your new fabric so you can line them up when you put the new covers on.

5. Assemble. Follow the way the chairs were originally constructed--for me, that was sewing right sides together and then topstitching the seam at the upper back of the seat, then sewing right sides together and topstitching the sides of the other backseat. For the bottom cushion, this meant sewing right sides together and pressing seam allowances toward the back for the vertical seams, then sewing right sides together and topstitching the square seat top piece.


6. Pull onto chair. These were a very tight fit and the original fabric had a tiny bit of stretch where is my Sunbrella fabric did not. This makes for a more secure fit once there on, but it was a little difficult to get the top seat pieces pulled over the multiple layers of foam on the seat. This works better if you don’t let the fabric bunch as you pull it down.
7. Staple outer fabric. Pull tight! Loose upholstery never looks good. Pull to line up with defining features like the holes for the bolts.


8. Staple black liner. You'll need denser staples at the front (at least for this style of chair), so the black doesn't hang down at all and show.

9. Reassemble chair. I kept the instructions that came with mine which were helpful for remembering which bolt lengths go where.


Ta-da!! What a satisfying project! I LOVE having the lighter color in here and am so excited to have the color I want, on-budget, and durable, stain-resistant fabric! (Buy locally or online here.)

I didn't notice until I took these pics that because our TV is centered on the wall between the door and window wall, it's off-center from the rug/chairs/couch! Oops... (Don't worry, dealing with those cords is next on the project list.)

I think they look great with our beige sofa and other whites and blacks!


Thank you again to Sunbrella for providing this fabric! I'm so happy with it!

These have a few features like sets of holes where the bolts go--make sure you copy those onto your new fabric so you can line them up when you put the new covers on.

5. Assemble. Follow the way the chairs were originally constructed--for me, that was sewing right sides together and then topstitching the seam at the upper back of the seat, then sewing right sides together and topstitching the sides of the other backseat. For the bottom cushion, this meant sewing right sides together and pressing seam allowances toward the back for the vertical seams, then sewing right sides together and topstitching the square seat top piece.

Topstitching is key! Really gives it a more finished look.

6. Pull onto chair. These were a very tight fit and the original fabric had a tiny bit of stretch where is my Sunbrella fabric did not. This makes for a more secure fit once there on, but it was a little difficult to get the top seat pieces pulled over the multiple layers of foam on the seat. This works better if you don’t let the fabric bunch as you pull it down.
7. Staple outer fabric. Pull tight! Loose upholstery never looks good. Pull to line up with defining features like the holes for the bolts.

I found for the seat especially, it helped to have someone push down to compress the foam and get the outer fabric to pull a little further over the frame. There wasn't much excess at all which made me nervous at first, but then I think helped to keep everything straight and in the right place. Less wiggle room.
It also helped to use the grain of the canvas as a guide as I went from one side to the other.

8. Staple black liner. You'll need denser staples at the front (at least for this style of chair), so the black doesn't hang down at all and show.

9. Reassemble chair. I kept the instructions that came with mine which were helpful for remembering which bolt lengths go where.


Ta-da!! What a satisfying project! I LOVE having the lighter color in here and am so excited to have the color I want, on-budget, and durable, stain-resistant fabric! (Buy locally or online here.)

I didn't notice until I took these pics that because our TV is centered on the wall between the door and window wall, it's off-center from the rug/chairs/couch! Oops... (Don't worry, dealing with those cords is next on the project list.)

I think they look great with our beige sofa and other whites and blacks!


Thank you again to Sunbrella for providing this fabric! I'm so happy with it!
No comments
Post a Comment