Here it comes... Profesh headboard tufting tutorial!
I would say that I have pretty much failed before when I've attempted a classy, simple padded or tufted headboard look--previous attempts here for you to see. ;) This time I wanted to do something much better, so I've really been doing my research!
There are TONS of great photo tutorials out there for padded headboards, and a lot of them use the same basic methods, but it wasn't until I found this tufting tutorial for classic, old school horsehair upholstery, from a workshop by a very impressive professional upholsterer, that I saw that I was going about it all wrong. I couldn't imagine how my tufts would get tight enough because I was trying to come in from the back, pull really tight, and tie them off--but when really, the pros seem to do it another way and anchor in the back but tie off in the front! Then you don't have to put the pressure on the button so your covered buttons don't pop apart and your tension doesn't loosen behind your heads. You'll see what I mean...
So like I said, there are tons of tutorials and I've pored over many of them, and I think I've taken away some wisdom from many--and put together this version for you. I think of this as a tufting tutorial, less than a tutfted headboard tutorial, since while I reeeeeally admire people that cut their own fancy curved shapes and drill their tufting holes... I was able to do it a little simpler, using the frame I already had. But the tufting's the complicated party, anyway!
So here it is, a combination of my favorite techniques, a little like the professionals do! Here's the tufting tutorial!
Materials:
Padded headboard frame (or whatever you wanna make... bench?)
Fabric--I used this perfect grey cotton blend velveteen I got on JoAnn clearance!
Covered button kits, however many you need--I used 19 3/8" buttons, a serious pain with that thick fabric
Really, really strong upholstery thread
A really big needle
Washers or zip ties or other strong anchors
Your trusty staple gun
Your trusty staple gun
- I started with a bead board headboard frame that my dad made me with some 2"x4"s, L brackets, and a big piece of bead board. I've used it several ways before, and it's great that the bead board holes let me put the buttons wherever I want!
- I used 2-3" thick foam from JoAnn, cut to size. It was a super pain to cut, had to use intense scissors. But again, I had done that already. Looks liked you could also use that green foam stuff plus a layer of batting to soften the lines.
- Figure out where you want your tufts to go. Inspired by several fave headboards (I counted the buttons on each row!), I decided on 6 on the top row, 7 on the middle row, 6 on the bottom row. I measured and centered them--again, easy with the peg board.
- I wanted to go for real, true, deeper tufts on this headboard, so I learned I needed to cut away the foam or padding around each button. Duh, that makes sense. Here it is one step ahead...
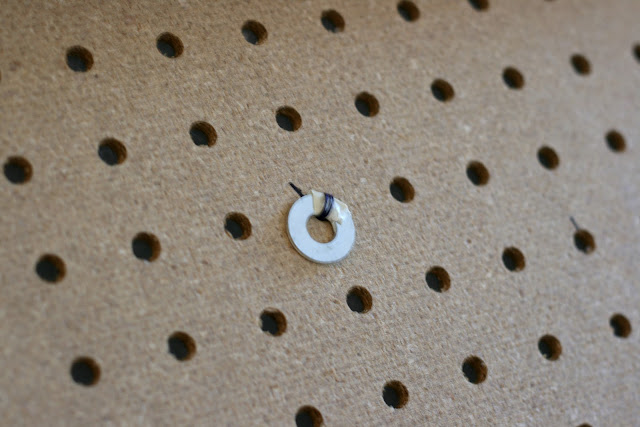
- The important part: Come at your tufts from the back out to the front; when you tie the buttons on the front, you'll cover the ends of the threads. So anchor each tuft with a washer or other strong base. I used these little washers but gave them a strip of tape to protect the thread from their cheap metal edges; this part probably wasn't necessary, but I wanted to be extra safe.
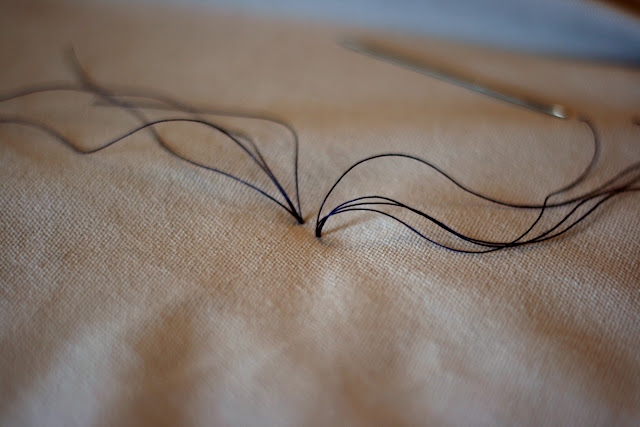
- I quadrupled my thread and sewed from the front of the hollowed out foam hole to the back, looped around my washer, then carried the needle back to the front. Leave really long ends on the thread.
- This method involves sort of a two-to-three step process, but it's worth it. Now, lay your top fabric over the headboard and position it. I anchored mine with some staples at the center top and center bottom, but you can't know where it will end up going until the tufting is in since the depth of each button/tuft takes away from the fabric's width and length.
- Loosely position your fabric in the center tuft and re-thread the needle with one side of the dangling threads. Sew through the fabric. Then repeat with the other side of the thread, spacing it out a little.
- That's the beginning of the tuft! Now you can tighten the threads and tie a double knot! I checked the backs for my washers' tape alignment on this part.
- Repeat! A lot! I also learned from this upholsterer that you want the folds of the diamonds to point down. Maybe it's so you don't worry about dust collecting or something. So play with your tufting and folds, position as you want them, all that. I followed the grain of my fabric so I knew each tuft sucked in about as much fabric as the others.
- Now you can staple the fabric to the frame at the top. I started at the top and made the pleats of the diamonds the way they would have wanted to go had there been more tufting there.
- It was suuuuper helpful to watch myself in the mirror as I did this from behind the headboard. Trying to make the downward-pointing triangles all look the same and all.
- Staple the sides and bottom of the frame.
- The fun part! Attaching your buttons! Okay, so the needle-from-behind method is really a three-step process, since you have to thread your needle again and put it through your covered button back.
- Again just double-knot those threads together, but this time they're under the button. Carefully clip threads!
OMG, ta-da!!!
Done! It was a labor of love but I'm so so so happy with it and I feel quite the sense of accomplishment! I recommend you try it out! ;)
Still playing with the rest of the room, but that headboard sure anchors things!


This looks great! I've always admired these headboards but they looked like so much work! Your method seems much more doable.
ReplyDeleteOh that is so pretty! GREAT job! I want to do this someday!
ReplyDeleteThat looks beautiful, but also very complicated. Kudos to you for doing such a fine job with it!
ReplyDeleteLooking so great like bought at stores.. Good job.. It inspired me make things on my own..
ReplyDeletelooks so amazing! this is one I will bookmark for future use!
ReplyDeleteThis is a great tutorial! Thanks for posting it. Would it work to use heavy thread or waxed upholstery type thread instead? I am in need of a new headboard and I am planning on trying this soon. Thank You.
ReplyDeleteThanks! Yes, I'm sure it would work to use very heavy or waxed thread. Like I said, I sort of quadrupled mine anyway. You should be able to tell if it's strong enough when you try it out--it shouldn't stretch or give when you pull on it. You should be all set!
DeleteI LOVE IT!!!!! So pretty!!!
ReplyDeletethis headboard looks beautiful! i'm inspired to do a king sized version. hopefully soon!
ReplyDeleteWow! That would be a lot of work but beautiful, and way affordable compared to a storebought one!
DeleteThat looks absolutely FANTASTIC . Thankyou so much for sharing . I have been wanting to do that for so long . Did your dad frame the backboard ?, Could you describe how he did that ? . I love padded had boards as they are so comfortable to sit up and read with . Thanks Again
ReplyDeleteThanks! He made it with four 2x4s, two vertical and two meeting them at the top and bottom, and L brackets on top of and in the 2" depth of the boards. Then the legs are just the vertical boards sticking out the bottom. We drilled holes in the legs to bolt to the bed frame.
DeleteThis looks awesome, great job! For future reference with the foam, a bread knife or any sharp serrated knife is much easier for cutting foam than scissors.
ReplyDeleteI bet! I was wishing for one of those electric vibrating knives for tea sandwiches!
DeleteBeautiful!
ReplyDeleteA beautiful idea!!!
ReplyDeleteSo pretty and very professional looking! I love the way it turned out, great job!
ReplyDeleteIt looks wonderful!!! (I love the bedding, too!)
ReplyDeleteOh, this is awesome! Just got around to reading this post and I am sooo inspired! For nearly 2 years now I have obstained from buing a headboard since it semed such a permanent decision. Seing how you changed headboards and the look of the room makes me feel giddy: Nothing too permanent- Jay!
ReplyDeleteThanks for sharing! Yash
You did such an amazing job!
ReplyDeleteThank you for showing us how to do it.
seelovemake.blogspot.com
I absolutely LOVE this!! Ive been trying to muster up the courage to try my own padded headboard for awhile. Maybe ill start with a bench or something smaller first :)
ReplyDeleteWow Susannah, this is amazing looking! I have always wanted to try one of these but they looked so darn complicated.
ReplyDeleteThat's gorgeous! I'm going to try this on my next headboard for sure.
ReplyDeleteYour headboard is the prettiest tufted headboard I have seen, you did such a fantastic job. I stumbled onto your blog by accident and I'm so glad I did. Your are an inspiration! I would love to give this headboard a try :)
ReplyDeleteHi, did you make the buttons yourself? What size are they? I wouldn't have imagined it looking so cute with small buttons. Also, did you have to glue the foam/batting down? Beautiful headboard and write up! :)
ReplyDeleteHello, I absolutely adore your headboard! It's one of the best DIY ones I've seen. I was wondering what size your headboard was (king, queen, full, etc. or even LxW dimensions) b/c I wanted to get similar results in terms of button spacing. Thanks!!
ReplyDeleteIt has really superior journal! I alawys accurately came here
ReplyDeletefrom http://klebebh.ch that thoughts to be eager material confront raise
recording in the earth and it's rattling useable.
Love it!!
ReplyDelete